How to Build a Website with Builder.io: Step-by-Step Guide
Builder.io combines AI code generation with a visual canvas, so you can describe a website, watch the agent build it, adjust the interface, test interactions, create a Git repository, and move the finished project into a normal production workflow. This guide takes you from the first prompt to a live domain without pretending the first AI draft is automatically launch-ready.
Quick Answer
To build a website with Builder.io, create a Builder account, choose a Fusion Space, and start a project from a prompt or an existing repository. Describe the website’s audience, pages, components, visual direction, interactions, responsive behavior, and technical requirements. Let Builder generate the first version, then use Design mode for visual refinement, Interact mode for functional testing, and Code mode to inspect implementation details. Once the project works, create or connect a Git repository, deploy it to a production host such as Hostinger, add environment variables, connect a custom domain, and complete SEO, accessibility, and performance checks.
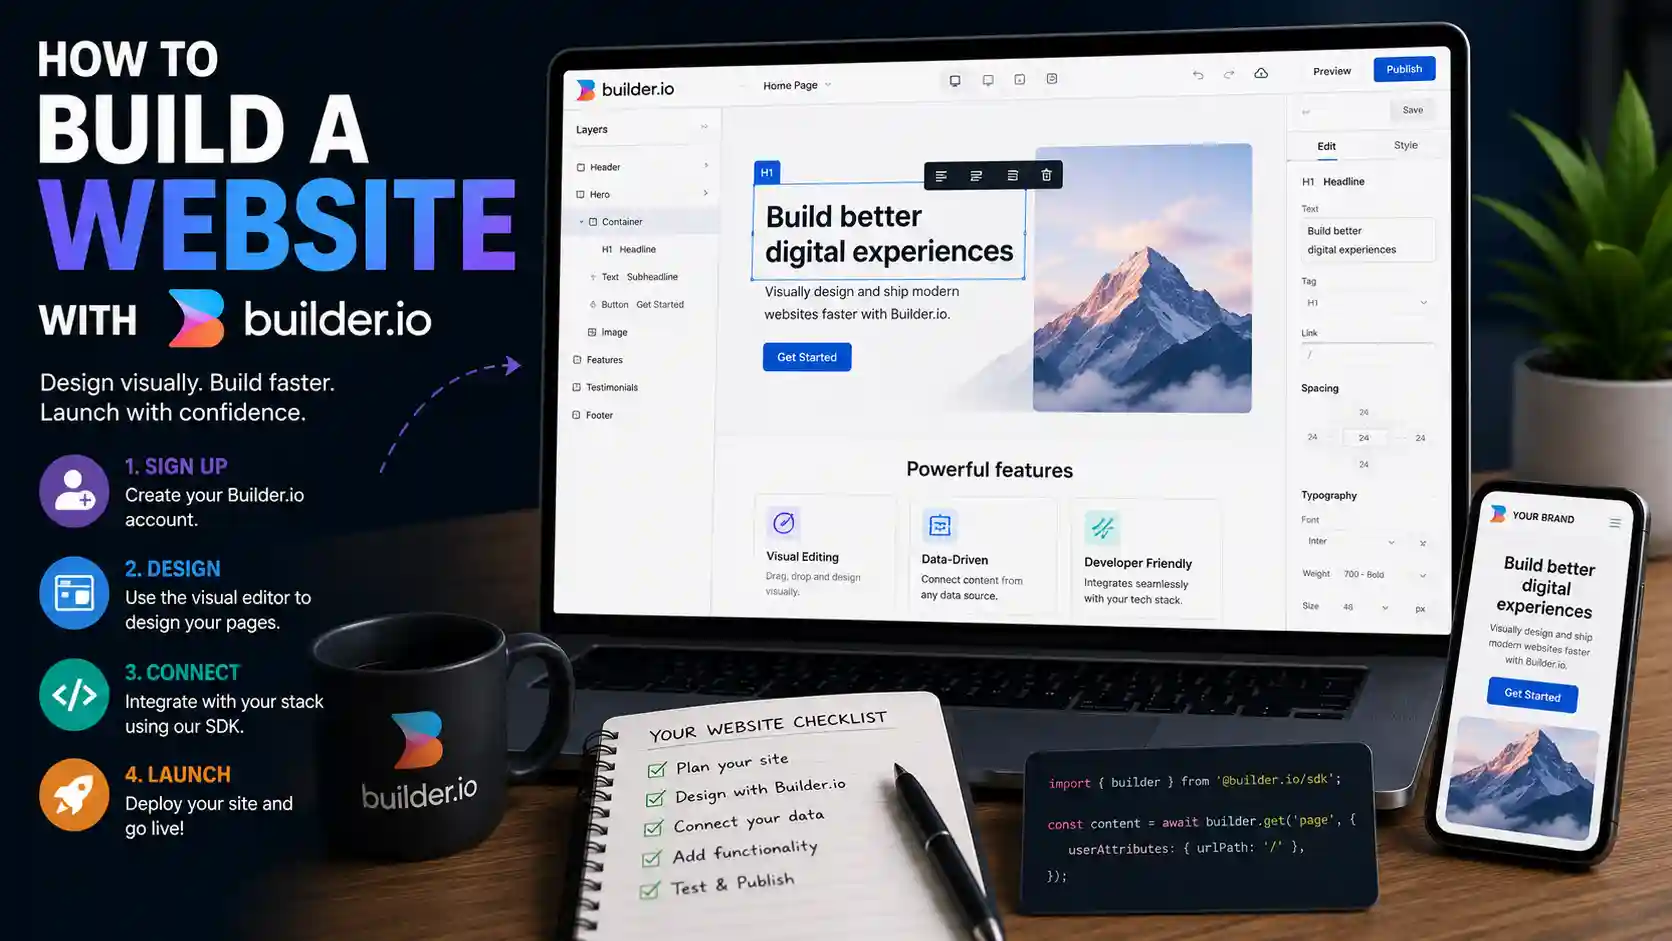
Most AI website tutorials stop when a polished preview appears. That is the wrong finish line. A preview can look convincing while links fail, forms lose data, routes break on refresh, mobile layouts overflow, and generated copy misses the search intent. Builder.io is valuable because it gives you several ways to continue after generation: prompt the agent, edit on the canvas, test the live application, inspect the code, connect a repository, and send changes through a normal Git workflow.
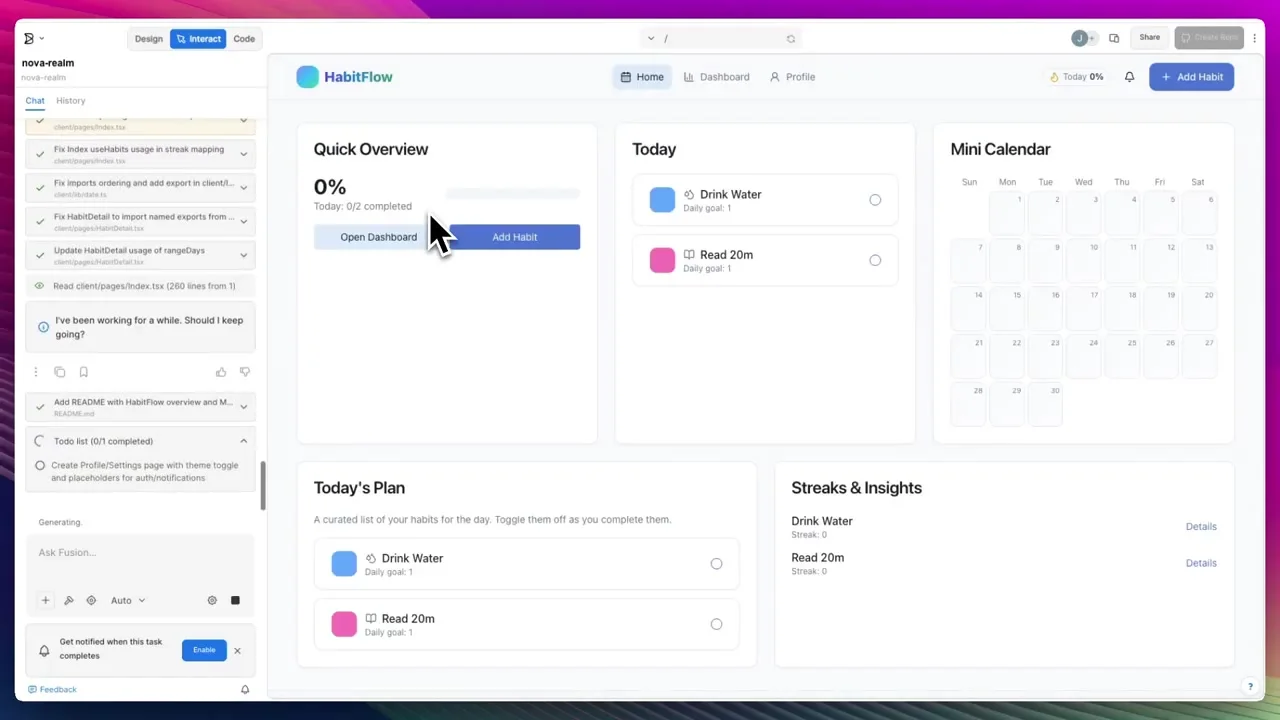
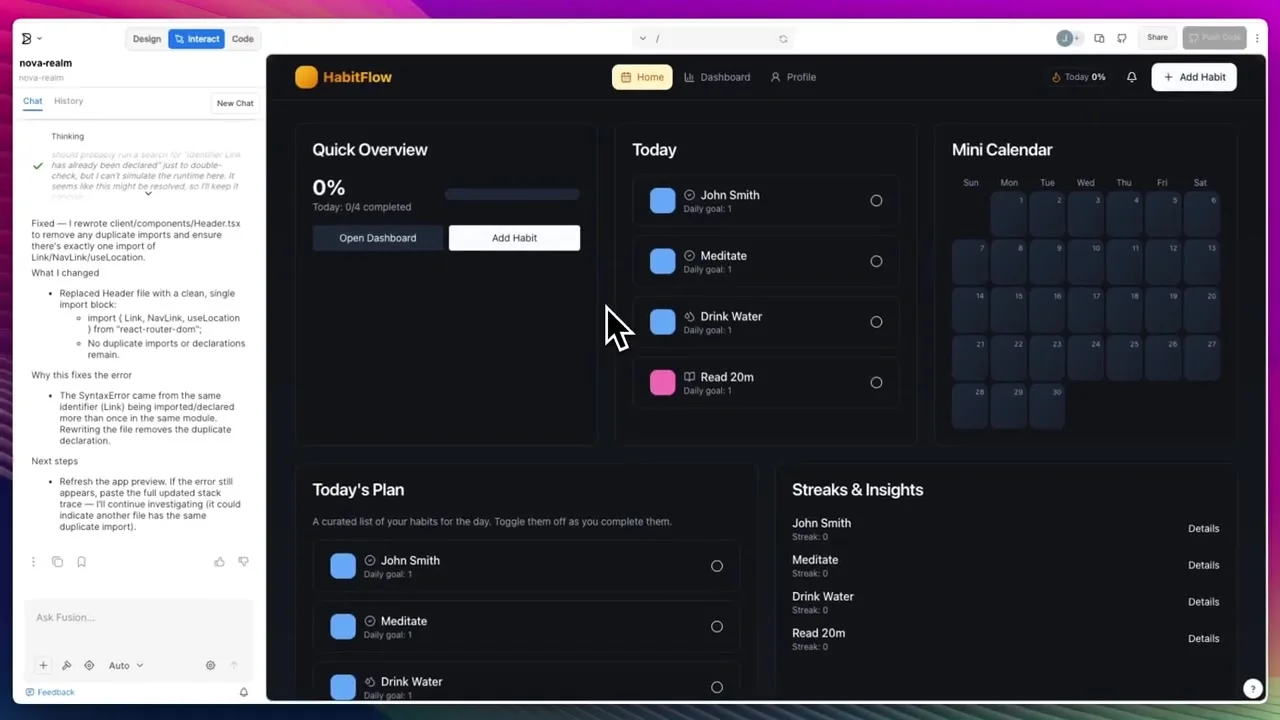
The reference video demonstrates that broader workflow by creating a habit-tracking web app called HabitFlow. The project includes a homepage, dashboard, profile/settings page, habit cards, progress metrics, a calendar, a functional add-habit form, theme controls, and responsive UI. It is a useful example because it tests more than visual design; it forces Builder to generate routes, state, components, forms, interactions, and error fixes.
Related guides:
- How to Build a Website with Google AI Studio for a Gemini-based prompt-to-code workflow.
- How to Create a Website with AI for the broader planning, design, content, and launch process.
- How to Create a Website Using Google Antigravity for an agent-assisted animated website workflow.
What Is Builder.io?
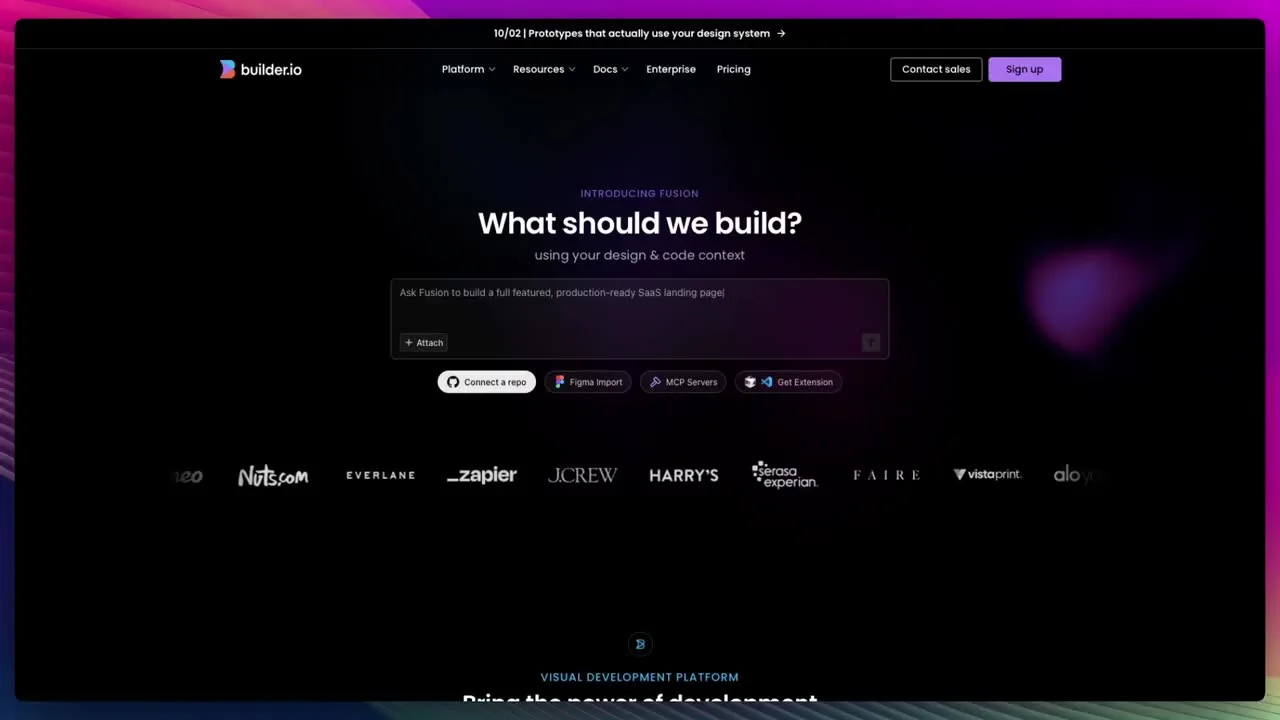
Builder.io is a visual development platform that works with modern websites and application codebases. Its current product structure includes Fusion, an AI-assisted visual development environment for generating and editing code, and Publish, a visual content management workflow for pages, sections, and structured data inside an existing site or app.
That distinction is what makes Builder different from a simple template builder. You are not limited to changing text inside a hosted theme. Fusion can connect to repositories, understand components and design systems, generate code from prompts or Figma files, and send changes through pull requests. Publish can let marketers and content teams visually manage approved areas while developers retain control over the surrounding application.
Who Builder.io Is Best For
- Founders and creators who need a functional prototype without hand-coding every component.
- Designers who want to work visually while producing real application code.
- Developers who want AI assistance that connects to repositories, components, and pull requests.
- Marketing teams that need visual page control without rebuilding the application architecture.
- Product teams that want faster handoff between Figma, implementation, review, and deployment.
Important: Builder can accelerate implementation, but it does not remove engineering judgment. Review generated dependencies, state management, accessibility, authentication, API usage, routing, and security before shipping a production application.
Builder Fusion vs Builder Publish
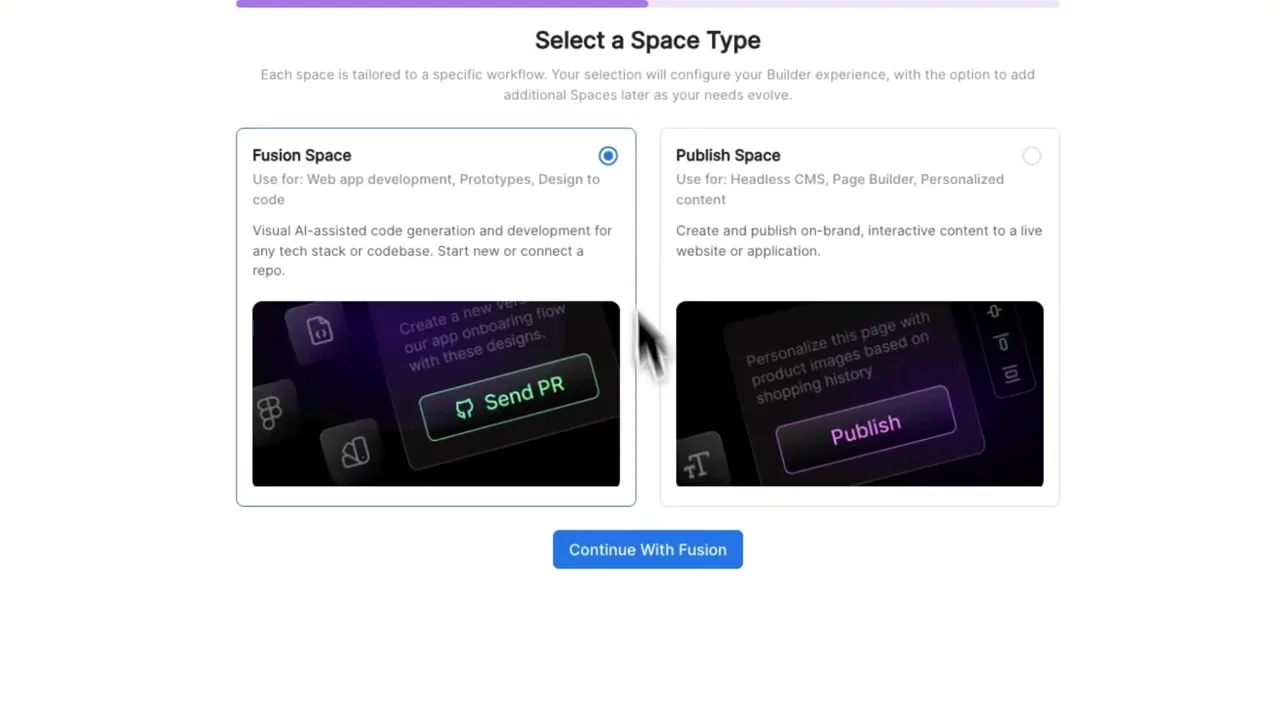
During onboarding, Builder asks you to select a Space type. The video chooses Fusion because the goal is to generate a new web application from a prompt. Choose deliberately; Fusion and Publish overlap visually, but they solve different jobs.
| Question | Fusion Space | Publish Space |
|---|---|---|
| Primary purpose | Generate and edit application code visually with AI | Create and manage visual pages, sections, and structured content |
| Best starting point | Prompt, repository, Figma design, or starter project | An existing site integrated with Builder SDKs and content models |
| Typical output | Code changes, repository commits, and pull requests | Published content delivered to your application through Builder APIs |
| Best users | Developers, designers, founders, and product teams | Marketers, content editors, developers, and ecommerce teams |
| Use for this tutorial? | Yes | No, unless your real goal is visual CMS management |
What You Need Before Building
Prepare these items first:
- Builder.io account: create one through the Builder link in this guide.
- Website brief: define the audience, purpose, primary action, pages, and required functionality.
- Brand direction: collect colors, typography, logos, product screenshots, and reference sites.
- Framework choice: the video uses React with Vite; choose a stack your deployment target supports.
- Git provider account: GitHub is useful for source control, review, and Hostinger deployment.
- Hosting account: use a compatible production host after the Builder preview is approved.
- Content: gather accurate service details, calls to action, legal pages, and contact information.
- SEO target: assign one search intent and primary keyword to each important page.
Do not begin with “make me a nice website.” Builder has to invent too many decisions, and the result will usually look generic. A useful brief gives the agent constraints: who the site serves, what visitors should do, which pages and components are required, how the brand should feel, what data should persist, and which integrations can remain placeholders.
How to Build a Website with Builder.io: Step by Step
Open Builder.io and Follow Along
Create a Fusion Space, keep this guide open, and use the prompt framework below instead of starting from a one-line request.
Step 1: Create Your Builder.io Account
Open Builder.io and sign up. Builder’s interface and plan limits change over time, so review the current plan details, included agent credits, repository connections, preview protection, collaboration features, and usage limits during signup rather than relying on pricing shown in an older screenshot.
Use an email and Git provider account you can keep long term. A disposable login becomes a problem once the project repository, team access, preview links, and production deployment depend on it.
Step 2: Select a Fusion Space
Choose Fusion Space when Builder asks for the Space type. The onboarding screen describes Fusion as the workflow for web application development, prototypes, design-to-code, and AI-assisted code generation. That matches the goal of building a new website from a prompt.
Choose Publish only when you already have a site or application and want Builder to manage visual pages, sections, personalized content, or structured data through a headless CMS workflow.
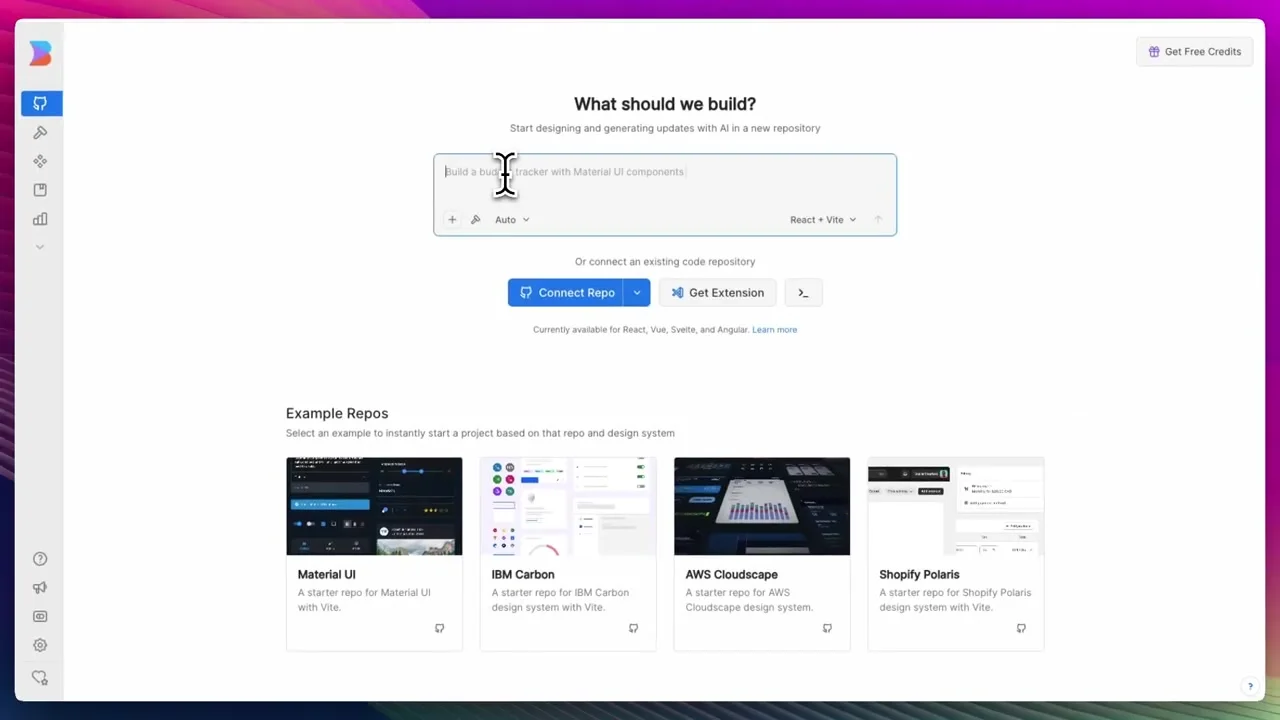
Step 3: Start from a Prompt or Connect a Repository
Builder offers two practical paths:
- New project from a prompt: best for a prototype, small website, dashboard, MVP, or blank-slate build.
- Connect an existing repository: best when the project already has components, routes, design tokens, dependencies, APIs, or a design system.
The video starts a new React and Vite project. This is a sensible stack for an interactive client-side website because it is widely supported, quick to build, and easy to deploy. Existing production teams should usually connect the real repository so Builder can follow established component and code patterns instead of generating a parallel application from scratch.
Step 4: Write a Detailed Builder.io Prompt
A good prompt should describe the product, user, page structure, visual system, interactions, data behavior, responsive rules, accessibility requirements, and technical boundaries. The video uses a detailed habit-tracker brief to force Builder to demonstrate forms, components, charts, navigation, state, and theme behavior.
Replace HabitFlow with your business and update every section. If you are building a service website, ask for Home, About, Services, Case Studies, Contact, Privacy, and Terms pages. If you are building ecommerce, define the product source, cart behavior, checkout provider, product schema, inventory rules, and account requirements.
Step 5: Let Builder Generate the First Version
Submit the prompt and let the Builder agent work. It may create files, install dependencies, start the preview server, detect errors, and iterate. Avoid sending several new prompts while the current generation is still running; competing instructions can create duplicated work or inconsistent code.
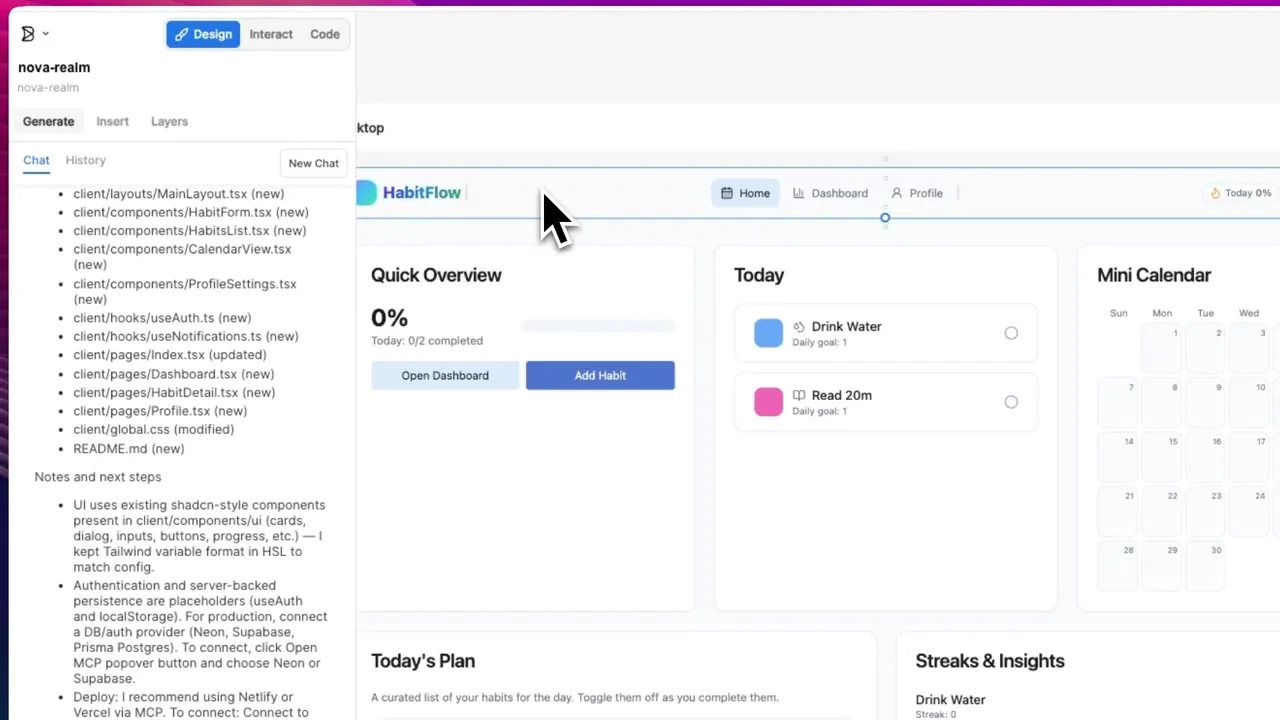
Read the agent’s summary after generation. Look for the files created, routes added, components reused, dependencies installed, data storage choices, placeholders, and known limitations. The summary is useful, but it is not proof that every feature works.
Step 6: Understand Design, Interact, and Code Modes
The toolbar separates three types of work:
- Design: select elements and make visual changes on the canvas.
- Interact: use the generated website like a visitor to test links, routes, forms, buttons, and state.
- Code: inspect the implementation when you need to understand files, components, styles, or errors.
Step 7: Review Every Route and Major Component
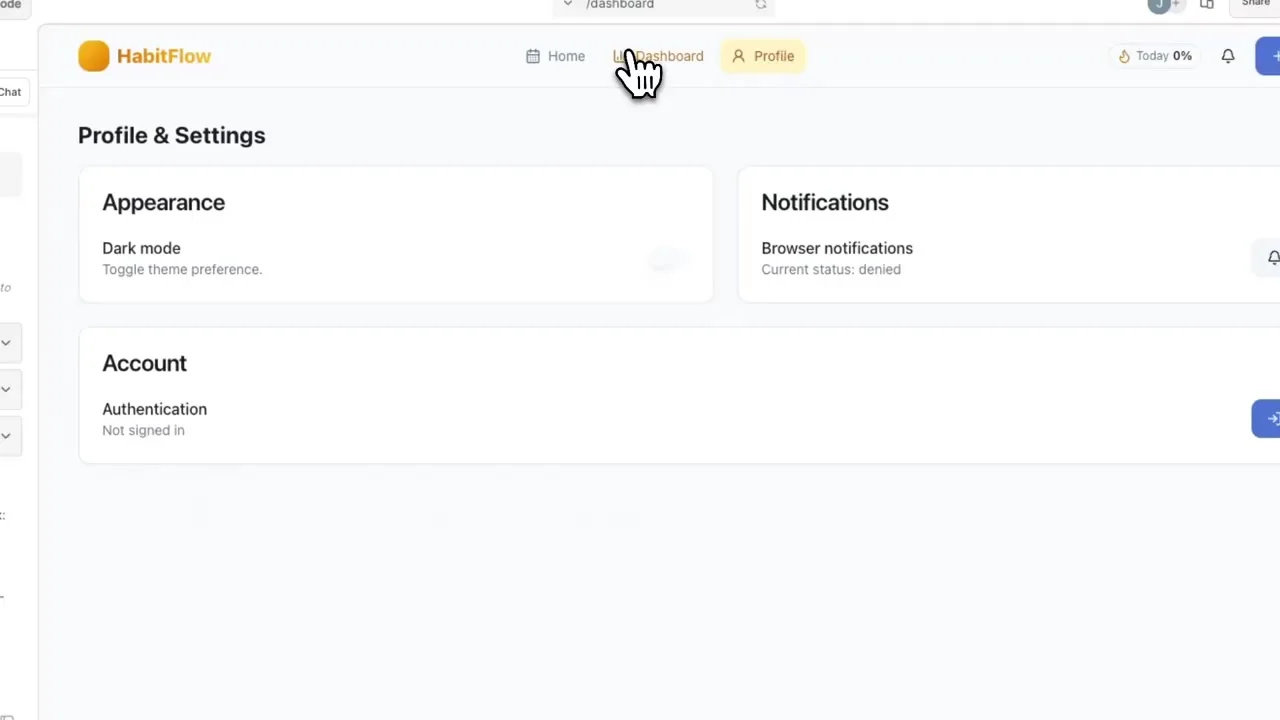
Open every page from the navigation. Check whether the active navigation state changes, the URL updates, direct route loading works, and the browser back button behaves correctly. Compare repeated components for spacing and typography consistency.
The HabitFlow example includes a Profile & Settings page with appearance, notification, and account areas. A page existing in the navigation does not mean every control is functional. Toggle dark mode, request browser notifications only when appropriate, and confirm placeholder authentication is clearly marked as a future integration rather than presented as real security.
Step 8: Test Forms and State
Switch to Interact mode and use the app. Open the Add Habit modal, submit it empty, enter valid values, choose a color and icon, create the habit, mark it complete, refresh the preview, and confirm that the expected state persists.
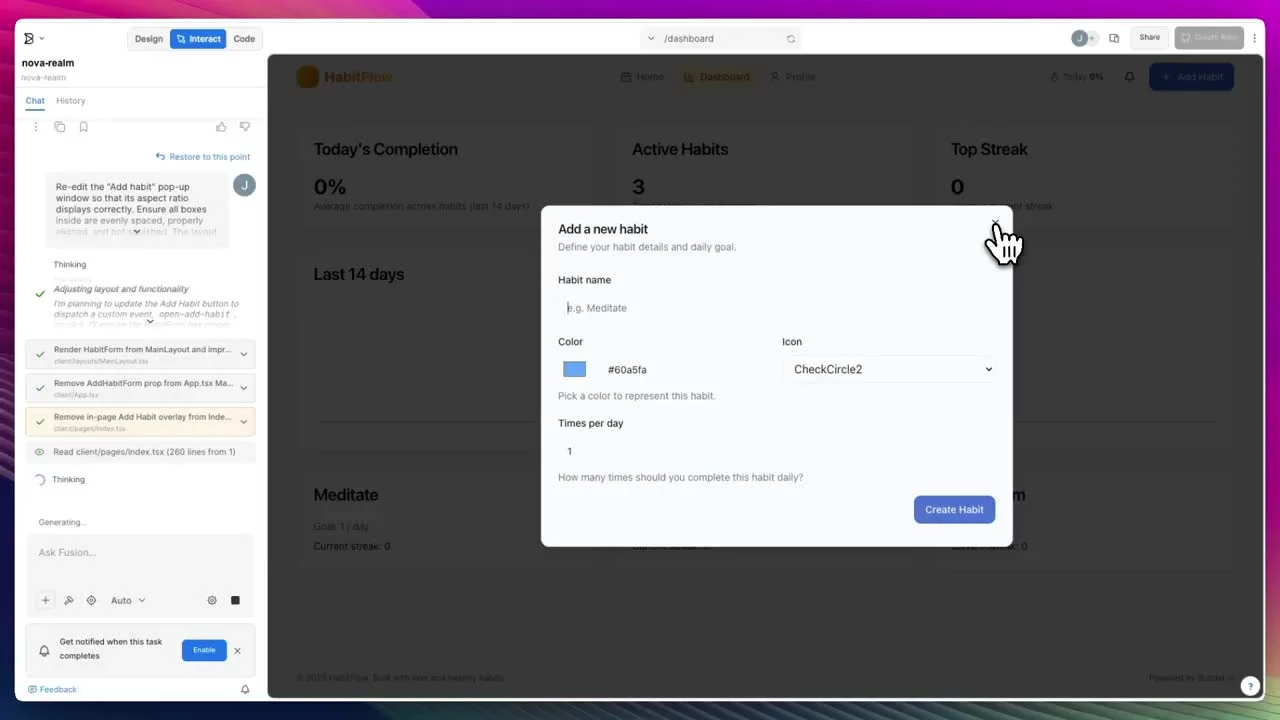
For a production contact form, connect a real form service or backend and test successful submission, error handling, spam protection, notification delivery, consent language, and where personal data is stored. A button that only closes a modal is not a production form.
Step 9: Refine with Focused Prompts
Ask for one coherent improvement at a time. Smaller prompts are easier to review and restore if the result is wrong. Good follow-up prompts include:
If the result gets worse, use history or restore controls before continuing. Do not stack correction prompts on top of a broken architecture indefinitely. Sometimes restoring to the last good point is cleaner and cheaper than asking the agent to reverse several intertwined changes.
Step 10: Test Responsive Layouts and Theme Behavior
Test at mobile, tablet, laptop, and wide desktop widths. Look for clipped navigation, fixed-width panels, overflowing charts, tiny tap targets, off-screen dialogs, unreadable text, and layout shifts when data changes.
Theme toggles need more than inverted colors. Check contrast, border visibility, disabled states, charts, icons, focus rings, modals, browser form controls, and whether the preference persists after refresh.
Builder.io Prompting and Code Best Practices
Strong Builder results come from managing context, scope, and acceptance criteria. The most effective workflow resembles a good engineering ticket: explain the user problem, show the desired result, define the boundaries, and state how someone can verify the work.
Give Builder Evidence, Not Only Adjectives
Words such as “modern,” “premium,” and “clean” are open to interpretation. Add more concrete context: screenshots, Figma frames, logos, real product images, a color palette, typography rules, existing components, or a reference URL. Explain which parts of the reference matter. For example, ask Builder to follow the reference’s information density and navigation pattern without copying its brand, text, or protected assets.
When connecting an existing repository, point the agent toward the real source of truth. Name the component directory, routing convention, design tokens, form library, data-fetching pattern, and test command. Builder’s repository workflow is most useful when it extends your system rather than inventing a second one beside it.
Write Acceptance Criteria
Acceptance criteria turn taste into testable requirements. Instead of asking for “a responsive contact page,” specify that the page must have a single H1, labeled form controls, inline validation, a success state, an error state, keyboard access, a two-column desktop layout, a one-column mobile layout, and no horizontal overflow at 320px. The agent and reviewer now have a shared definition of complete.
Separate Frontend Prototypes from Real Backends
A generated prototype often stores data in memory or localStorage. That is appropriate for demonstrating a habit tracker, but it is not a multi-user database. Before production, decide how accounts, data ownership, sessions, authorization, deletion, backups, and migrations work.
When adding a backend, ask Builder to integrate one service at a time. Give it the official SDK documentation, required environment variable names, database schema, access rules, and clear server/client boundaries. Test authorization independently of the interface. Hiding an Edit button is not authorization; the server must reject actions the current user is not permitted to perform.
Review Agent Fixes Instead of Accepting Them Blindly
Builder can detect and attempt to repair build or runtime errors. That is useful, but repeated automated fixes can also produce duplicated imports, unnecessary dependencies, broad rewrites, or code that silences an error without solving its cause. Read the error, inspect the changed files, and confirm the fix preserves the intended behavior.
If the agent is stuck, reduce the problem. Ask it to identify the first failing error, explain the cause, and change only the relevant files. Run type checking, linting, tests, and the production build after the fix. Save major features in separate commits or pull requests so each change can be reviewed and reversed cleanly.
Use Design Systems to Reduce AI Drift
Generated interfaces become inconsistent when every prompt invents new colors, spacing, buttons, and cards. Define design tokens and reusable components early. Tell Builder to use existing buttons, form controls, modals, typography, spacing variables, and icon libraries. This makes later pages feel like one product and reduces the amount of CSS the agent has to generate.
Recommended iteration loop:
- Describe one feature and its acceptance criteria.
- Let the agent finish and read its summary.
- Inspect the visual change in Design mode.
- Exercise the workflow in Interact mode.
- Review the code or diff.
- Run checks and the production build.
- Commit the working state before starting the next feature.
How to Test a Builder.io Website Before Launch
AI-generated applications need the same quality checks as hand-written applications. The agent can generate a convincing happy path while leaving edge cases unfinished.
| Area | What to Test | Common Failure |
|---|---|---|
| Navigation | Every link, direct URL, refresh, back button, and active state | Routes work inside the preview but 404 after deployment |
| Forms | Required fields, validation, success, errors, keyboard use, spam protection | Form looks real but never sends or stores anything |
| State | Create, edit, delete, refresh, duplicate, and empty states | Data disappears or UI counts fall out of sync |
| Responsive design | 320px mobile through wide desktop, portrait and landscape | Modals or dashboards overflow on narrow screens |
| Accessibility | Headings, labels, keyboard order, focus, contrast, alt text | Clickable elements cannot be reached or understood without a mouse |
| Performance | Image size, bundle size, loading behavior, font delivery, layout shift | Large generated assets make the first page slow |
| Security | Secrets, authentication, authorization, dependencies, API validation | Private keys or trusted actions are exposed in browser code |
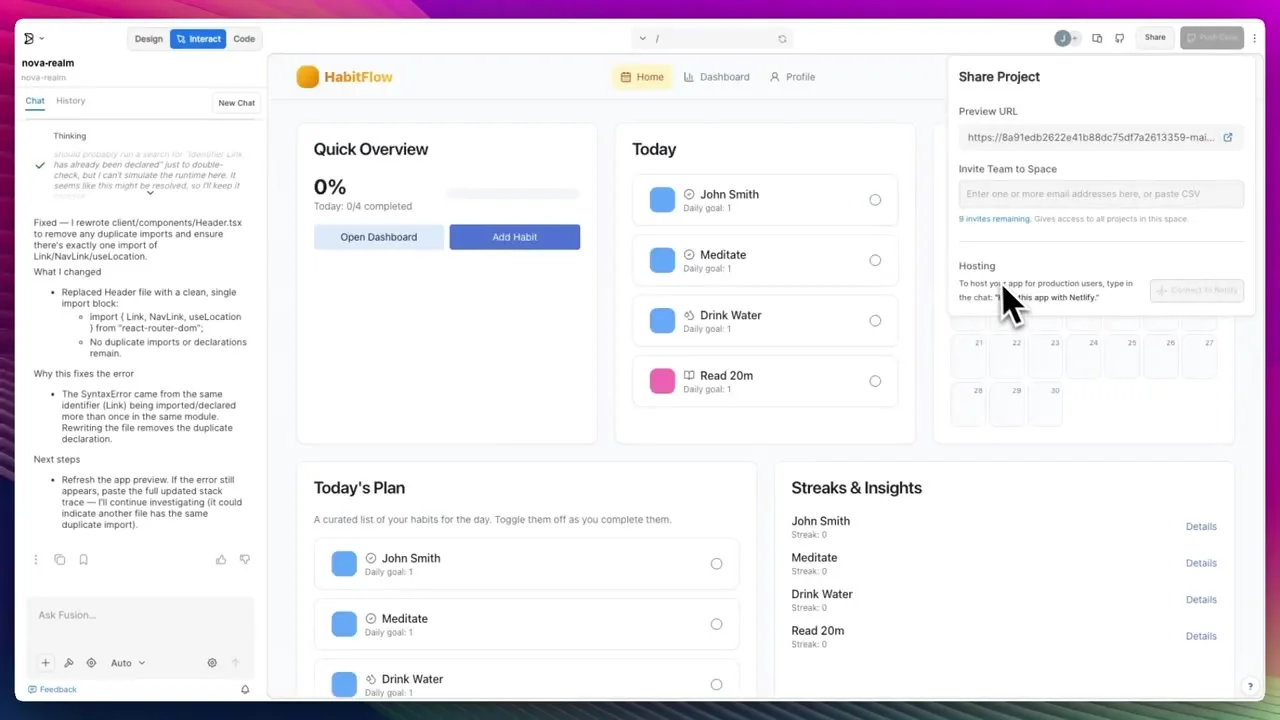
Do not confuse a preview URL with production: Builder documentation describes Project previews as shareable review links. Use your own production hosting, domain, monitoring, analytics, backups, and deployment process for a public website.
Create a GitHub Repository and Review the Code
Projects created from prompts can show a Create Repo button. Connect your Git provider, select the account or organization, choose a clear repository name, and create the repository. Projects that started from an existing repository can send changes as pull requests instead.
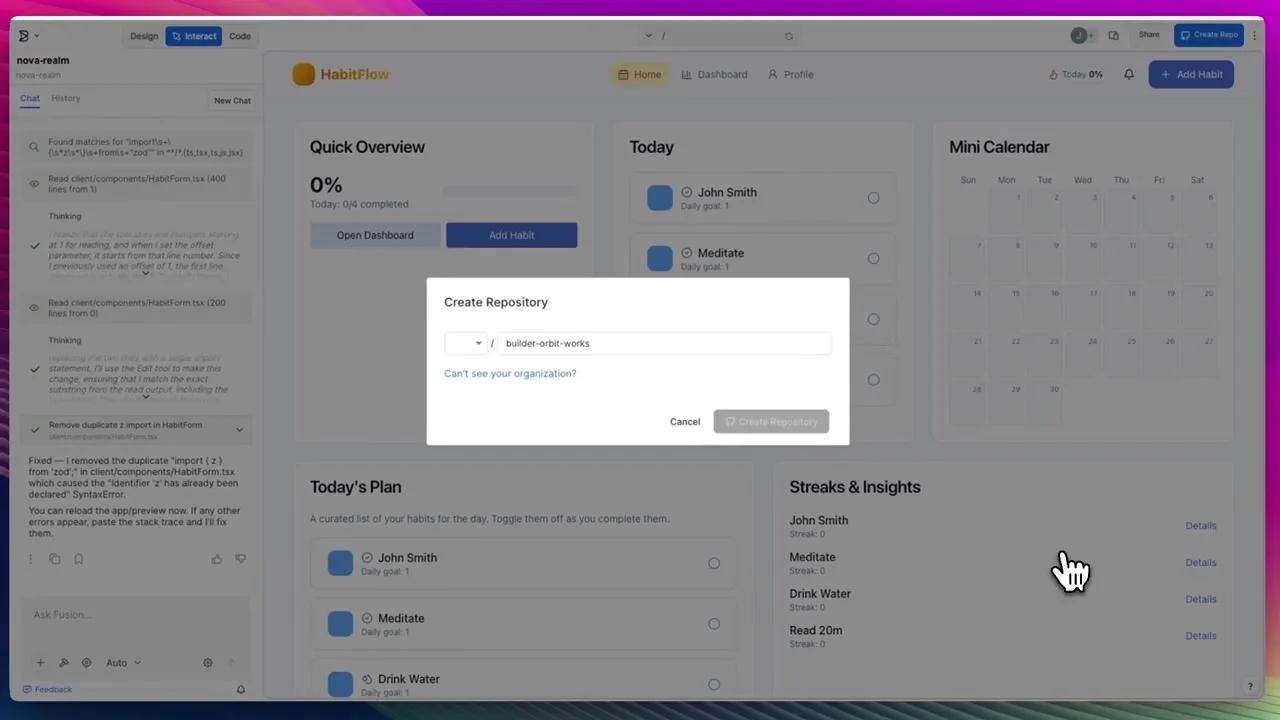
Before deployment, review:
package.jsonscripts and dependencies.- Generated routes, components, hooks, and global styles.
- Environment variable names and whether secrets stay server-side.
- Authentication and authorization placeholders.
- License compatibility for packages and copied assets.
- README setup, build, testing, and deployment instructions.
- Build output and automated checks.
Use the Share menu for stakeholder review. Builder’s Project preview can be opened in another tab and shared with collaborators. Supported plans can add preview password protection. Never place confidential customer data or production credentials in a public preview.
How to Deploy a Builder.io Website on Hostinger
Builder’s official documentation says Builder is not the production hosting platform. You deploy the generated code through your normal hosting workflow. For a React/Vite or supported Node.js project, Hostinger provides a practical GitHub-based path.
Move the Finished Builder Project to Production
Create the GitHub repository in Builder, then connect that repository to Hostinger so future pushes can trigger redeployment.
1. Prepare the Repository
Confirm that the repository contains package.json, a lockfile, source files, build scripts, and documentation. Run the production build before hosting. A common Vite project uses:
The common Vite output directory is dist, but use the actual project configuration rather than assuming. Fix build errors inside source control before connecting a domain.
2. Create a Node.js Web App in Hostinger
Open Hostinger hPanel, add a website, and choose the Node.js Web App flow available for your plan. Connect GitHub and authorize access to the Builder-generated repository. Hostinger’s current Node.js deployment workflow supports common frameworks including React and Vite and can detect settings from package.json.
3. Review Build Settings
Confirm the branch, Node.js version, install command, build command, output directory, and application type. For a purely static Vite frontend, the important values are normally the build command and output directory. For a server-rendered or full-stack project, the host also needs the correct start command or entry point.
4. Add Environment Variables
Add API URLs, public configuration, and server-side secrets through Hostinger’s environment settings. Remember that variables included in a browser bundle are visible to users even when their names contain “key” or “secret.” Keep privileged credentials behind a server endpoint and validate every request.
5. Configure SPA Routing
If the project uses client-side React routes, configure the host to serve the application entry point for unknown routes. Without an SPA fallback, clicking inside the site may work while directly opening /dashboard returns a 404.
6. Connect the Domain
Choose the domain or subdomain in Hostinger, update DNS if required, enable HTTPS, and decide whether the canonical hostname uses www or the root domain. Redirect every alternate hostname to the canonical version.
Deployment checklist:
- The production build completes without errors.
- Environment variables exist in the correct environment.
- Direct route refreshes do not return 404.
- HTTPS works and insecure requests redirect.
- Forms deliver to the correct destination.
- Analytics and consent tools are configured correctly.
- The custom domain resolves from multiple networks.
- Rollback and backup procedures are documented.
Maintain the Website After Deployment
A production website needs an owner after launch. Connect error monitoring, uptime checks, analytics, and Search Console. Decide who reviews dependency updates, form delivery, broken links, performance regressions, and accessibility issues. Keep staging and production environment variables separate, and never test destructive changes against live customer data.
Continue using Builder through source control. Pull the latest repository state before asking for a feature, keep each change focused, review the generated pull request, and merge only after checks pass. If teammates also edit the code, synchronize those changes before starting another Builder branch to reduce conflicts and stale assumptions.
Recommended Launch Cadence
- Immediately after launch: test the canonical domain, forms, routes, redirects, analytics, sitemap, and indexing controls.
- During the first week: review real-user errors, mobile behavior, search crawling, and conversion drop-off.
- Monthly: update dependencies, check broken links, review backups, inspect Core Web Vitals, and verify important integrations.
- Before major Builder changes: create a branch or restore point and confirm the current production build passes.
Builder.io Website SEO Checklist
AI-generated pages are not automatically search-optimized. Builder can create the markup and copy, but you must define search intent, remove generic language, add trustworthy details, and verify that crawlers receive the correct content.
On-Page SEO
- Give every indexable page a unique title and meta description.
- Use one descriptive H1 followed by logical H2 and H3 sections.
- Write copy for the visitor’s real question instead of repeating a keyword mechanically.
- Add descriptive alt text to informative images and empty alt text to decorative images.
- Use internal links with natural anchor text to related JoshWP-style guides and relevant pages.
- Add author, business, product, contact, and policy information where appropriate.
Technical SEO
- Add a canonical URL to each indexable page.
- Create and submit an XML sitemap.
- Review
robots.txtand remove preview-domain blocks from production. - Return a real 404 status for missing pages.
- Use server rendering or prerendering when critical content otherwise depends entirely on client-side JavaScript.
- Add valid structured data only when the visible content supports it.
- Redirect old URLs when replacing an existing site.
Performance and Core Web Vitals
- Compress screenshots and photos to modern formats such as WebP or AVIF.
- Set image dimensions to reduce layout shift.
- Lazy-load below-the-fold media but prioritize the main hero image.
- Remove unused packages, fonts, tracking scripts, and oversized icon libraries.
- Test the production URL with Lighthouse and PageSpeed Insights.
For a different prompt-to-website process, compare this workflow with building a website in Google AI Studio. The interface changes, but the SEO discipline remains the same: clear intent, useful content, semantic structure, fast delivery, and a crawlable production deployment.
Builder.io Plans, Agent Credits, and Total Website Cost
The price displayed in a tutorial can become outdated quickly. Builder plans may differ by users, agent credits, collaboration, preview protection, repository features, context limits, and enterprise controls. Check the current Builder pricing page before beginning a large generation or inviting a team.
Agent usage is only one part of the budget. A production Builder project can also involve:
- Hosting and custom domain renewal.
- Database, authentication, email, forms, search, storage, or payment services.
- Premium fonts, photography, icons, or licensed media.
- Analytics, monitoring, backups, and security tooling.
- Developer or designer time for review, testing, content, and ongoing maintenance.
Control agent costs by planning before prompting, attaching relevant context once, making focused changes, and restoring bad generations instead of repeatedly asking the agent to undo them. Use inexpensive prototypes to validate the information architecture before spending credits on detailed polish.
Start with the Current Builder Plan
Review today’s Builder features and credits, build the first working version, then choose hosting based on the framework and production requirements.
Common Builder.io Mistakes and How to Avoid Them
Choosing Publish When You Need Fusion
Publish is excellent for visual CMS content inside an existing application. It is not the same as starting a new prompt-generated code project. Choose Fusion for the workflow demonstrated in the video.
Using a One-Sentence Prompt
“Build a coaching website” leaves audience, pages, brand, features, responsiveness, and technology undefined. Use a structured brief and tell Builder what should remain a placeholder.
Assuming the First Draft Is Finished
Inspect every route and interaction. The video itself shows the agent fixing imports, hook order, and component issues. A polished canvas does not guarantee clean code or correct behavior.
Making Huge Follow-Up Requests
Large prompts create large diffs and make regressions harder to isolate. Change one page, component, or behavior at a time and review the result before continuing.
Exposing Secrets in Client Code
React and Vite frontend variables are delivered to the browser. Never place private database credentials, privileged API keys, or service secrets in frontend code. Use server endpoints and environment-specific secret storage.
Treating the Preview URL as Hosting
Use previews for review and collaboration. Deploy the repository to a production host for a custom domain, durable builds, operational control, and monitoring.
Ignoring Mobile and Accessibility
Check the smallest supported width, keyboard navigation, focus order, labels, contrast, touch targets, modal behavior, reduced motion, and zoom. AI can generate responsive CSS and still miss real assistive-technology behavior.
Quoting Old Plan Prices
Builder plans, agent credits, and feature limits change. Confirm the current pricing page before budgeting a long project or inviting a team.
Frequently Asked Questions
Can Builder.io build a complete website?
Yes. Builder Fusion can generate a responsive website or web app from a prompt, then let you refine it visually, test interactions, inspect code, and connect the result to a Git repository. Production readiness still requires code review, testing, security, SEO, and deployment work.
Do I need coding experience to use Builder.io?
You can create and visually edit a substantial project without manually writing every line. Coding knowledge becomes valuable when reviewing generated architecture, connecting APIs, debugging state and routes, protecting secrets, and preparing production deployment.
Should I choose Fusion or Publish?
Choose Fusion to generate or modify application code with AI, repositories, design systems, and pull requests. Choose Publish to let teams visually manage pages, sections, and structured content in an application already integrated with Builder.
Can I connect an existing website to Builder.io?
Yes. Fusion can connect to existing repositories, and Publish can integrate with an existing application through Builder SDKs and content models. Connecting a real repository usually produces better continuity than generating a replacement from a blank prompt.
Does Builder.io host the finished website?
Builder provides previews and content APIs, but its current documentation says Builder is not the production hosting platform. Deploy your code to your own provider and configure the custom domain through that host.
Can I deploy a Builder.io website on Hostinger?
Yes, when the generated framework is compatible. Create the repository in Builder, connect GitHub to Hostinger’s Node.js Web App flow, review the detected framework and build settings, add environment variables, and deploy.
Is Builder.io good for SEO?
Builder can support SEO-friendly websites, but the result depends on your framework, rendering approach, content, metadata, structured data, image optimization, performance, and production configuration. Run a complete SEO audit before launch.
Can Builder.io import Figma designs?
Yes. Builder supports Figma-based workflows and can use design context when generating interfaces. The best results come from clean Figma structure, mapped design systems, clear instructions, and human review of responsive behavior.
Final Thoughts
Builder.io is most compelling when you use the whole workflow, not only the first prompt. Start with the correct Space, give Fusion a disciplined brief, inspect what the agent creates, move between Design, Interact, and Code modes, test real behavior, make focused revisions, and put the result into source control.
From there, treat the website like a normal software project. Build it, review it, deploy it to production hosting, connect the domain, protect secrets, monitor errors, and improve it based on real visitor behavior. AI shortens the distance from idea to working interface; it does not make the final review optional.
Build the Project, Then Give It a Real Home
Start the site in Builder.io, create the GitHub repository when it is ready, and deploy the reviewed project on Hostinger.
Related Guides
Video inspiration credit: This article is inspired by the Builder.io beginner tutorial from Digibase Media on YouTube. The written guide is original, expanded with current Builder documentation, production deployment guidance, SEO checks, and practical safeguards.