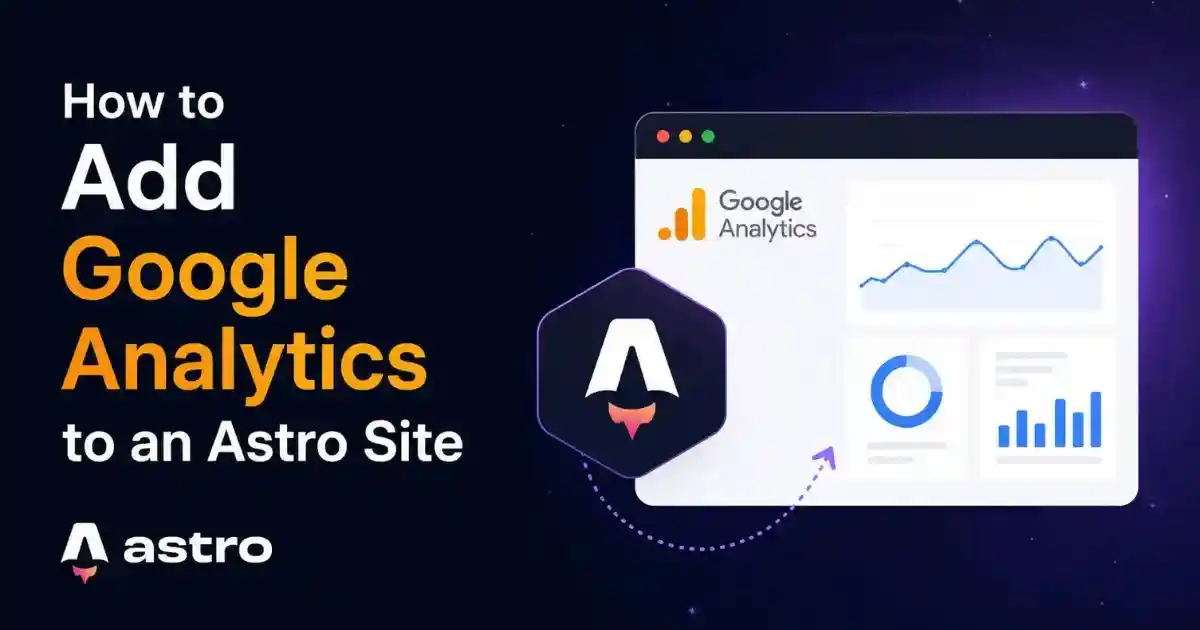
How to Add Google Analytics to an Astro Site
Install Google Analytics 4 correctly, keep the tag available across every Astro page, track client-side navigation, verify incoming data, and avoid the setup mistakes that cause missing or duplicate page views.
Adding Google Analytics to an Astro site is straightforward once you know where the Google tag belongs and how your site navigates. For a traditional multi-page Astro website, the normal GA4 installation works well. If your project uses Astro’s ClientRouter for view transitions, you need one additional tracking step so Google Analytics records client-side page changes.
<head> of your shared Astro layout, and deploy the site. Then visit your live website and confirm the session in Google Analytics Realtime. For projects using ClientRouter, send a manual page_view on the astro:page-load event.What You Need Before You Start
You need an Astro project, a Google account, and a website URL. The URL can be a production domain or a temporary deployed address, but verification is usually easier on the live site because browser extensions, local development settings, and consent tools can affect tracking.
You should also know which navigation model your project uses:
| Astro site type | Tracking approach |
|---|---|
| Standard multi-page Astro site | Use the normal Google tag. Each full page load can produce a page view automatically. |
Astro with ClientRouter | Send a page view on astro:page-load so client-side navigation is measured. |
| Hybrid or server-rendered Astro | Use the same browser tag, but confirm that the shared layout and public environment variable are present in production. |
Google Analytics 4, commonly called GA4, is the current generation of Google Analytics. It uses an event-based data model: page views, clicks, form submissions, purchases, and other interactions are represented as events. The basic installation starts with the Google tag, while more useful reporting comes from adding intentional events and conversions later.
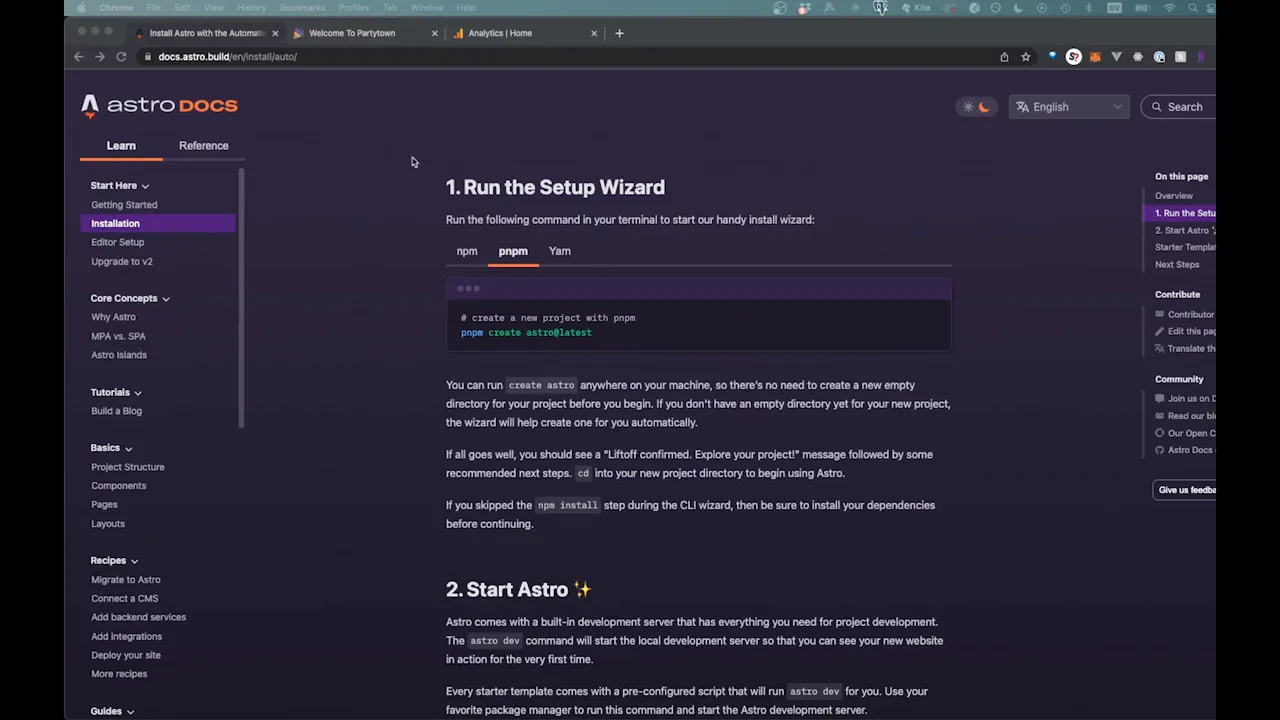
Video: Astro Google Analytics Tutorial for Beginners
Watch the complete walkthrough below, then use the written instructions for the reusable component, environment-variable option, view-transition tracking, event examples, and troubleshooting checks.
If the player does not load, watch the tutorial directly on YouTube.
Need Hosting for Your Astro Website?
Hostinger supports Astro deployments and gives you a practical route from a local project to a live domain. Add your Analytics environment variable before the production build, deploy the site, and verify tracking on the public URL.
View Hostinger PlansHow to Add Google Analytics to an Astro Site: Step by Step
The complete process has four core parts: create the Analytics property, create a web data stream, install its Google tag in a shared Astro layout, and verify that the deployed site sends data. The remaining sections improve maintainability and make the setup reliable on more advanced Astro projects.
- Sign in to Google Analytics and create or select an account.
- Create a GA4 property with the correct reporting time zone and currency.
- Create a web data stream for your Astro domain.
- Copy the measurement ID that begins with
G-. - Add the Google tag to a reusable Astro component.
- Render that component inside the shared layout’s
<head>. - Handle
ClientRouternavigation if your site uses view transitions. - Deploy and confirm your visit in Realtime or DebugView.
1. Create a Google Analytics 4 Property
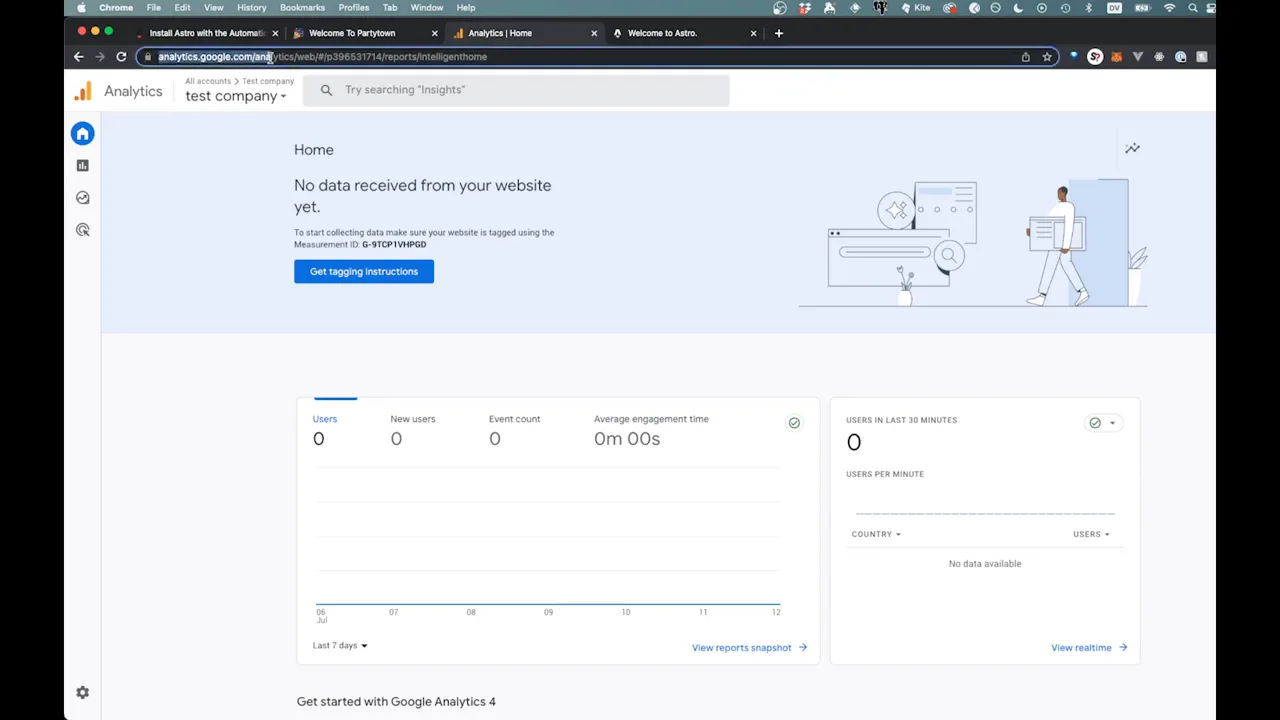
Go to Google Analytics, sign in, and open Admin. If you are new to Analytics, the setup flow asks you to create an account first. An Analytics account is the top-level container, while a property represents the website or app you want to measure.
- Enter an account name that identifies your business or organization.
- Review the account data-sharing settings and choose the options appropriate for you.
- Create a property and give it a recognizable name, such as your brand or domain.
- Select the reporting time zone used by your business.
- Select the currency used for revenue reporting.
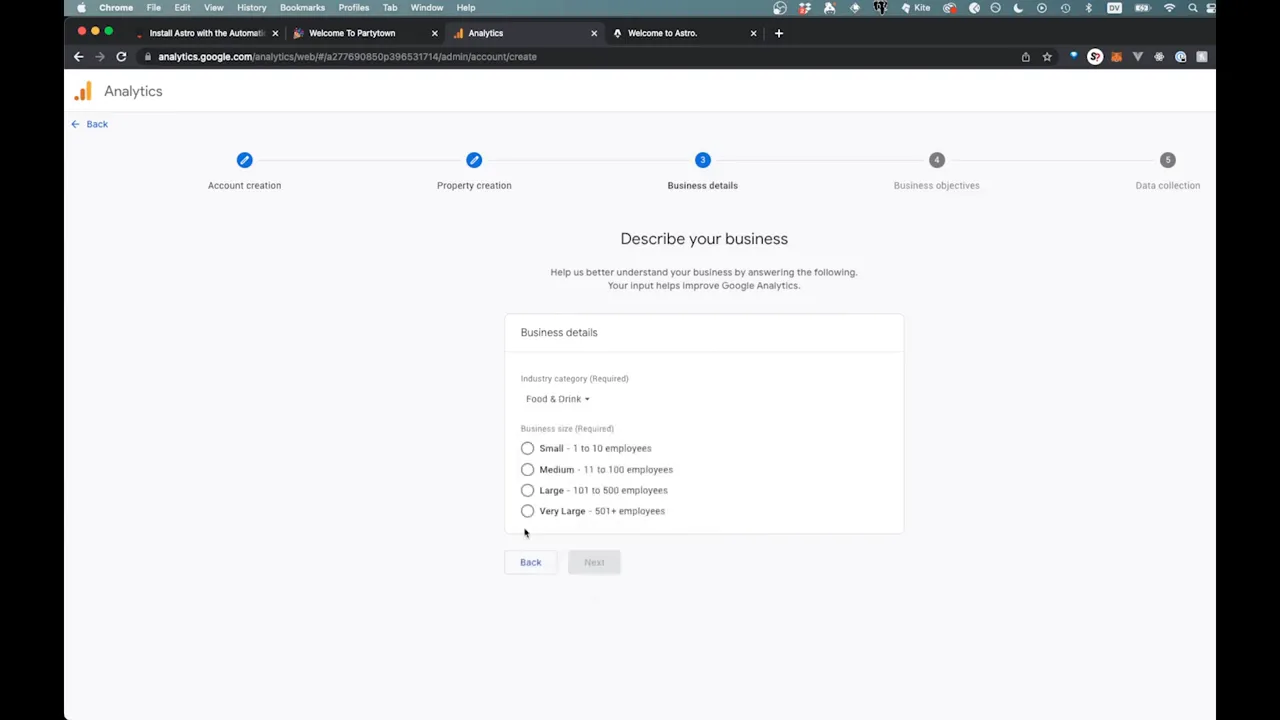
Google may ask for industry, business size, and reporting objectives. These choices can customize the initial reports you see; they do not change the basic Astro installation. Select the objectives that match what the site is meant to accomplish, such as generating leads, examining user behavior, driving sales, or increasing awareness.
2. Create a Web Data Stream and Copy the Measurement ID
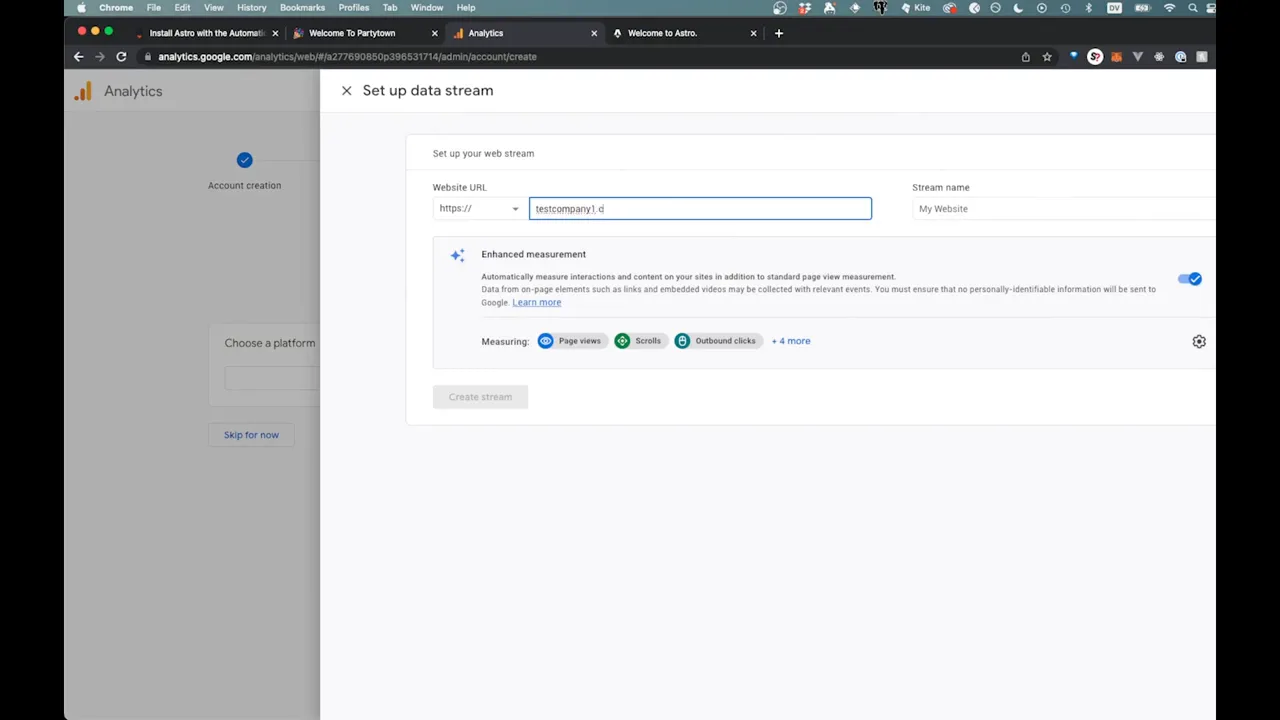
After creating the property, choose Web as the platform. Enter the full production URL and a descriptive stream name. For example, the stream name might be “Main website” or the domain itself.
Google Analytics may enable enhanced measurement by default. Enhanced measurement can collect interactions such as page views, scrolls, outbound clicks, site searches, video engagement, and file downloads without requiring separate code for every interaction. Review these settings rather than assuming every option is appropriate for your site.
Once the stream is created, copy the measurement ID. It follows a format similar to:
G-XXXXXXXXXXDo not confuse the measurement ID with the numeric property ID or stream ID. The browser installation uses the value beginning with G-.
3. Create a Reusable Google Analytics Astro Component
You can paste the Google tag directly into a layout, but a dedicated component is easier to maintain. Create a file such as:
src/components/GoogleAnalytics.astroThe version below reads the measurement ID from an environment variable. Astro exposes client-available environment variables when their names begin with PUBLIC_. A GA measurement ID is visible in the delivered page source anyway, so treating it as public is expected. Private API keys and service-account credentials must never be exposed this way.
---
const measurementId = import.meta.env.PUBLIC_GA_MEASUREMENT_ID;
const enabled = import.meta.env.PROD && Boolean(measurementId);
---

{enabled && (
  <>
    <script
      is:inline
      async
      src={`https://www.googletagmanager.com/gtag/js?id=${measurementId}`}
    ></script>

    <script is:inline define:vars={{ measurementId }}>
      window.dataLayer = window.dataLayer || [];
      window.gtag = window.gtag || function () {
        window.dataLayer.push(arguments);
      };

      window.gtag('js', new Date());
      window.gtag('config', measurementId);
    </script>
  </>
)}
The is:inline directive matters for the remote Google script. Astro’s documentation explains that external scripts loaded from a remote URL use is:inline. The define:vars directive passes the server-side measurement ID into the inline script safely.
import.meta.env.PROD is true. This prevents your own local testing from polluting production reports. Remove the production check temporarily if you specifically need to test the tag on localhost.Add the measurement ID to the environment used for the build:
PUBLIC_GA_MEASUREMENT_ID=G-XXXXXXXXXXFor local development, place that line in an appropriate .env file and restart the Astro development server after changing it. In production, add the same variable through your hosting platform’s environment settings before running the build. Do not commit unrelated secrets in the same file.
Simpler hard-coded version
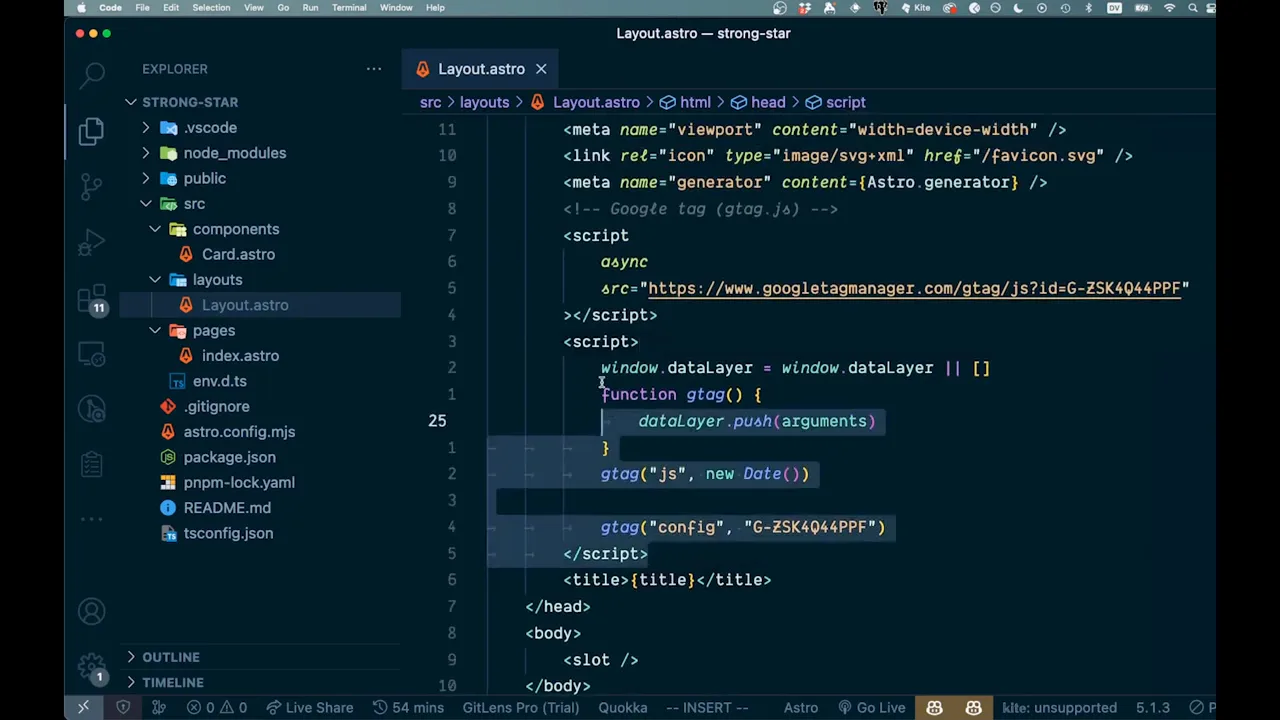
If you manage only one small website and do not need environment-specific IDs, you can use Google’s standard snippet directly. Replace both instances of G-XXXXXXXXXX with your real measurement ID.
<script
  is:inline
  async
  src="https://www.googletagmanager.com/gtag/js?id=G-XXXXXXXXXX"
></script>

<script is:inline>
  window.dataLayer = window.dataLayer || [];
  function gtag(){dataLayer.push(arguments);}
  gtag('js', new Date());
  gtag('config', 'G-XXXXXXXXXX');
</script>
The environment-variable component is generally cleaner when you have preview and production deployments, several properties, or a public repository.
4. Add the Component to Your Shared Astro Layout
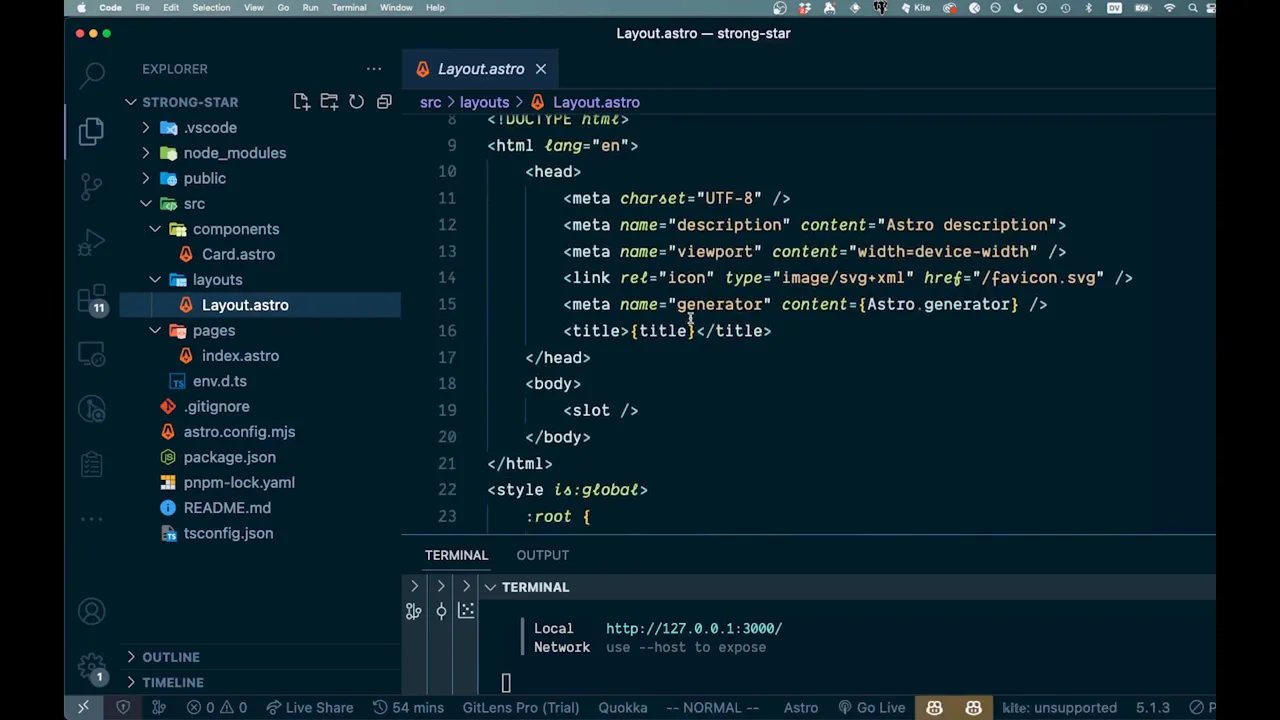
Open the layout used by your pages. Common paths include src/layouts/Layout.astro, src/layouts/BaseLayout.astro, or src/layouts/BlogLayout.astro. Import the component in the frontmatter and render it near the beginning of the document head:
---
import GoogleAnalytics from '../components/GoogleAnalytics.astro';

const { title = 'My Astro Site' } = Astro.props;
---

<!doctype html>
<html lang="en">
  <head>
    <GoogleAnalytics />
    <meta charset="UTF-8" />
    <meta name="viewport" content="width=device-width" />
    <title>{title}</title>
  </head>
  <body>
    <slot />
  </body>
</html>
Google recommends placing the Google tag immediately after the opening <head> on every page you want to measure. A shared layout achieves that without repeating the snippet in every .astro page.
googletagmanager.com, your measurement ID, and any Analytics integration before adding the component. Loading the same property through a layout, Google Tag Manager, and a plugin can create duplicate page views.5. Track Page Views with Astro View Transitions
Many Astro sites perform full document navigation, so Google’s default configuration records a new page view as each page loads. The situation changes when you add Astro’s ClientRouter. Client-side navigation replaces page content without always performing a full browser reload, and a script that ran on the initial page may not run again in the way you expect.
Astro provides the astro:page-load event for this situation. According to Astro’s documentation, it fires after the initial page render and after every navigation completed by ClientRouter. Use it as the point where you send a page view.
To prevent duplicate initial page views, disable the automatic page view in the GA configuration and then send exactly one manual event on astro:page-load:
---
const measurementId = import.meta.env.PUBLIC_GA_MEASUREMENT_ID;
const enabled = import.meta.env.PROD && Boolean(measurementId);
---

{enabled && (
  <>
    <script
      is:inline
      async
      src={`https://www.googletagmanager.com/gtag/js?id=${measurementId}`}
    ></script>

    <script is:inline define:vars={{ measurementId }}>
      window.dataLayer = window.dataLayer || [];
      window.gtag = window.gtag || function () {
        window.dataLayer.push(arguments);
      };

      window.gtag('js', new Date());
      window.gtag('config', measurementId, {
        send_page_view: false
      });

      document.addEventListener('astro:page-load', () => {
        window.gtag('event', 'page_view', {
          page_title: document.title,
          page_location: window.location.href,
          page_path: window.location.pathname + window.location.search
        });
      });
    </script>
  </>
)}
Use either the standard automatic setup or the manual astro:page-load version based on your router. Do not combine automatic page views with an additional manual event unless you have explicitly designed filters to prevent duplication.
6. Verify That Google Analytics Is Working
Do not consider the installation finished merely because the snippet appears in the layout. Verify that the browser downloads the tag, sends collection requests, and produces a session in the intended GA4 property.
Method 1: Google Analytics Realtime
- Deploy the Astro website.
- Open it in a private window with ad blocking disabled.
- Navigate through several pages.
- Open Reports and then Realtime in Google Analytics.
- Allow a short delay and look for your active user, location, pages, and events.
Method 2: Browser developer tools
Open the Network panel, reload the page, and search for gtag, googletagmanager, or collect. You should see the Google script request and one or more Analytics collection requests. A successful script download alone does not prove that events are reaching the property.
Method 3: Tag Assistant and DebugView
Google Tag Assistant can help identify whether the tag is present and which property receives data. GA4 DebugView is useful while testing event names and parameters because it presents debug events more quickly than standard reports.
npm run build followed by npm run preview. This catches missing production environment variables and build-only behavior before deployment. If Analytics is restricted to import.meta.env.PROD, it should load in the preview build but not the regular development server.7. Track Custom Events in Astro
Page views show where visitors go, but custom events reveal what they do. Good event candidates include newsletter signups, contact-form submissions, downloads, product clicks, account creation, and outbound affiliate clicks.
For example, a Hostinger call-to-action can send an event before opening the destination:
<a
  href="https://joshwp.com/recommends/hostinger/"
  id="hostinger-cta"
  rel="sponsored noopener"
>
  Get Hostinger Web Hosting
</a>

<script>
  document.querySelector('#hostinger-cta')?.addEventListener('click', () => {
    window.gtag?.('event', 'affiliate_click', {
      affiliate_name: 'hostinger',
      link_location: 'article_cta'
    });
  });
</script>
Use stable, descriptive event names. Google recommends lower-case names with underscores for custom events. Avoid sending personally identifiable information such as names, email addresses, phone numbers, or form-message contents to Analytics.
After confirming the event in DebugView and reports, mark business-critical events as key events in GA4. Typical key events include a successful lead submission, completed purchase, or account registration. A button click alone may be too early in the funnel unless that click is the meaningful outcome.
8. Handle Privacy, Cookies, and Consent
Analytics implementation is partly a technical decision and partly a privacy decision. Your obligations depend on where you and your visitors are located, what data you collect, and how your site uses advertising or personalization. This guide is technical information, not legal advice.
At minimum:
- Explain Analytics use in your privacy policy.
- Do not send personally identifiable information in URLs or event parameters.
- Use an appropriate consent mechanism where consent is required.
- Configure Google Consent Mode through a compatible consent platform if it fits your requirements.
- Test both consent choices to confirm the tag behaves as intended.
- Review data retention and advertising settings inside GA4.
If a consent manager controls Analytics, the absence of collection requests before consent may be correct behavior rather than an installation failure. Test the consent state explicitly when troubleshooting.
Need Hosting for Your Astro Website?
Hostinger supports Astro deployments and gives you a practical route from a local project to a live domain. Add your Analytics environment variable before the production build, deploy the site, and verify tracking on the public URL.
View Hostinger Plans9. Deploy an Astro Site on Hostinger
Google Analytics only becomes useful when the site is available to real visitors. Astro can produce a static build that is well suited to conventional web hosting, and Astro’s official deployment documentation includes Hostinger guidance.
A typical static deployment works like this:
- Add
PUBLIC_GA_MEASUREMENT_IDto the environment used by the build. - Run
npm run build. - Confirm that Astro creates the production output, usually in
dist/. - Deploy through Hostinger’s supported Git workflow or upload the built output according to your hosting setup.
- Connect the production domain and enable HTTPS.
- Open the live URL and verify Analytics in Realtime.
Environment variables used by a static Astro site are generally evaluated during the build. If you add or change the measurement ID after deploying, rebuild and redeploy the site. Simply changing an environment setting may not rewrite files that have already been generated.
Server-rendered Astro adapters can have different deployment requirements from a static build. Check your astro.config.mjs and selected adapter before choosing a hosting method.
10. Does Google Analytics Slow Down Astro?
Any third-party script adds network and processing cost. The Google tag is asynchronous, so it does not block HTML parsing in the same way as a synchronous script, but it still downloads JavaScript and performs work in the browser.
Keep the implementation lean:
- Load one Analytics implementation rather than duplicate tags.
- Do not add Google Tag Manager unless you need its tag-management capabilities.
- Limit unnecessary marketing and tracking scripts.
- Measure performance after deployment with realistic consent settings.
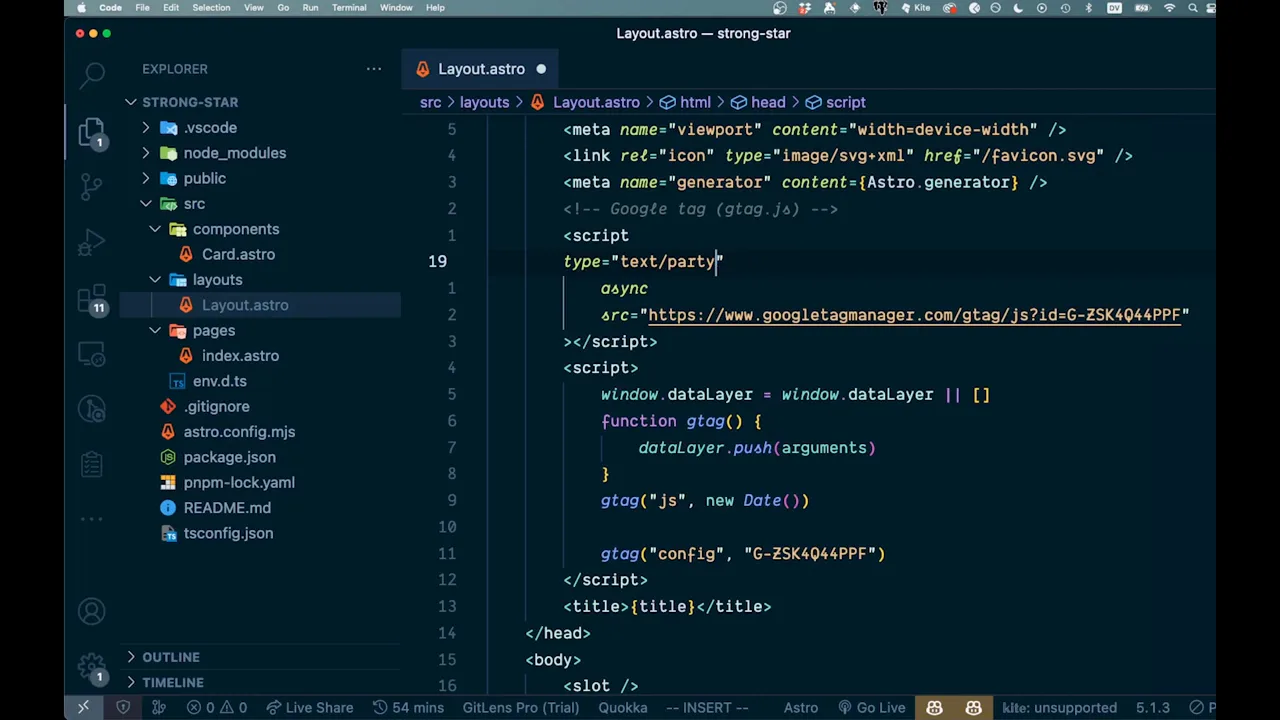
- Consider Astro’s Partytown integration for advanced third-party-script optimization, then test Analytics and consent behavior carefully.
Partytown can move compatible third-party scripts into a web worker, reducing main-thread work. It is an optimization option, not a requirement for a basic GA4 installation. Start with a correct direct setup and add complexity only when measurements show a meaningful benefit.
Common Astro Google Analytics Problems
No users appear in Realtime
Confirm that the measurement ID begins with G- and belongs to the property you are viewing. Disable ad blockers, accept Analytics consent if applicable, and test the production URL in a private window. Check the browser Network panel for blocked or missing requests.
The script is missing from the built page
If your component uses import.meta.env.PROD, it is intentionally absent during npm run dev. Test with a production preview. If it is also missing there, make sure PUBLIC_GA_MEASUREMENT_ID exists in the build environment and restart or rebuild after changing it.
Some Astro pages are not tracked
The pages may use a different layout. Search the project for all root layouts and ensure each relevant document renders the Analytics component. Also check whether an error page, standalone landing page, or content collection uses a separate shell.
Page views are duplicated
Look for multiple installations: a direct Google tag, Google Tag Manager, a framework integration, or code injected by the hosting platform. On a ClientRouter site, verify that send_page_view: false is set before manually sending events on astro:page-load.
Only the first page is tracked
This commonly indicates client-side navigation. If the site uses ClientRouter, implement the manual page-view pattern shown above and test several navigations without reloading the tab.
The tag works locally but not after deployment
The production build may not receive your environment variable, or a production Content Security Policy may block Google domains. Inspect the deployed page source, browser console, and Network panel. If you use a restrictive CSP, allow only the specific Google script and collection origins required by your configuration.
Analytics reports show the wrong page title
For client-side navigation, send the event after Astro has updated the document. The astro:page-load event is designed for that lifecycle point. Confirm that each page also supplies the correct title through your layout.
Recommended Final Checklist
- The measurement ID begins with
G-and belongs to the correct property. - The Google tag is rendered once in every measured page.
- The remote script uses the required Astro inline handling.
- The public environment variable exists during the production build.
ClientRouternavigation sends one page view per route change.- Consent behavior matches your privacy requirements.
- Realtime, Network tools, or DebugView confirms incoming events.
- Custom events avoid personal information and use consistent names.
- The live site is tested after every tracking-related deployment.
Frequently Asked Questions
Can I use Google Analytics with an Astro website?
Yes. Google Analytics runs in the visitor’s browser, so it works with static, hybrid, and server-rendered Astro projects. The important part is including the tag in a shared layout and accounting for client-side navigation when used.
Where should I put the Google Analytics script in Astro?
Place it near the start of the <head> in the highest-level shared layout. A separate GoogleAnalytics.astro component makes the code easier to configure and prevents accidental repetition.
Do I need an Astro Google Analytics package?
No. The direct Google tag is sufficient for most sites. A package may offer convenience, but it also adds another dependency. If you use one, verify that it supports your Astro version, navigation model, consent requirements, and GA4 event needs.
Why is Google Analytics not tracking my Astro site?
Check the measurement ID, environment variable, layout coverage, browser blockers, consent state, Content Security Policy, and Network requests. If only the first page is recorded, check whether the project uses ClientRouter.
How do I track Astro view transitions in GA4?
Disable the automatic page view with send_page_view: false, listen for astro:page-load, and send one page_view event with the current title and URL after every completed navigation.
Is the GA4 measurement ID a secret?
No. Visitors can see it in browser-delivered code. It is appropriate for an Astro variable prefixed with PUBLIC_. This does not mean private Google API credentials should ever be placed in public environment variables.
Can I test Google Analytics on localhost?
Yes, but local traffic can pollute reports and extensions may block it. A production preview or staging deployment is often a more realistic test. The component in this guide intentionally loads only in production unless you remove that condition.
Should I use Google Tag Manager instead?
Use Tag Manager when you need to manage several marketing tags, triggers, or stakeholder workflows without changing application code for every update. For one GA4 property and a few coded events, the direct Google tag is often simpler.
Publish Your Astro Site
Once the Google tag is installed and tested, deploy your production build, connect your domain, and begin collecting useful traffic and conversion data.
Get Started with Hostinger