How to Build a WordPress Website Using Claude Design and Elementor
Use Claude to turn a business brief into a polished visual system, then use Elementor to make that design responsive, editable, search-friendly, and ready for real visitors.
Quick Answer
The strongest workflow is to use Claude Design for strategy, visual direction, page structure, copy, and rapid prototyping, then use Elementor as the production layer inside WordPress. Claude helps you decide what the website should be; Elementor gives you a maintainable way to publish and update it. For most live websites, rebuilding the approved design with native Elementor containers and widgets is safer than pasting an entire AI-generated codebase into one HTML widget.
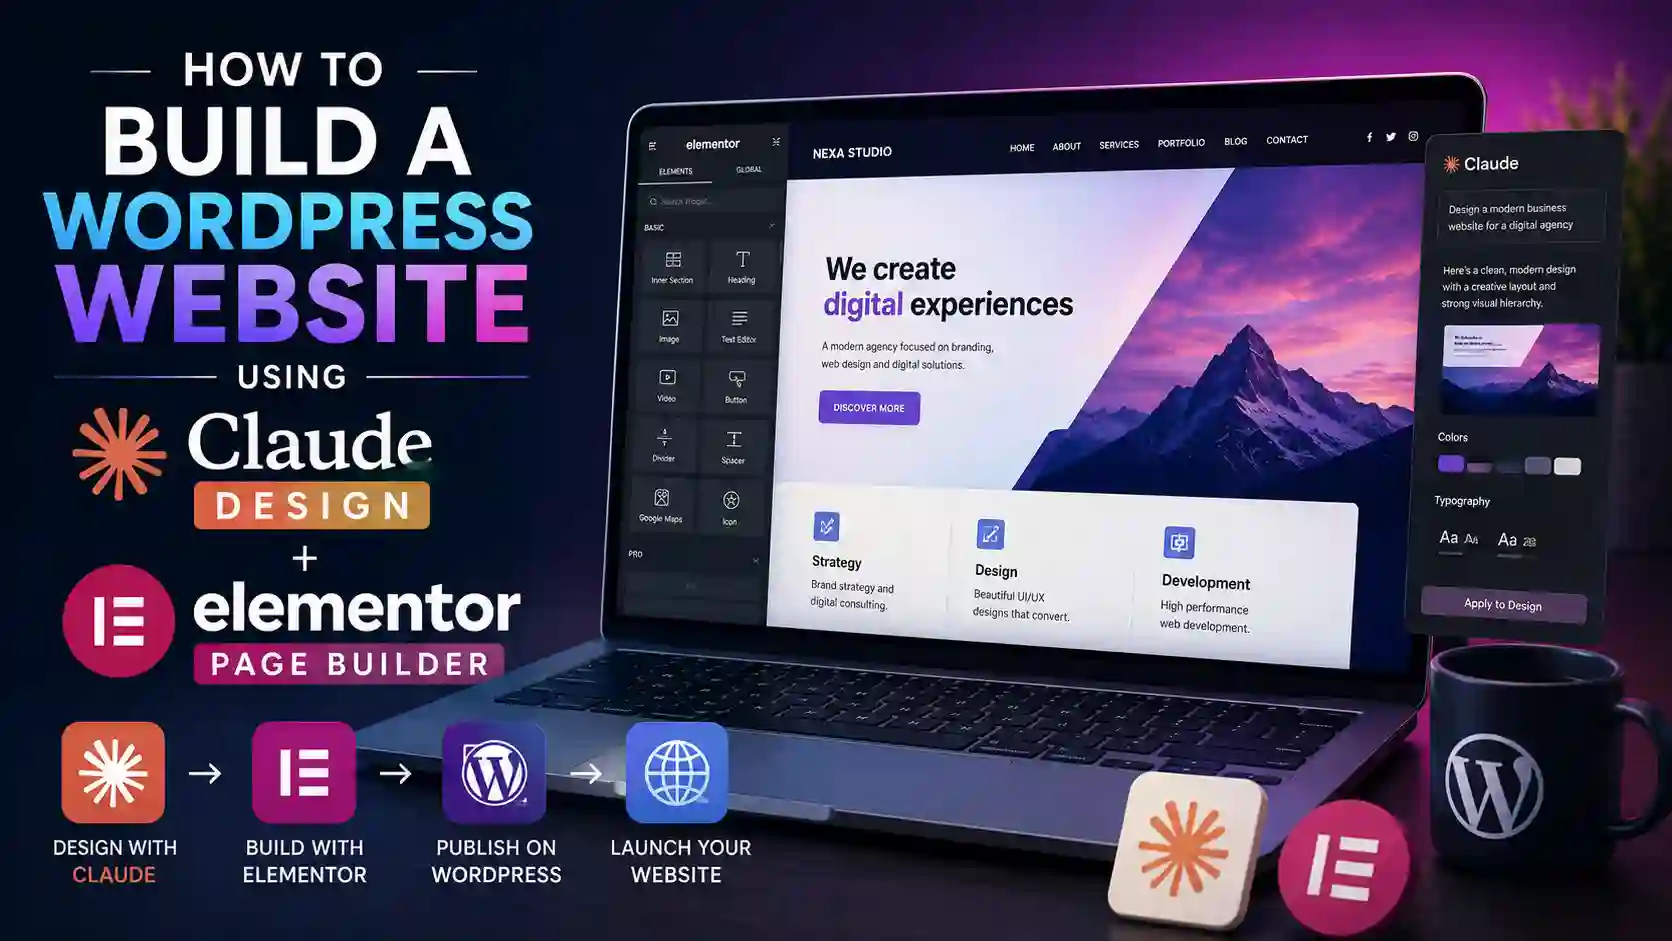
AI website builders are excellent at collapsing the blank-page phase. The problem is that a beautiful prototype and a dependable WordPress site are not the same deliverable. A prototype can look finished while its forms, navigation, mobile layout, content model, SEO fields, or update workflow remain unresolved.
This guide bridges that gap. It follows the core process demonstrated in the reference video, then extends it with a production-minded Elementor workflow, staging precautions, cleaner prompt engineering, technical SEO, accessibility, and a launch checklist.
The Big Picture
What Claude Design and Elementor Each Do Best
Claude and Elementor solve different parts of the website problem. Claude is strongest when the work is ambiguous: defining hierarchy, exploring art direction, generating conversion-focused copy, and iterating on a complete concept. Elementor is strongest after the direction is approved: arranging responsive containers, connecting WordPress content, creating forms, controlling global styles, and giving a site owner a familiar editor.
The finished site should not depend on an ongoing Claude conversation to remain editable. That is the architectural goal: use AI to accelerate decisions, but keep the production website understandable inside WordPress.
Before You Start
What You Need for This Tutorial
- A Claude account with access to the design or artifact tools used for your prototype.
- A clear business offer, audience, primary call to action, and basic brand direction.
- A WordPress installation on a domain or temporary staging URL.
- The Elementor plugin. Elementor Pro is optional for basic pages but valuable for Theme Builder, forms, custom code, and dynamic content.
- A lightweight WordPress theme such as Hello Elementor.
- Brand assets: logo, approved photography, colors, legal copy, contact details, and social links.
- A staging environment and current backup before any automated code or agent touches WordPress.
Reference Video
Watch the Claude Design and Elementor Workflow
Keep the video open for visual context, but use the guide below as the working checklist. It separates the creative design stage from the technical production stage, which makes troubleshooting much easier.
Turn the Claude Concept into a Real WordPress Site
Start with dependable WordPress hosting, build the approved design in Elementor, and keep the finished site editable long after the AI conversation ends.
Step 1
Write a Website Brief Before Prompting Claude
A weak prompt usually creates a generic website because the model has to invent the business strategy. Give Claude enough information to make deliberate choices. At minimum, define:
- Business and offer: What do you sell, and what outcome does the customer receive?
- Audience: Who is the ideal visitor, and what do they care about most?
- Primary conversion: Book a call, request a quote, buy a product, join a list, or visit a location.
- Pages: Home, About, Services, portfolio or case studies, blog, contact, and any legal pages.
- SEO topics: The main service, location, and supporting questions each page should target.
- Brand character: Precise adjectives such as editorial, calm, technical, premium, playful, or direct.
- Proof: Testimonials, case studies, credentials, statistics, guarantees, or recognizable clients.
- Constraints: Available imagery, accessibility needs, platform limits, and content that must not be invented.
For the real estate example in the video, the prompt includes the business name, Las Vegas location, target keywords, ideal customer, services, voice, CTA, and contact details. This is why Claude can produce copy that feels more specific than a standard template.
Step 2
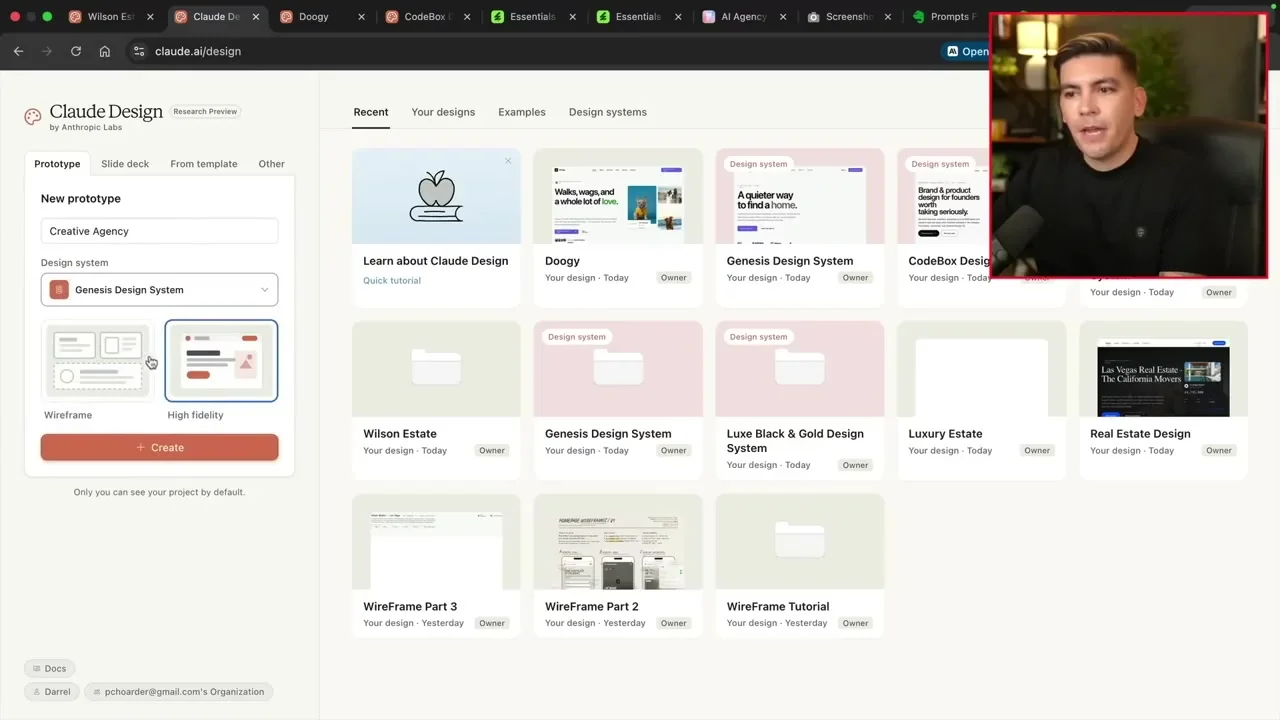
Create the Website Concept in Claude Design
You can begin in one of two ways. The first is a reference-led design, where you provide a screenshot and ask Claude to infer its visual grammar: spacing, typography scale, composition, color balance, imagery treatment, and component rhythm. The second is a brief-led design, where Claude develops an original direction from your business strategy without a screenshot.
A reference should guide the system, not invite a clone. Tell Claude not to copy a competitor’s logo, copy, photos, proprietary illustrations, or distinctive branded elements. You want the discipline behind the page, adapted to your own offer.
Recommended Claude Design sequence
- Create or select a design system with your brand colors, typography, spacing, button styles, and border treatment.
- Choose a high-fidelity prototype when you need an accurate visual target.
- Paste your structured brief and attach a reference screenshot only when it adds useful direction.
- Ask Claude to produce the homepage first. Confirm the system before generating five inconsistent pages.
- Review the desktop design, then explicitly request tablet and mobile behavior.
- Generate the remaining pages using the approved tokens and components.
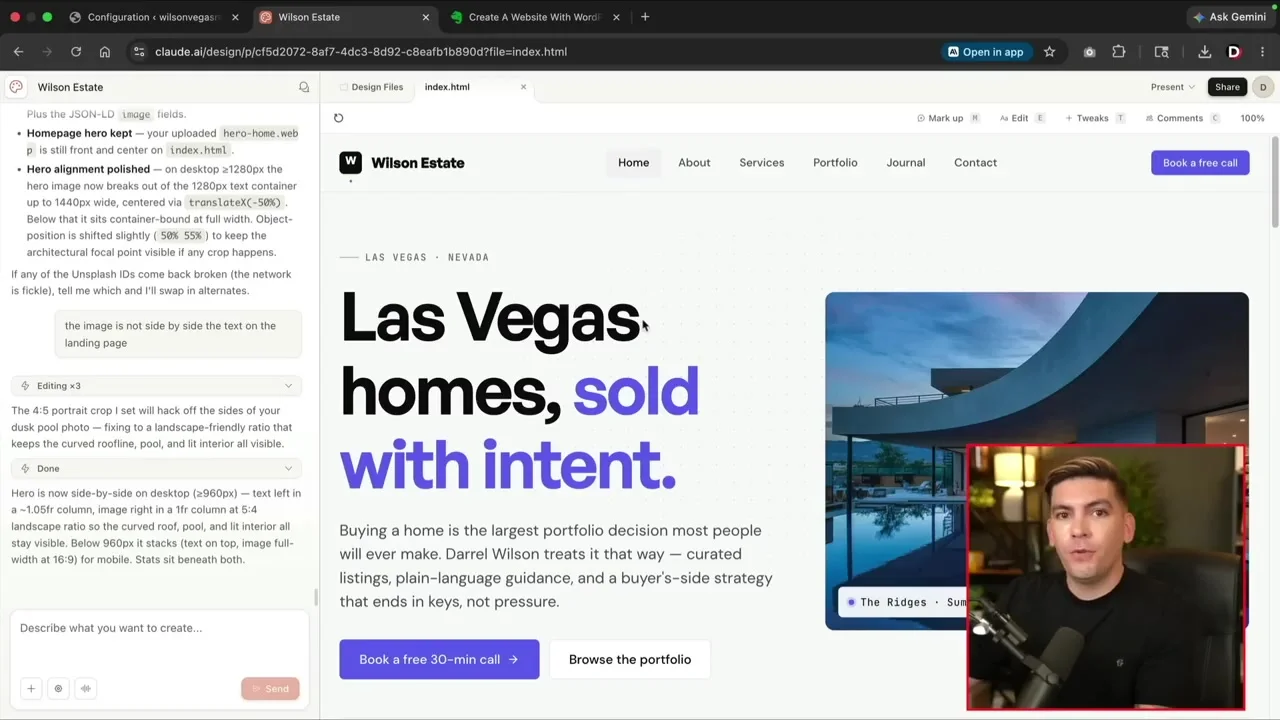
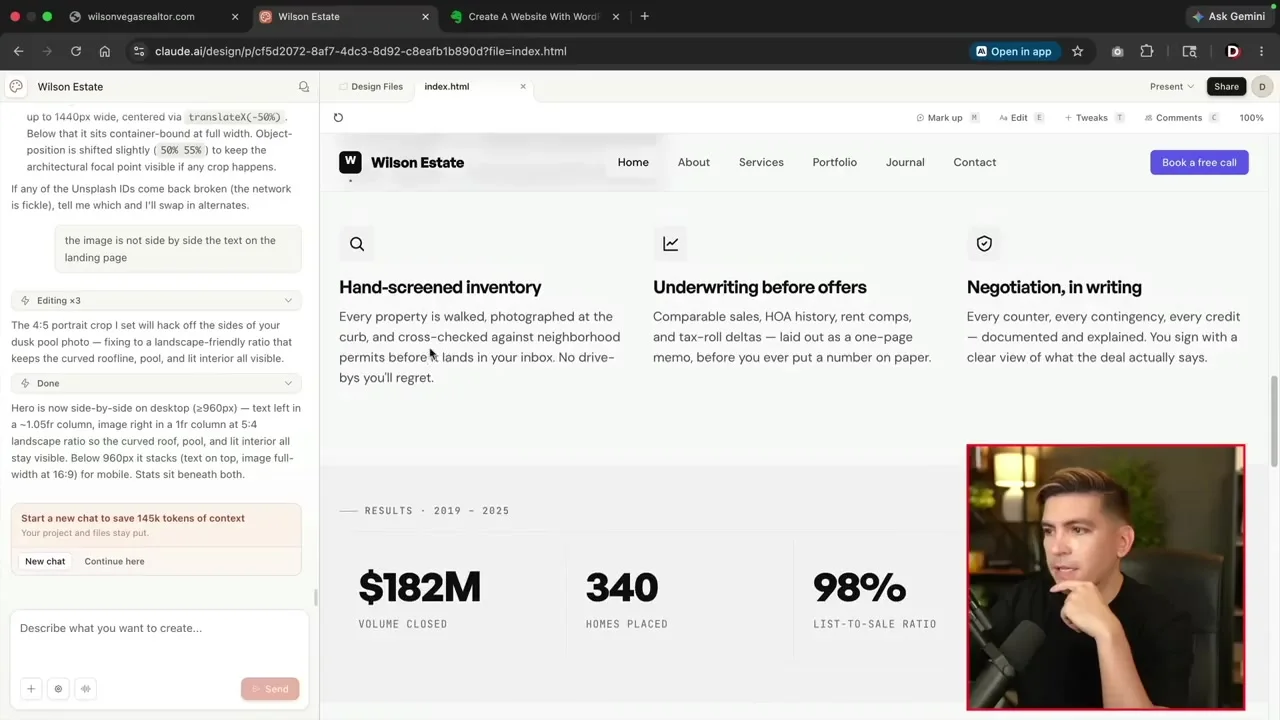
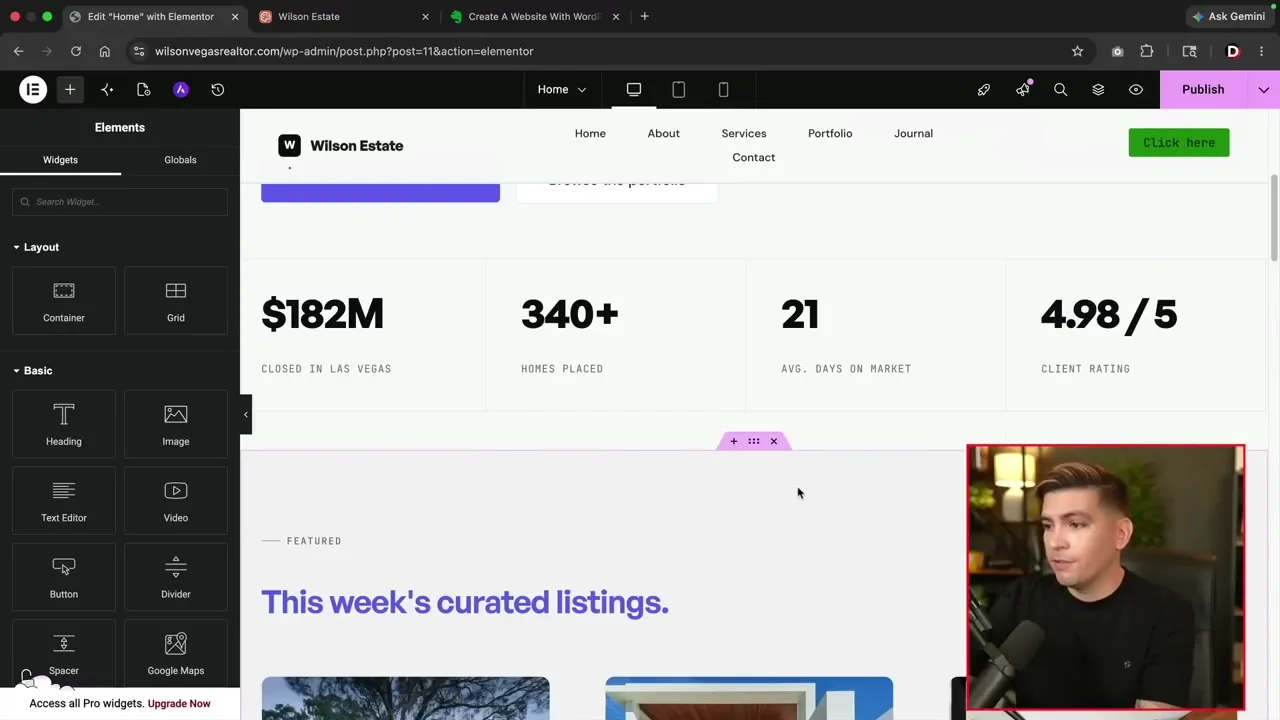
In the video, Claude produces a modern real estate concept with a split hero, confident typography, restrained purple accents, service benefits, proof statistics, curated property cards, and a strong booking CTA. The output is coherent because the prompt establishes both content and visual rules.
Step 3
Claude Prompt Templates That Produce Better Elementor Builds
The best prompts describe the design outcome and the handoff constraints. These original templates are deliberately structured so the output is easier to recreate in Elementor.
Prompt A: Build from a screenshot
You are a senior web designer and conversion strategist.

Analyze the attached reference screenshot for its visual system only:
layout hierarchy, spacing rhythm, typography scale, image treatment,
color balance, button hierarchy, and reusable components.

Do not copy the source brand, text, logo, photos, or distinctive assets.
Create an original responsive website for this business:

Business: [NAME]
Offer: [SERVICES OR PRODUCTS]
Audience: [IDEAL CUSTOMER]
Location: [LOCATION OR ONLINE]
Primary goal: [CTA]
SEO topics: [5-10 TOPICS]
Brand voice: [3-5 ADJECTIVES]
Pages: [PAGE LIST]
Proof available: [TESTIMONIALS, RESULTS, CREDENTIALS]

First define a design system with CSS variables for colors, fonts,
spacing, max-width, radius, and shadows. Then create the homepage.
Include desktop, tablet, and mobile behavior. Use semantic headings,
visible focus states, accessible contrast, descriptive link text,
and reduced-motion support. Never invent unverifiable claims.
Prompt B: Build without a screenshot
Design an original, high-fidelity website for [BUSINESS].
The website should feel [BRAND ADJECTIVES], not like a generic template.

Audience: [AUDIENCE]
Core problem: [PROBLEM]
Offer: [OFFER]
Primary conversion: [CTA]
Secondary conversion: [CTA]
Required pages: [PAGES]
Required homepage sections: [SECTIONS]
SEO topics: [TOPICS]

Create a clear visual system before designing the page. Keep the content
width consistent, use one primary accent plus supporting neutral colors,
and establish repeatable spacing. Provide practical responsive behavior
for every section. Prefer purposeful interactions over decorative motion.
Return editable, well-structured content and do not fabricate testimonials,
prices, addresses, statistics, or legal claims.
Prompt C: Convert the approved concept into an Elementor plan
Turn this approved website design into an Elementor build specification.
For each page and section, provide:

1. Container hierarchy and direction
2. Content width, gap, padding, and alignment
3. Elementor widgets to use
4. Global color and typography token references
5. Desktop, tablet, and mobile values
6. Image dimensions and aspect ratios
7. Hover, focus, and active states
8. Reusable components and template parts

Use native Elementor containers and widgets wherever possible.
Flag anything that genuinely requires custom CSS or JavaScript.
Do not output a complete HTML document unless I ask for one.
Prompt D: Generate safe code for one Elementor HTML widget
Create one self-contained section for an Elementor HTML widget.
Use the unique class prefix "acme-hero-" for every selector.

Rules:
- Do not include html, head, or body tags
- Do not use global selectors or CSS resets
- Do not load external frameworks or libraries
- Keep JavaScript optional and minimal
- Use semantic HTML and keyboard-accessible controls
- Add responsive styles for 1024px, 767px, and 480px
- Respect prefers-reduced-motion
- Avoid fixed heights that can clip text
- Return HTML, scoped CSS, then optional JavaScript

Section content: [CONTENT]
Visual requirements: [REQUIREMENTS]
Step 4
Refine the Claude Prototype Before Opening WordPress
Do not start the Elementor build while the information architecture is still changing. It is faster to correct a vague hero, weak CTA, or missing trust section in Claude than to restructure several Elementor templates later.
- The homepage communicates the offer, audience, and next step above the fold.
- Every page has one clear H1 and a logical H2/H3 hierarchy.
- The navigation labels match what visitors actually search for.
- The design has consistent colors, type sizes, spacing, buttons, cards, and image ratios.
- All claims, testimonials, addresses, prices, and statistics are verified.
- Desktop, tablet, and mobile states have been considered.
- Forms have a defined destination, success state, privacy notice, and spam protection plan.
- The site can be maintained without asking Claude to rewrite everything.
Need a WordPress Home for the Design?
Hostinger gives you a straightforward WordPress starting point, and eligible plans include a staging workflow that is especially useful when AI-generated code or automated agents are involved.
Affiliate disclosure: I may earn a commission if you purchase through this link, at no extra cost to you.
Step 5
Set Up WordPress Hosting and a Staging Site
Choose your domain and WordPress hosting, enable SSL, and complete the WordPress installation. If you already have a live site, create a staging copy rather than experimenting on production. A staging site lets you test design imports, plugins, custom code, and agent access without exposing unfinished work to customers or search engines.
- Connect the domain and confirm HTTPS works.
- Create the WordPress administrator with a unique username and strong password.
- Set the site title, timezone, language, and permalink structure.
- Create a full backup or server snapshot.
- Create a staging environment before enabling experimental plugins or AI-agent access.
- Discourage search engines on staging and make sure staging URLs are not linked publicly.
If this is your first Elementor setup, read the related guide on how to create a WordPress website with Elementor Hosting. The hosting interface differs, but the same principles apply: secure WordPress first, then build.
Step 6
Install a Lightweight Theme and Prepare Elementor
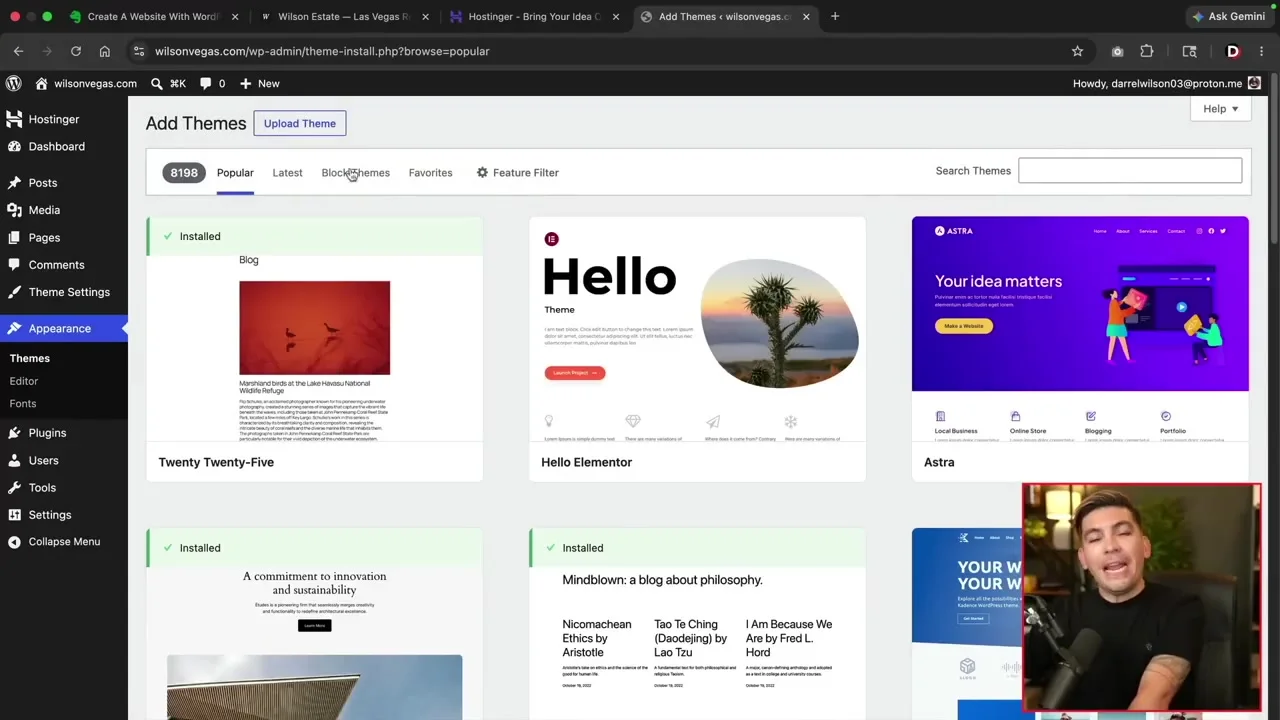
Install and activate Hello Elementor or another lightweight theme that follows WordPress standards. Hello is intentionally minimal, which reduces the chance that theme typography, widths, and button styles will fight your Claude design.
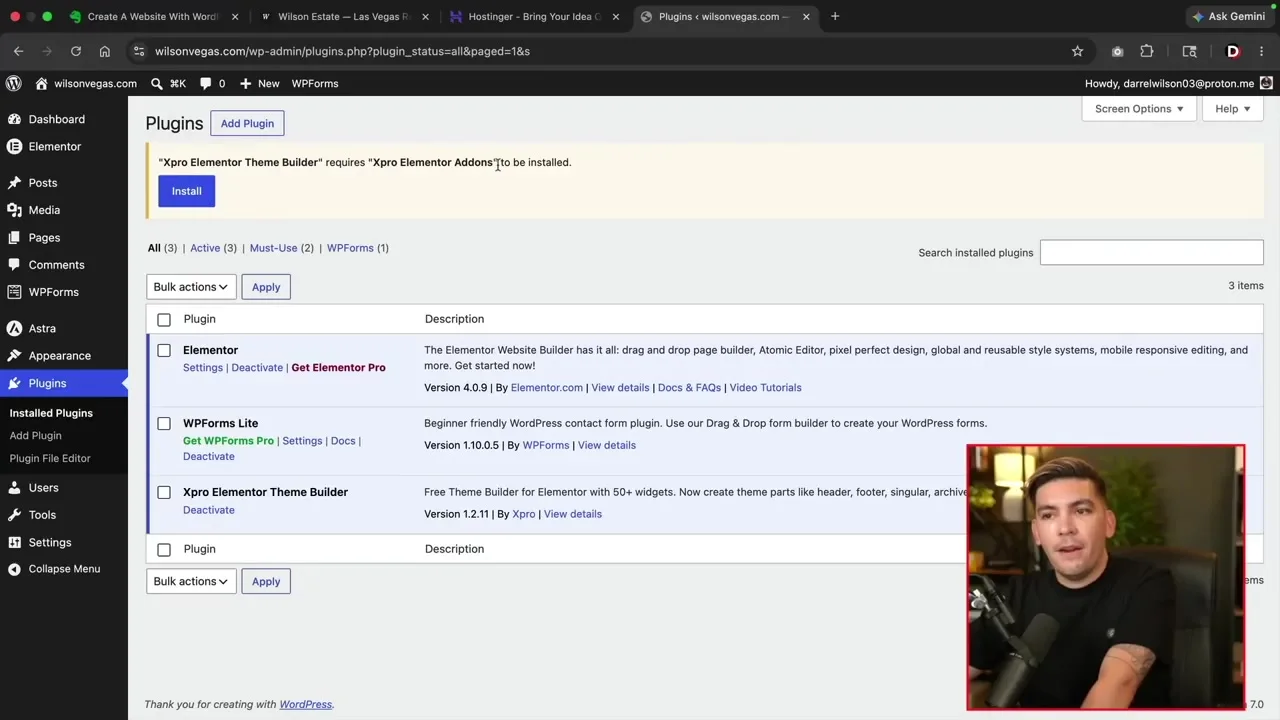
Next, install Elementor and only the additional plugins the project genuinely needs. Extra widget packs can be useful, but each one expands the update, performance, and compatibility surface. Elementor Free handles standard layout and content. Elementor Pro becomes valuable for Theme Builder, forms, dynamic fields, popups, custom code, and more advanced sitewide control.
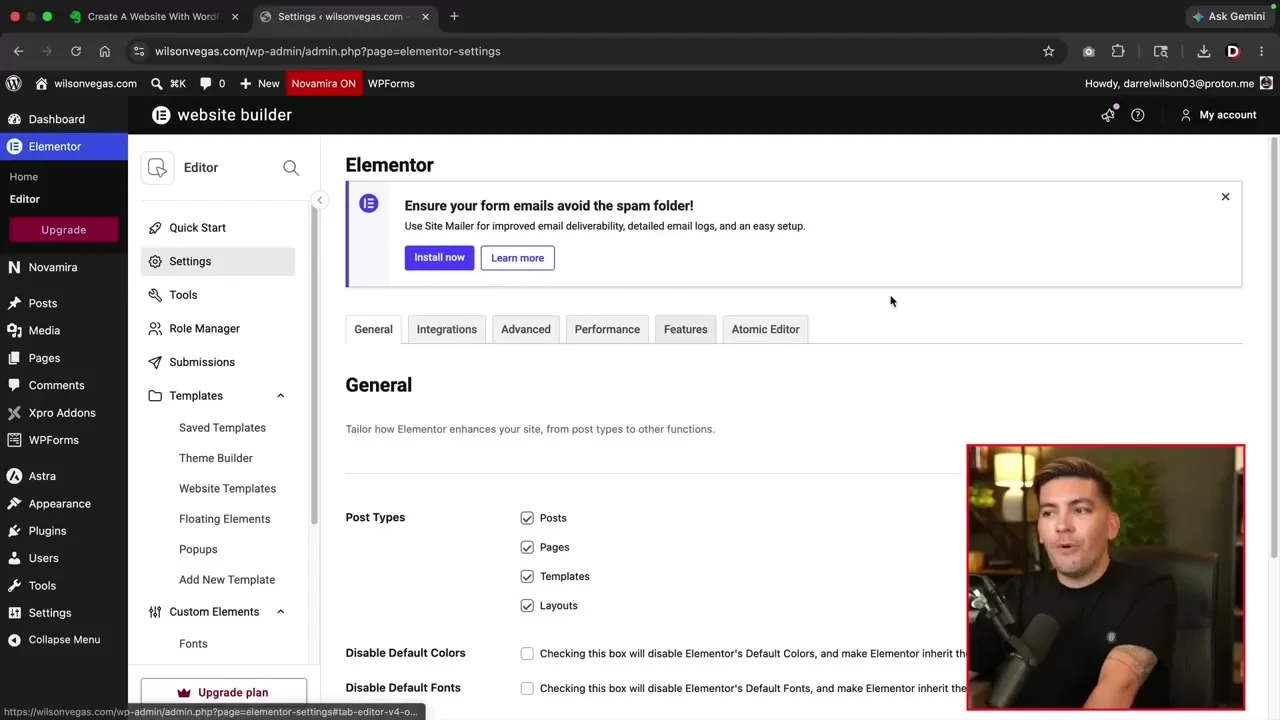
Elementor setup checklist
- Set the homepage under Settings > Reading.
- Choose Elementor Full Width for pages that should retain your theme header and footer, or Canvas for a blank layout.
- Enable containers if your installation does not already use them by default.
- Confirm image sizes, SVG policy, user roles, and form email delivery.
- Set global colors and fonts before manually styling dozens of widgets.
- Configure backups, caching, and security before launch, not after a problem.
Build the Production Version in Elementor
Elementor turns the approved Claude concept into a visual WordPress site that you or a client can continue editing after launch.
Step 7
Choose the Right Claude-to-Elementor Handoff
There are three practical transfer methods. The fastest is not always the best long-term choice.
| Method | Best For | Advantages | Tradeoffs |
|---|---|---|---|
| Native Elementor rebuild | Business sites, client work, SEO-focused sites | Fully editable, responsive controls, cleaner maintenance, WordPress integrations | More manual work at the beginning |
| Scoped HTML widget sections | Prototypes and isolated custom sections | Fast visual transfer, flexible code | Less visual editability, possible CSS/JS conflicts, greater testing burden |
| AI agent or connector | Experienced users working on staging | Can automate files, pages, plugins, and repetitive conversion work | High permissions, unpredictable changes, plugin dependency, security risk |
My default recommendation is the native rebuild. Use Claude’s output as the visual source of truth and ask it for an Elementor specification. Reserve custom code for elements that Elementor cannot express cleanly.
Step 8
Rebuild the Approved Design with Native Elementor Containers
Create one page at a time, beginning with the homepage. Work from large structure to fine detail:
- Page shell: Set the page layout and create a top-level vertical container.
- Sections: Add separate containers for the hero, proof, services, portfolio, testimonials, FAQ, and final CTA.
- Inner layout: Use nested flex or grid containers for columns and repeated cards.
- Content: Add heading, text, image, icon, button, form, posts, or gallery widgets.
- Tokens: Apply global colors and fonts instead of local values wherever possible.
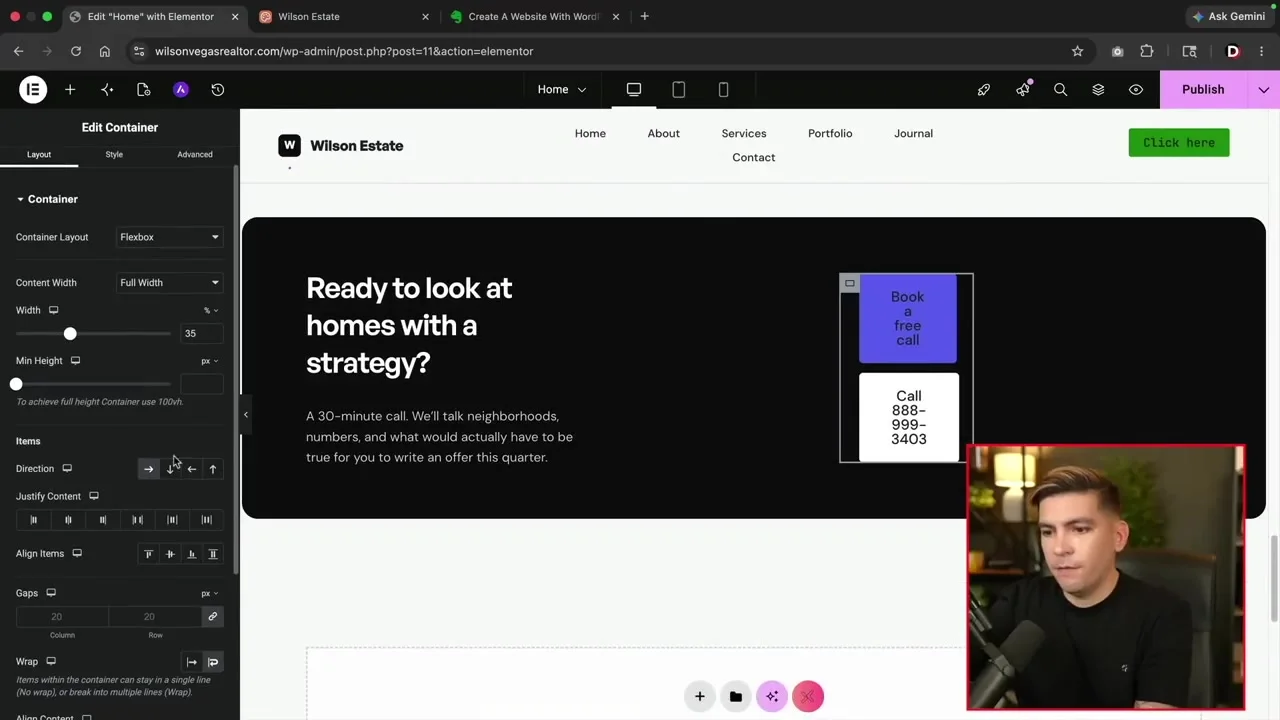
- Responsive rules: Define stacking, order, alignment, gaps, and padding for tablet and mobile.
- Reusable patterns: Save repeated sections or containers as templates.
For the reference hero, you would create a full-width section with a constrained inner container, two columns, text and buttons on the left, and an image on the right. On mobile, stack the text above the image and allow the CTA buttons to fill the available width.
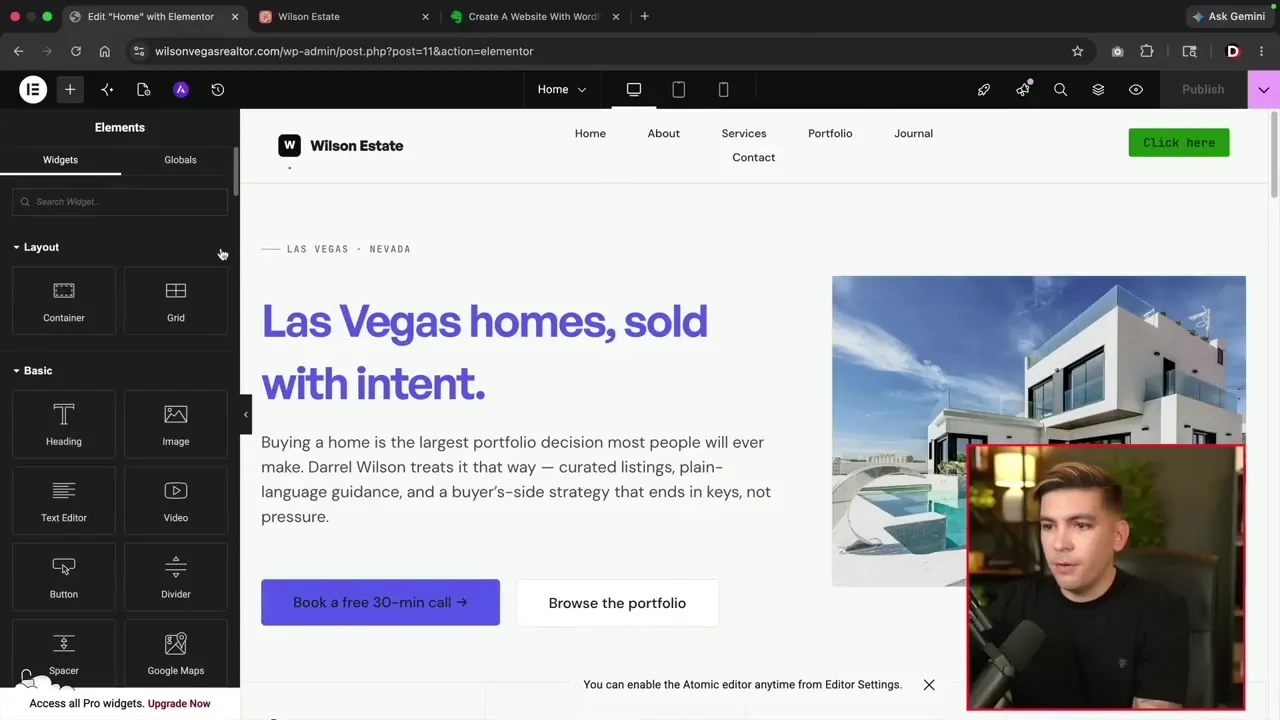
Continue down the page, matching visual hierarchy rather than chasing pixel-for-pixel sameness. A production site must survive real text, changing images, browser zoom, mobile keyboards, and future edits. Flexible structure matters more than a screenshot-perfect frozen canvas.
Optional Advanced Route
Use an AI Agent to Transfer the Site Only on Staging
The video also demonstrates an agent-assisted WordPress conversion using a connector plugin and application credentials. This approach can inspect a downloaded design, create pages, configure plugins, and perform repetitive conversion steps. It is powerful, but the permissions are also powerful.
If the agent generates PHP, JavaScript, plugin files, or database changes, treat that output as unreviewed code. Check for remote requests, hard-coded credentials, unsafe file operations, unsanitized input, unescaped output, hidden admin users, and dependencies that are no longer required.
When the HTML widget route makes sense
Elementor’s HTML widget can embed HTML, CSS, shortcodes, and JavaScript. It is useful for a genuinely isolated custom component. It is less suitable for an entire multi-page site because one large snippet is difficult for nontechnical editors to maintain and can affect the rest of the page if selectors are not scoped.
When you use the widget, omit full-document tags, prefix every CSS class, avoid global selectors, keep JavaScript minimal, and save a page revision first. Elementor itself warns that HTML widget code can contain malware and restricts access to administrators by default.
Step 9
Translate Claude’s Design System into Elementor Global Styles
Global styles are where the prototype becomes a coherent website system. In Elementor Site Settings, create semantic tokens rather than names tied to one page:
- Colors: Primary, secondary, accent, text, muted text, border, surface, and alternate background.
- Typography: Display, heading, body, caption, and button styles.
- Layout: Content width, wide width, section spacing, container gaps, and mobile padding.
- Components: Primary and secondary buttons, form fields, image radius, cards, links, and focus states.
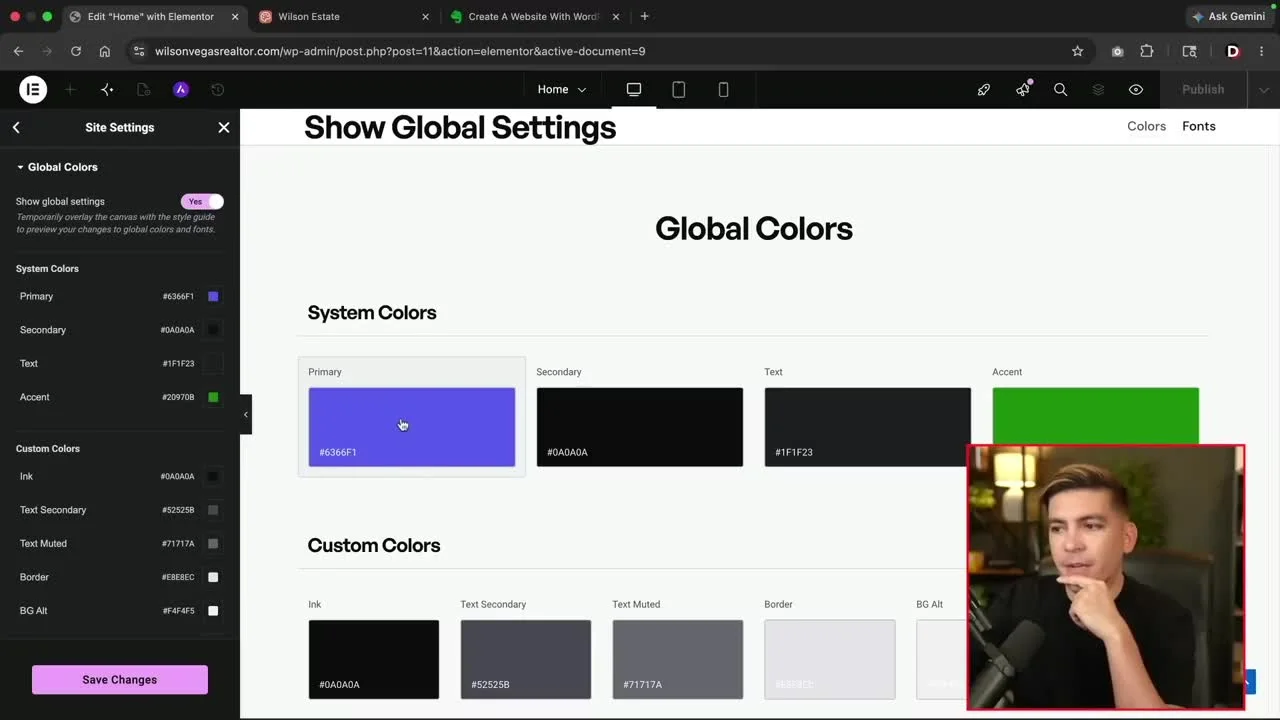
Once widgets reference global tokens, a brand update becomes a controlled change instead of a scavenger hunt through every page. This is also the best defense against the slightly different purples, grays, and spacing values that often accumulate during fast AI-assisted builds.
Create the header and footer
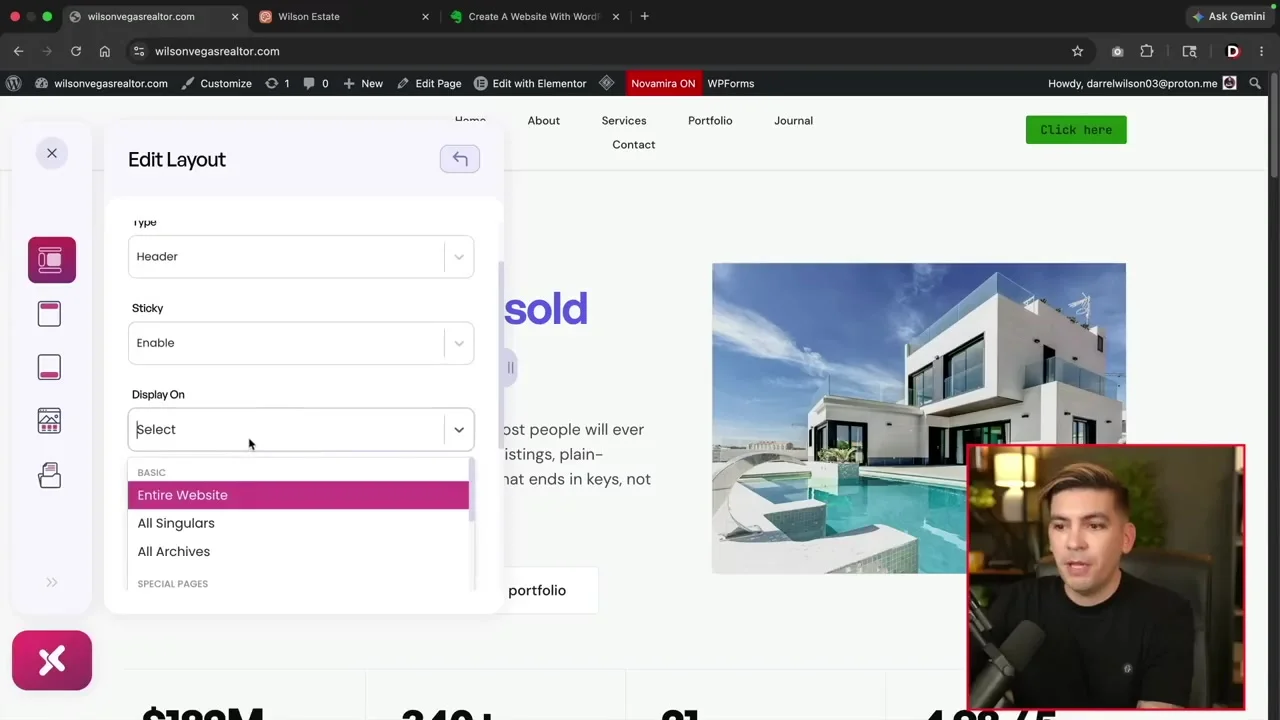
With Elementor Pro, use Theme Builder to create a header and footer and apply display conditions across the entire site. Include a clear logo link, compact navigation, visible CTA, accessible mobile menu, contact details, privacy links, and current copyright information. Elementor Free users can rely on the theme’s header and footer or a carefully selected compatible add-on.
Step 10
Make the Website Responsive and Accessible
AI-generated desktop layouts often look convincing because they have generous space. Mobile reveals the real quality of the system. Check the design in Elementor’s responsive modes, then test the live preview at several widths rather than trusting only three device icons.
Responsive checks
- Stack columns in an order that preserves the story and call to action.
- Reduce section padding and grid gaps without making the page feel cramped.
- Let text wrap naturally; avoid fixed heights on headings, cards, buttons, and form fields.
- Use responsive image dimensions and crop positions that preserve the subject.
- Make tap targets comfortably large and separate adjacent links.
- Check navigation, sliders, accordions, popups, forms, and sticky elements with touch input.
- Test long titles, error messages, and translated content where relevant.
Accessibility checks
- Use one descriptive H1 and a logical heading hierarchy.
- Add useful alt text to informative images and empty alt text to decorative images.
- Verify color contrast and visible keyboard focus styles.
- Do not communicate meaning with color alone.
- Give form fields visible labels and useful validation messages.
- Respect reduced-motion preferences and avoid autoplaying distractions.
- Navigate the page using only a keyboard and test with browser zoom at 200%.
Step 11
Optimize the Claude and Elementor Website for SEO
Claude can accelerate keyword mapping and first-draft copy, but it cannot verify your real experience or business claims unless you provide them. SEO quality comes from useful firsthand content, clear information architecture, accurate metadata, and a technically sound website.
On-page SEO
- Assign one primary search intent to each page and avoid having several pages compete for the same query.
- Write an accurate title tag and meta description that match the page content.
- Use the primary topic naturally in the H1, opening section, relevant subheadings, image context, and internal links.
- Add original examples, process details, screenshots, credentials, FAQs, and proof that generic AI content cannot provide.
- Use concise, descriptive URLs and link related pages with meaningful anchor text.
- Add appropriate schema through your SEO plugin, but only for content visitors can actually see.
Elementor performance
- Convert large images to WebP or AVIF and upload them near their rendered dimensions.
- Preload only the genuinely critical hero image or font; lazy-load content below the fold.
- Limit font families, weights, animation libraries, sliders, background videos, and third-party scripts.
- Avoid deep container nesting and duplicate hidden desktop/mobile sections where CSS can handle the layout.
- Use server caching and a CDN where appropriate, then test Core Web Vitals on the public URL.
- Remove temporary AI connectors, unused plugins, design exports, and test pages before launch.
Build a useful topic cluster around the site. For related workflows, see how to build a futuristic 3D website with AI, how to make a WordPress theme with Google Antigravity, and how to build a website with Google AI Studio. These internal links help users compare different AI-to-web production paths while strengthening topical relevance.
Step 12
Test and Launch the Website
- Replace all placeholder copy, AI claims, demo properties, stock logos, and temporary contact details.
- Test every menu item, button, phone link, email link, form, download, and social profile.
- Confirm form delivery, spam controls, success messages, and CRM or email integrations.
- Check desktop, tablet, and mobile in Chrome, Safari, Firefox, and a real phone.
- Review keyboard navigation, focus states, contrast, headings, labels, and image alt text.
- Check title tags, meta descriptions, canonicals, XML sitemap, robots settings, and social previews.
- Run performance tests after caching is enabled and inspect the largest page templates.
- Enable analytics and consent controls that match the laws applicable to your visitors.
- Create a final backup and document plugin licenses, credentials, and update ownership.
- Revoke temporary application passwords and disable development-only AI access.
Publish from staging only after checking whether the staging tool replaces both files and the database. If editors have added orders, form entries, comments, or content to the live site since staging was created, a full database overwrite could erase that newer data. Plan the launch window accordingly.
Common mistakes to avoid
- Building before approving the structure: Finish the page map and conversion path first.
- Copying a reference too closely: Borrow design principles, not another company’s identity.
- Pasting a complete site into one widget: Fast today can mean expensive maintenance tomorrow.
- Giving an agent production credentials: Use staging, limited access, backups, and human review.
- Styling every widget locally: Create global tokens before polishing individual sections.
- Trusting the responsive preview: Test real devices, long content, forms, and browser zoom.
- Publishing unverified AI copy: Accuracy and genuine experience matter more than volume.
FAQ
Claude Design and Elementor Questions
Can Claude build an Elementor website automatically?
Claude can generate the concept, content, code, and an Elementor build specification. An agent may also automate some WordPress work. A dependable production site still needs a controlled handoff, review, responsive testing, and ongoing editability.
Do I need Elementor Pro?
No for a basic page build. Elementor Free includes the core visual editor and common widgets. Pro is useful when you want Theme Builder, advanced forms, custom code, dynamic content, popups, and centralized header and footer templates.
Should I use Claude code or native Elementor widgets?
Use native widgets for headings, text, images, buttons, forms, posts, galleries, and standard layouts. Use scoped custom code for a section that would otherwise require awkward workarounds. This balance preserves editability without suppressing creative ideas.
Is an AI WordPress connector safe?
It can be used responsibly on staging with a backup, temporary credentials, restricted privileges, and review of every action. It should not receive unrestricted, permanent access to a live business website.
Can Claude Design replace a professional web designer?
It can dramatically speed up ideation and first drafts. It does not replace business discovery, brand judgment, original art direction, accessibility expertise, content verification, conversion strategy, technical QA, or accountability for the finished site.
How long does this workflow take?
A focused one-page site can take a few hours once the copy and assets are ready. A multi-page business site usually needs more time for strategy, content approval, responsive work, forms, SEO, accessibility, and testing. AI makes the first version faster; it does not eliminate production work.
Turn the Claude Concept into a Real WordPress Site
Start with dependable WordPress hosting, build the approved design in Elementor, and keep the finished site editable long after the AI conversation ends.

This article includes affiliate links. If you buy through them, we may receive a commission at no additional cost to you. Recommendations are based on the workflow described above, not on the commission.