How to Create a Website Using Google Antigravity
Build a polished animated product website with custom visuals, a detailed AI brief, Google Antigravity’s coding agent, browser-based verification, performance safeguards, SEO, and production hosting.
Quick Answer
To create a website using Google Antigravity, install the platform, open a dedicated project folder, prepare your brand copy and optimized visual assets, and give the agent a detailed website brief. Ask it to plan the implementation before editing files, review the proposed approach, allow only the commands you understand, and let it build and test the site in its integrated editor, terminal, and browser. Inspect the generated Artifacts, refine the design through focused prompts, test mobile performance and accessibility, then deploy the production files to a host such as Hostinger.
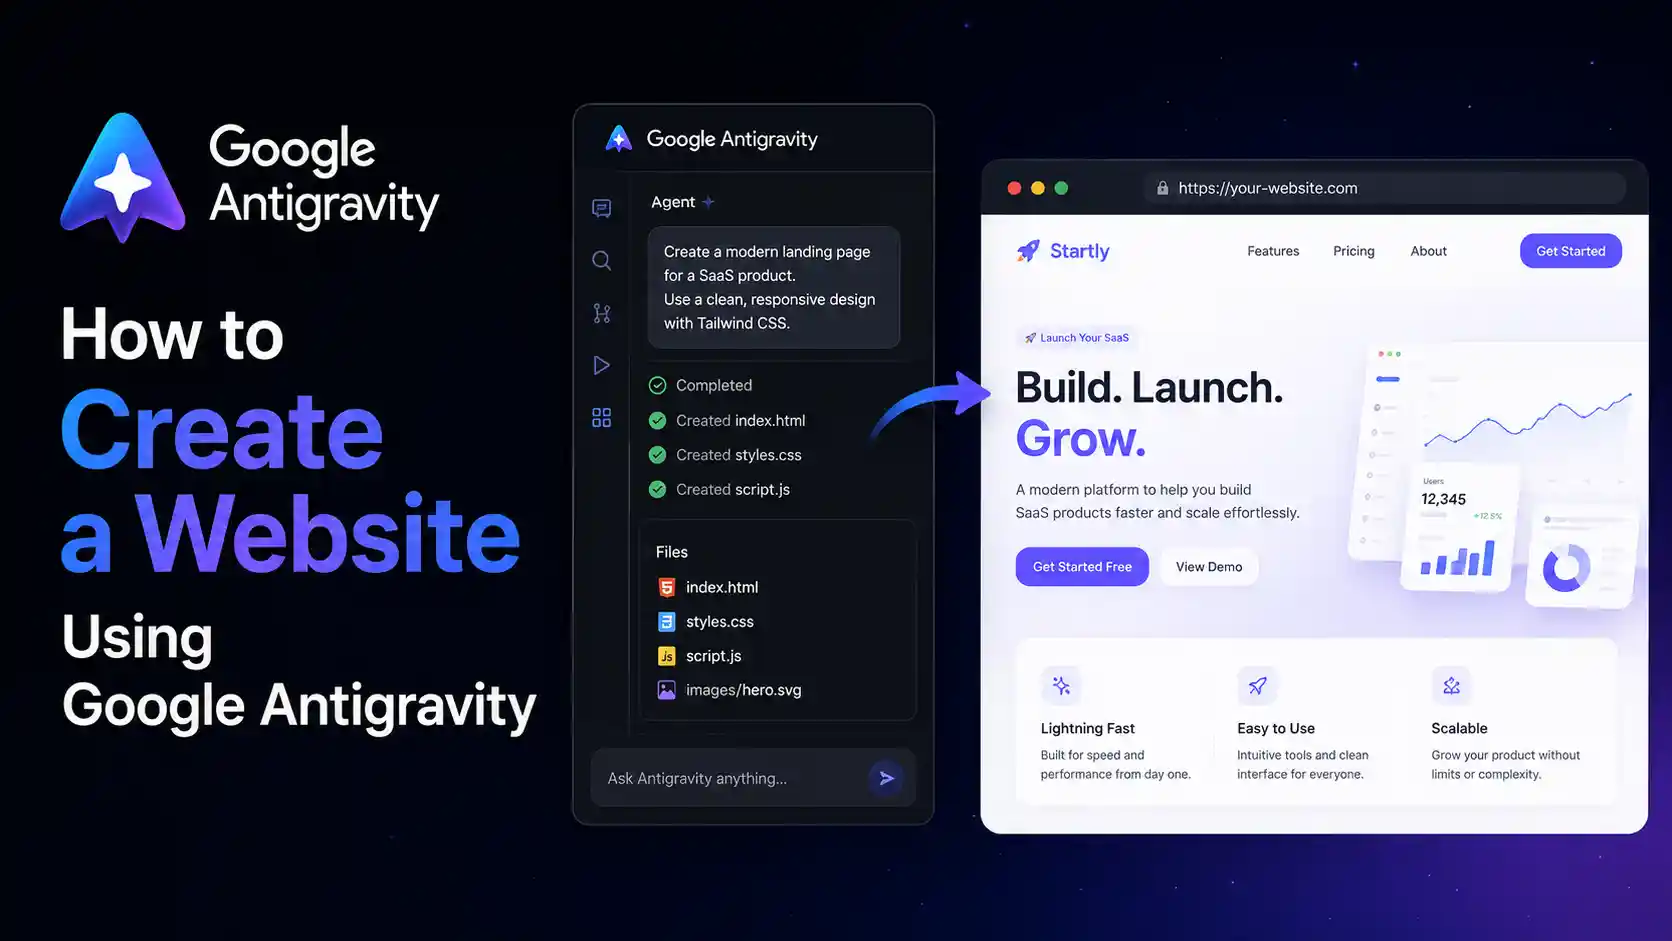
Google Antigravity changes the AI website workflow in an important way. Instead of only returning a code block in chat, its agents can work across a real project: planning the task, creating files, running a development server, opening the website in a browser, testing interactions, and showing you Artifacts that summarize what changed.
If you are researching how to create a website using Antigravity, the central lesson is to treat the platform as an AI development team inside your project, not as a one-click template generator. Give it strong source material, review its plan, and verify the finished experience yourself.
That does not make good websites automatic. The quality still depends on your creative direction, source assets, prompt, review standards, and willingness to test the result. The reference video succeeds because it does not begin with “make a cool website.” It begins with a specific product, distinctive imagery, planned content, animation assets, and a clear visual target.
Understand the tool
What Is Google Antigravity?
Google Antigravity is an agentic software-development platform. Google describes it as more than an editor: it combines a familiar AI-powered coding experience with an agent-first interface that can plan, execute, and verify complex tasks across an editor, terminal, and browser.
The platform provides two main working surfaces:
- Editor View: A hands-on coding environment with project files, code editing, inline assistance, terminal access, and an agent side panel.
- Manager Surface: A higher-level interface for launching, observing, and coordinating agents across workspaces and longer-running tasks.
Antigravity also creates Artifacts. These are reviewable outputs such as implementation plans, task lists, screenshots, browser recordings, and summaries. An Artifact is easier to assess than a long stream of tool calls because it shows what the agent intended to build and what it believes it completed.
| Capability | How It Helps with Website Creation | Your Responsibility |
|---|---|---|
| Project planning | Breaks a website brief into files, sections, interactions, and verification steps | Check that the plan matches the business goal before approving implementation |
| Editor access | Creates and updates HTML, CSS, JavaScript, components, and configuration | Review code quality, dependencies, paths, and maintainability |
| Terminal access | Installs packages, runs builds, launches servers, and executes tests | Approve commands carefully and protect unrelated files and secrets |
| Browser access | Loads the site, inspects layout, and verifies visible behavior | Test real devices, edge cases, forms, and accessibility yourself |
| Artifacts | Provides plans, screenshots, walkthroughs, and implementation summaries | Comment on errors and request targeted corrections |
Antigravity is different from a drag-and-drop website builder. It works with a codebase, which gives you greater flexibility but also makes technical review more important. If you prefer Google’s browser-based generative app workflow, compare this tutorial with how to build a website with Google AI Studio. For a broader tool-independent process, read how to create a website with AI.
Reference walkthrough
Watch: Building an Animated Website with Google Antigravity
The video shows a fast visual-production workflow followed by an Antigravity build. Watch it once for the overall sequence, then use the expanded instructions below to reproduce the process with stronger performance, accessibility, security, and deployment practices.
Plan Where Your Finished Website Will Live
Antigravity creates the website code; it is not the final public hosting layer. Use Hostinger to connect a domain and publish the production files after testing.
Preparation
What You Need Before Creating the Website
A ten-minute AI build is possible only after the raw ingredients exist. Prepare the brand direction and assets before asking Antigravity to write the interface.
Project Checklist
- A supported computer with Google Antigravity installed and signed in.
- A new project folder containing no unrelated personal files.
- A one-sentence website goal and one primary audience.
- A product name, positioning statement, features, benefits, and calls to action.
- Final product images with permission to use them.
- An animation source such as a short product video, frame sequence, or static fallback image.
- A section list: hero, benefits, ingredients or features, social proof, FAQ, and contact.
- Brand colors, typography direction, spacing style, and two or three visual references.
- A custom domain and hosting plan for the production site.
- A clean backup or Git repository before granting an agent permission to modify files.
Choose a sensible technical scope
The reference project is essentially a cinematic one-page product website. A plain HTML, CSS, and JavaScript stack is appropriate because it is portable and easy to host. A framework such as Astro, React, or Next.js can make sense when the website needs reusable components, content collections, application state, authentication, or server features. Do not add a framework merely because an AI agent can install one.
Create a separate project workspace
Give Antigravity access only to the folder required for this project. Do not open your home directory, downloads archive, password exports, cloud credentials, or a drive containing unrelated client work. Agentic tools can edit files and execute commands; a narrow workspace reduces the consequences of a mistaken instruction.
Complete workflow
How to Create a Website Using Google Antigravity: Step by Step
Step 1: Define the Product Story and Page Structure
Start with the message, not the animation. The visitor should understand the product before they are impressed by the motion. Define the product category, ideal customer, primary benefit, proof, and action you want the visitor to take.
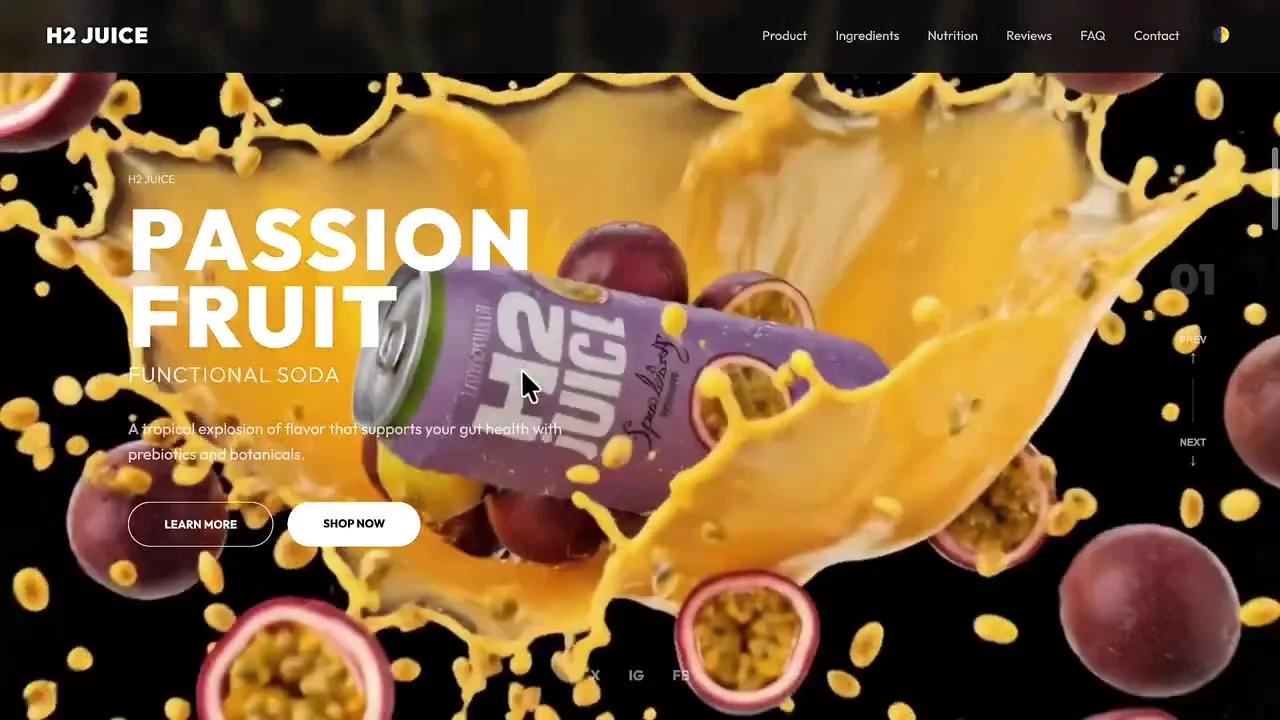
The reference website uses a simple hierarchy:
- A bold hero with product flavor, description, and two calls to action.
- A visual product-switching or variant experience.
- Ingredient and benefit cards.
- Nutrition or product-detail content.
- Reviews, FAQs, and a closing conversion section.
Write real copy for these sections. Placeholder text makes it harder to judge hierarchy, line length, mobile wrapping, and conversion clarity.
Step 2: Write a Structured Website Brief
The video organizes the website description, variants, image paths, frame counts, and visual requirements in a document before opening Antigravity. That preparation is one of the most transferable lessons in the workflow.
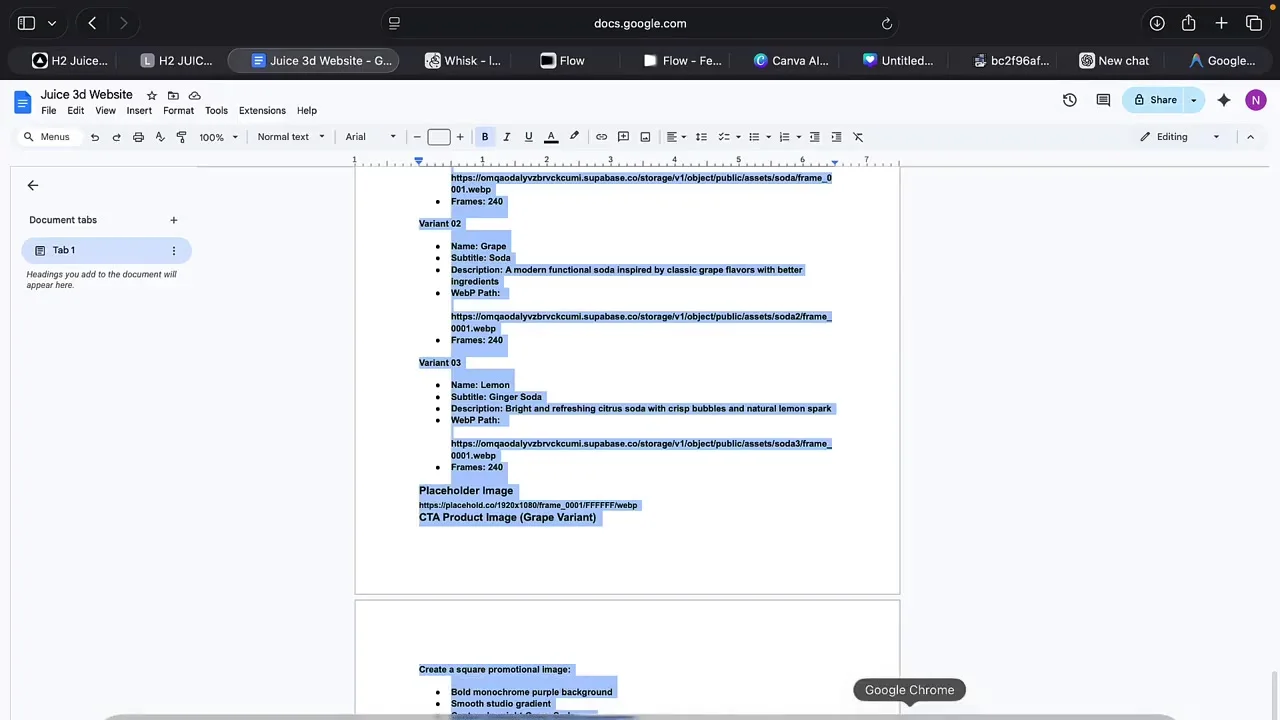
Use headings and lists in your brief. Include an explicit “do not” list, such as: do not invent health claims, do not use random stock photography, do not add unnecessary dependencies, and do not hide essential copy inside a canvas.
Step 3: Generate Consistent Product Visuals
The reference video uses Google Whisk to generate product scenes around an uploaded can image. The key is consistency: the label, can proportions, flavor color, lighting, camera angle, and background should remain coherent between outputs.
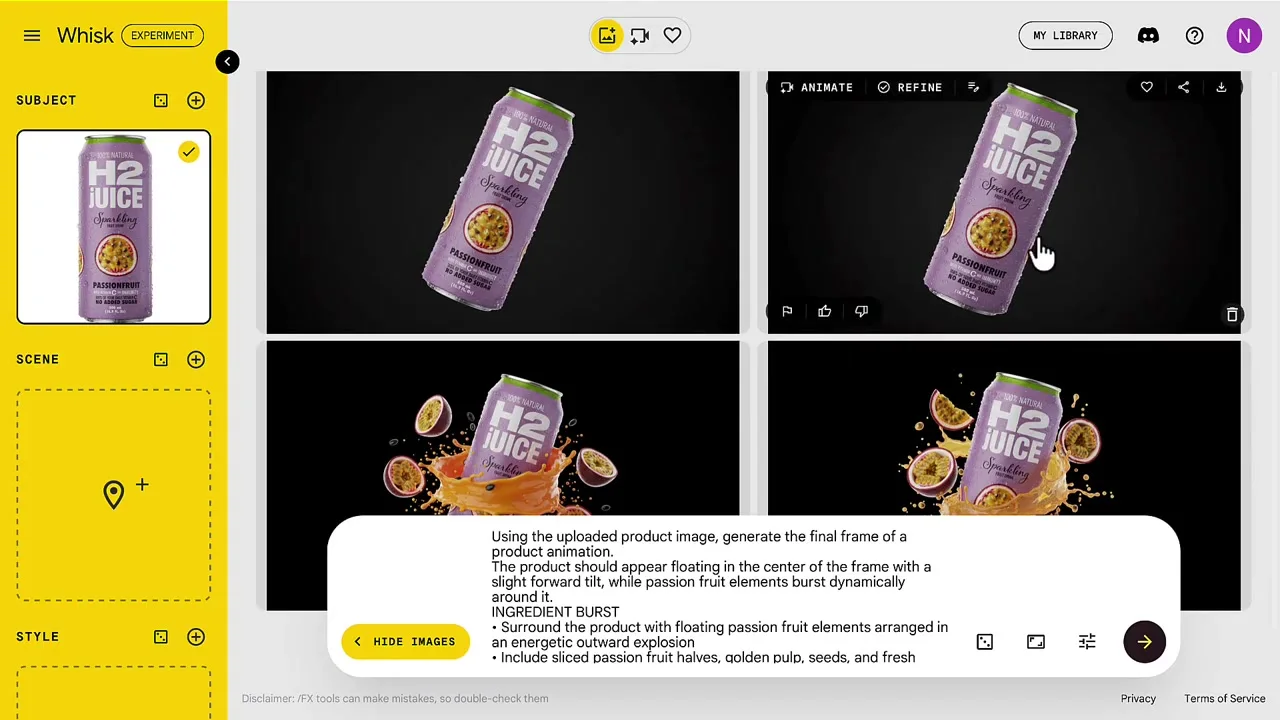
A useful product-image prompt describes:
- The exact product orientation and camera angle.
- The background color and lighting direction.
- The ingredients or objects surrounding the product.
- The amount of empty space required for website copy.
- The desired realism, sharpness, and commercial-photography style.
- Elements that must remain unchanged, especially brand marks and package text.
Step 4: Compose the Hero Scene
The video assembles the product, splash, fruit, and surrounding elements in Canva. This stage gives you control over composition before motion is added. Place the product where it can remain visible behind the website’s text and interface.
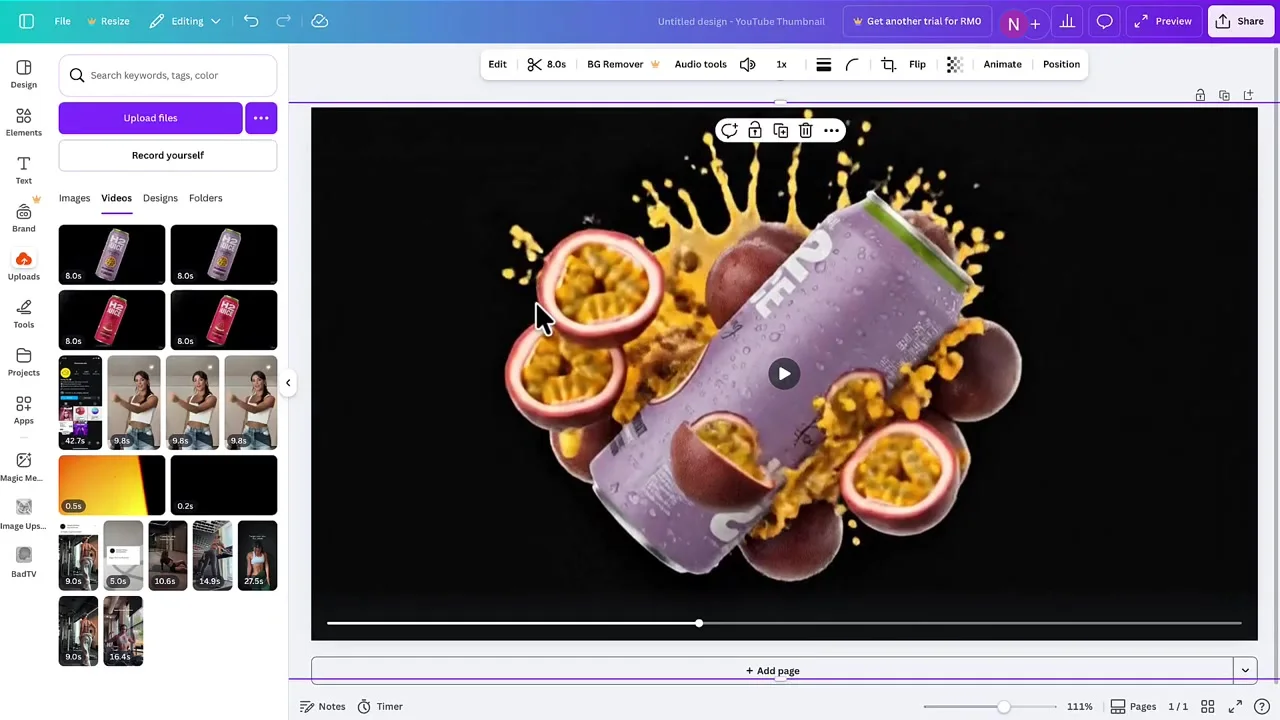
Build at the intended aspect ratio, ideally with extra space around important objects so responsive cropping has room to move. Test a 16:9 desktop crop and a tall mobile crop. Keep text out of the image whenever possible so the actual HTML can remain readable, responsive, accessible, and indexable.
Step 5: Animate the Product Scene
You can animate the composition with a generative video tool, motion-design software, or a simple manual transition. The video uses a short moving product scene as the source for the website’s cinematic hero.
Keep the motion controlled. A good loop may include a slow product rotation, a fluid splash, drifting fruit, or a subtle camera move. Avoid rapid zooms and chaotic object changes because they make the frame sequence harder to compress and can cause visual flicker when linked to scrolling.
Choose one animation delivery method
| Method | Best For | Advantages | Tradeoffs |
|---|---|---|---|
| MP4 or WebM video | Autoplaying or looping backgrounds | Usually the best compression and simplest delivery | Precise scroll scrubbing can be less predictable across browsers |
| Image sequence on canvas | Frame-accurate scroll-controlled effects | Direct mapping between scroll progress and visual frame | Many requests, memory use, and a potentially large download |
| Animated WebP | Short self-running loops | Easy to place as an image | Limited timeline control and may be larger than video |
| CSS or SVG | Interface motion and simple vector scenes | Sharp, responsive, and often lightweight | Not suitable for photorealistic liquid or product footage |
Step 6: Convert the Video into a WebP Frame Sequence
This step prepares the animation for scroll-controlled playback. The website does not simply autoplay the original video. Instead, JavaScript selects a specific image frame according to the visitor’s scroll position and draws that frame on a canvas.
The reference workflow performs two separate operations:
- Convert the MP4 into an animated WebP. The source clip is eight seconds long. At 30 frames per second, the resulting animated WebP contains 240 frames.
- Extract the animated WebP into individual still frames. The converter’s Frames tool separates the animation so each frame can be loaded and controlled independently by the website.
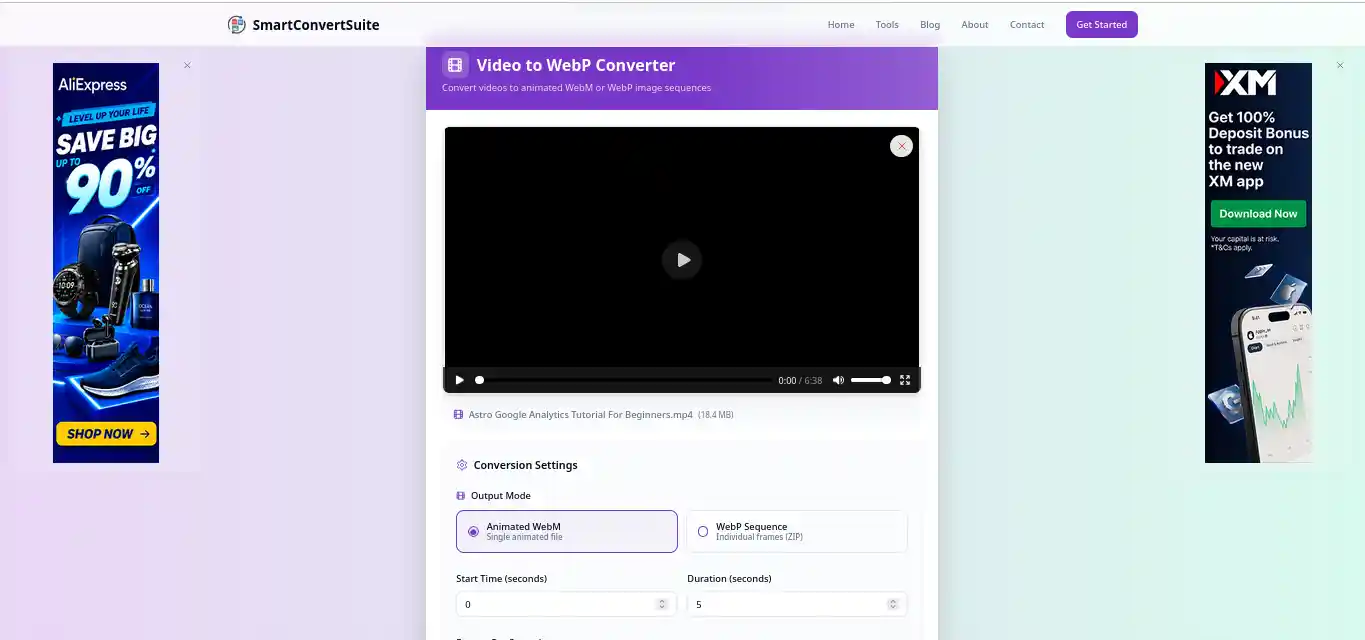
Use these conversion settings as a starting point
- Dimensions: Reduce the 4K source to 1280×720 unless the website genuinely displays a larger animation.
- Frame rate: The video uses 30 FPS, producing 240 frames from an eight-second clip. A lower frame rate can reduce the download significantly if the motion still looks smooth.
- Quality: Start around 75 to 85 and compare the product label, splash edges, gradients, and dark background for visible artifacts.
- Loop count: Looping is not important after the frames are extracted because JavaScript controls the sequence.
Extract and rename the frames
After conversion, click Frames, save the extracted images, and place them in a dedicated folder. Use consistent, zero-padded names so JavaScript can generate every path reliably:
assets/sequence/passion-fruit/frame_0001.webp
assets/sequence/passion-fruit/frame_0002.webp
assets/sequence/passion-fruit/frame_0003.webp
Keep all extracted frames at identical dimensions and preserve their original order. If the export uses names such as frame_1.webp, rename them to a fixed-width pattern such as frame_0001.webp. This prevents incorrect alphabetical ordering, where frame_10.webp can appear before frame_2.webp.
Step 7: Organize Local Assets or Public URLs
The video brief includes public storage paths for the sequence. You can instead keep assets inside the project when the total size is practical. Local project assets are easier to version and deploy together; external object storage can be useful for very large sequences or a content pipeline.
A clear project structure might look like this:
animated-product-site/
├── index.html
├── styles.css
├── main.js
└── assets/
    ├── product/
    │   ├── passion-fruit.webp
    │   └── lemon.webp
    ├── sequence/
    │   ├── passion-fruit/
    │   └── lemon/
    └── poster/
        └── hero-fallback.webp
If you use external storage, configure the correct content types, cross-origin headers, caching, access permissions, and a stable URL format. Never paste private storage keys into the website brief or commit them to browser-delivered code.
Step 8: Open the Project in Google Antigravity
Create a clean folder and open it in Antigravity. The Editor view will feel familiar if you have used a modern code editor. You can see the file explorer, source files, terminal, and agent interface in one workspace.
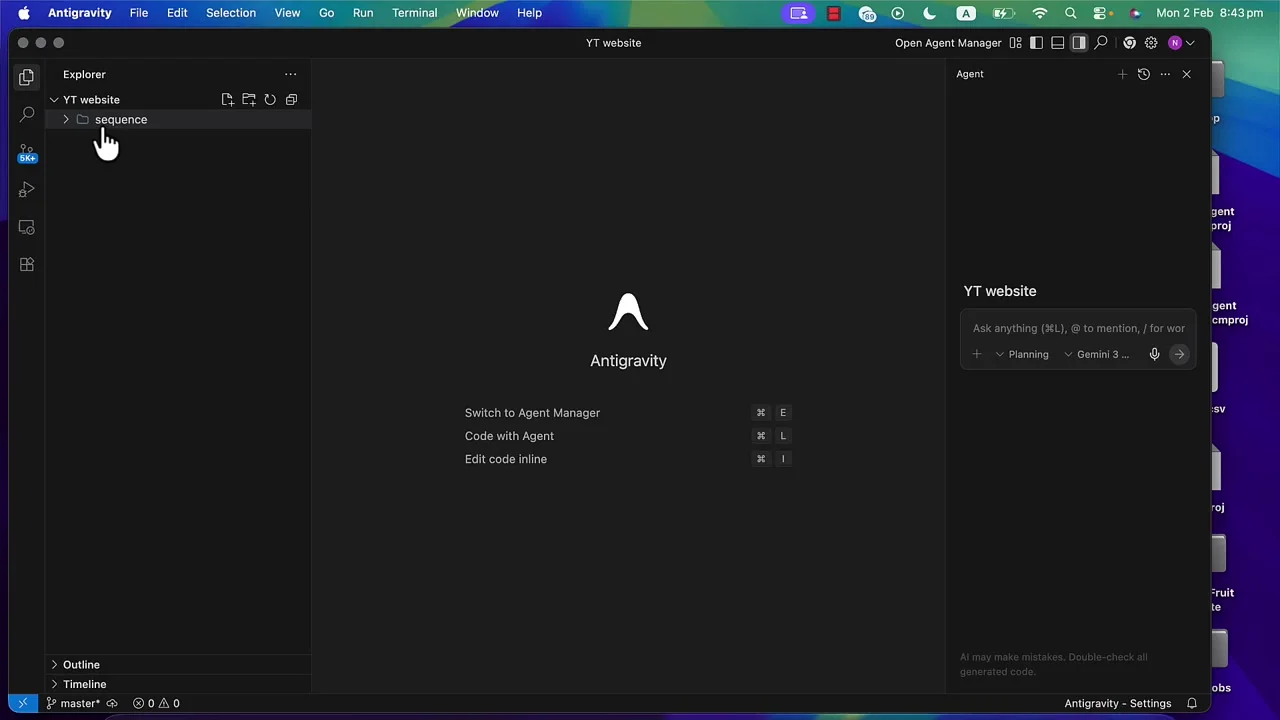
Before the first prompt:
- Initialize Git or make a backup.
- Confirm the agent cannot access unrelated directories.
- Place assets in their final folders.
- Decide whether the project should use plain web files or an existing framework.
- Open only the credentials needed for deployment after the website is ready, not during design generation.
Step 9: Give Antigravity the Complete Prompt
Paste the structured brief into the agent and ask for a plan before implementation. Explicit acceptance criteria reduce the chance that the agent declares success after producing only a visually similar desktop screen.
Tell the agent to verify:
- The hero animation responds smoothly to scroll.
- Product copy remains real HTML text above the visual layer.
- Navigation links reach real sections.
- Buttons have visible hover and keyboard-focus states.
- The page works at mobile, tablet, and desktop widths.
- A static poster appears if animation assets fail.
- Reduced-motion visitors receive a stable experience.
- There are no console errors, missing assets, or layout overflow.
Step 10: Review the Plan and Agent Permissions
Do not treat the planning stage as ceremony. Check whether Antigravity proposes the right stack, whether it wants to install unnecessary packages, and whether its file changes are limited to the project.
A reasonable plan for the reference-style site would include semantic HTML, component or section structure, responsive CSS, a canvas animation controller, progressive asset loading, a fallback poster, navigation behavior, accessibility states, and browser verification. Ask the agent to revise the plan before it writes code if those requirements are missing.
Step 11: Let Antigravity Build and Inspect the Assets
Once approved, the agent can create the website files, connect the image paths, launch the site, and inspect it. The reference video shows Antigravity examining the supplied product visual while the brief remains available in the agent panel.
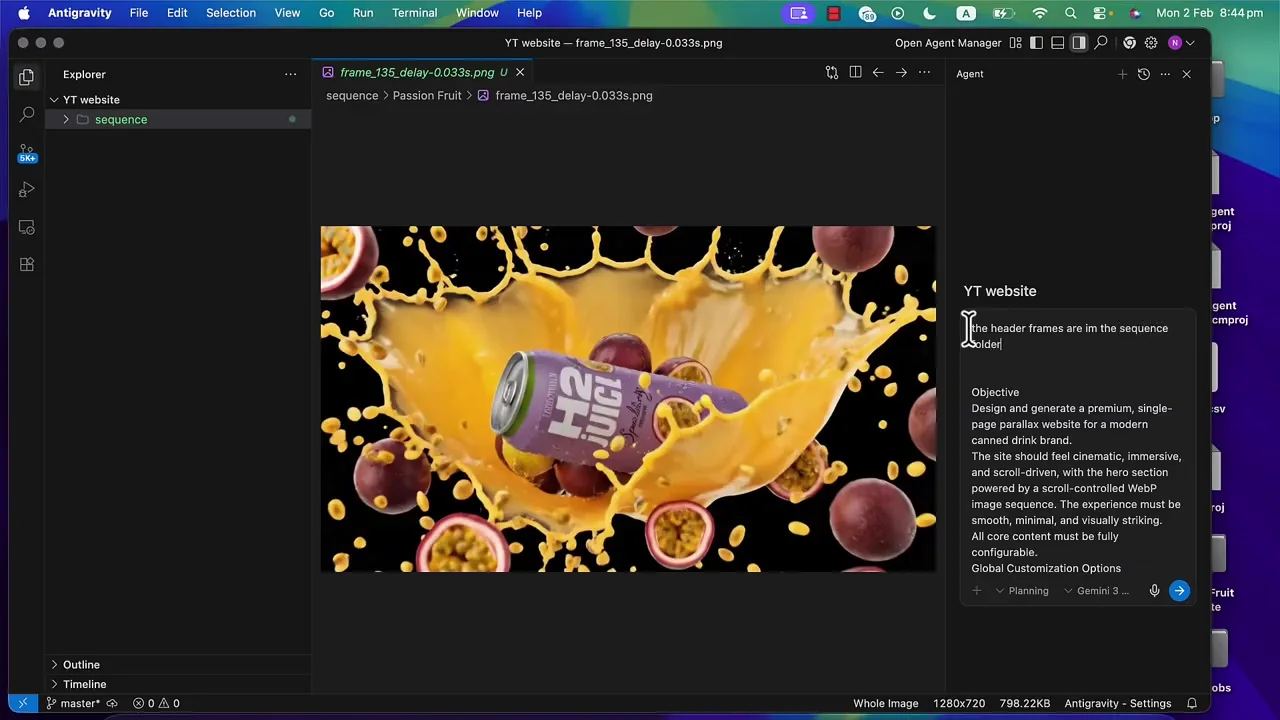
Stay involved. If the agent asks whether it should use a heavy library, modify a package file, or download a dependency, consider whether the benefit justifies the complexity. For a single scroll sequence, a small purpose-built JavaScript controller may be easier to maintain than a full animation framework.
Step 12: Review the Implementation Artifact
Google emphasizes Artifacts as a trust and review mechanism. In the video, the completed Artifact summarizes features such as the scroll-controlled hero, product variants, navigation, preloading, responsive layout, and page sections. It also includes a visual overview.
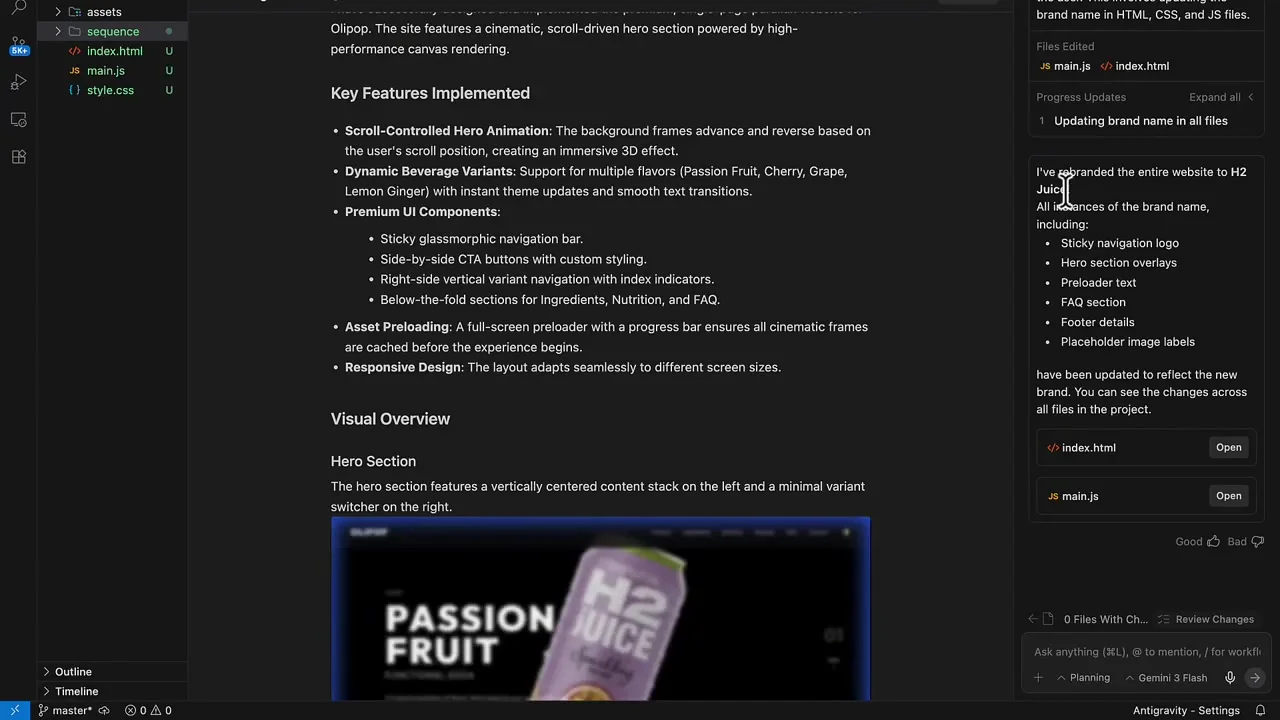
Use the Artifact as a checklist, not proof that everything is correct. Open the real site and verify every claim. Check buttons, links, product variants, scroll direction, animation reversal, fallback behavior, mobile layout, and page sections.
Step 13: Refine with Small, Testable Prompts
Do not respond to the first draft with “make it better.” Give one focused correction at a time:
- “Keep the product centered between 768 and 1100 pixels and prevent the headline from overlapping it.”
- “Reduce the hero sequence download by loading the first 12 frames immediately and the remaining frames after interaction.”
- “Add a visible keyboard focus style to every navigation and CTA link.”
- “When
prefers-reduced-motion: reduceis active, show the poster image and disable scroll scrubbing.” - “Run the site at 390 by 844 pixels and fix all horizontal overflow without shrinking body text.”
Ask Antigravity to show the changed files and re-run verification after each correction. Smaller iterations are easier to assess and reverse.
Step 14: Test the Complete Website Yourself
AI browser testing is useful, but it does not replace human review. Test at least one real phone and one desktop browser. Navigate without a mouse, turn off animation, simulate a slow connection, and reload deep sections.
Prelaunch Test
- The title, description, canonical URL, Open Graph image, and headings are correct.
- The H1 is unique and the section hierarchy is logical.
- All navigation links, buttons, forms, and external links work.
- The hero remains readable before the animation loads.
- The site does not shift dramatically as frames or fonts arrive.
- Mobile text and controls fit without horizontal scrolling.
- Keyboard focus is visible and the navigation order makes sense.
- Images have appropriate alternative text or are marked decorative.
- There are no console errors, missing frames, or mixed-content warnings.
- A failed animation request does not leave a blank hero.
Copy and customize
Google Antigravity Animated Website Prompt Template
Replace the brackets with your own brand, copy, file paths, and acceptance criteria. Ask for a plan first, then approve implementation after reviewing it.
Create a production-ready, responsive one-page product website.

Project goal:
Build a premium landing page for [BRAND], a [PRODUCT CATEGORY] for
[TARGET AUDIENCE]. The primary conversion is [PRIMARY CTA].

Technical approach:
- Use [plain HTML, CSS, and JavaScript / existing framework].
- Do not install additional dependencies unless they are necessary.
- Keep content semantic, accessible, and indexable.
- Plan the implementation and show me the plan before editing files.

Visual direction:
- Dark editorial product aesthetic with high contrast.
- Bold sans-serif display typography and readable body copy.
- Product imagery is the main visual focus.
- Use restrained glass effects only where they improve navigation.
- Avoid generic gradients, excessive cards, and decorative clutter.

Page sections:
1. Sticky navigation with Product, Benefits, Ingredients, Reviews, FAQ, Contact.
2. Cinematic hero with headline, supporting text, primary CTA, secondary CTA.
3. Product variants with accessible controls and clear active state.
4. Benefits and ingredients using semantic headings and concise copy.
5. Product details or nutrition section.
6. Reviews with honest placeholder labels if real reviews are unavailable.
7. FAQ and final CTA.
8. Footer with contact, privacy, and social links.

Hero animation:
- Render the frame sequence on a canvas behind the HTML content.
- Source pattern: assets/sequence/[VARIANT]/frame_####.webp
- Total frames: [FRAME COUNT].
- Map scroll progress smoothly to frame index.
- Load a small critical set first, then progressively load the rest.
- Display assets/poster/hero-fallback.webp before frames are ready.
- Respect prefers-reduced-motion and keep the fallback visible.
- Never hide the H1, copy, or CTA inside canvas.

Responsive behavior:
- Test at 390x844, 768x1024, 1440x900, and 1920x1080.
- No horizontal overflow.
- Keep buttons at least 44 pixels high.
- Preserve readable contrast over every animation frame.

SEO and accessibility:
- Add a unique title, meta description, canonical placeholder,
  Open Graph tags, semantic landmarks, and one H1.
- Add descriptive alt text to meaningful images.
- Include visible keyboard focus and correct button/link semantics.
- Do not animate for users who prefer reduced motion.

Verification:
- Run the site locally.
- Test all navigation, controls, and CTAs.
- Confirm there are no console errors or missing assets.
- Test mobile and desktop layouts.
- Create an Artifact with the implementation summary,
  changed files, screenshots, and any remaining limitations.
Build Locally, Publish Professionally
Once Antigravity has generated and tested the code, deploy the optimized production version to Hostinger and connect your own domain.
Technical explanation
How to Create an Animated Website Using Google Antigravity
The visual centerpiece in the reference build is a scroll-driven image sequence. JavaScript watches the page’s scroll progress, converts that progress into a frame number, loads the corresponding WebP image, and draws it to a canvas.
The simplified relationship is:
progress = clamp(scrollPosition / animationDistance, 0, 1)
frameIndex = round(progress * (totalFrames - 1))
drawFrame(frameIndex)
The canvas should scale for the device pixel ratio without downloading larger source images than necessary. The code also needs to handle rapid scrolling, frame-loading gaps, viewport resizing, and reverse scrolling.
Use progressive frame loading
Loading 240 frames before showing the website creates a poor first visit, especially on mobile. A better strategy is:
- Render the static poster immediately.
- Load the first frame and a small group near the start.
- Load evenly distributed key frames to make scrubbing usable quickly.
- Fetch the remaining neighboring frames during idle time.
- Prioritize the frames closest to the visitor’s current scroll position.
Provide a reduced-motion experience
Some visitors experience discomfort from large motion tied to scrolling. When the operating system requests reduced motion, replace the sequence with the poster, remove forced scroll distance, and ensure all content remains available.
@media (prefers-reduced-motion: reduce) {
  .hero-canvas {
    display: none;
  }

  .hero {
    background-image: url("/assets/poster/hero-fallback.webp");
  }
}
Do not let the canvas become the website
A canvas is a visual layer, not a substitute for semantic content. Headlines, paragraphs, links, buttons, prices, product details, and legal information should remain real DOM elements. This helps search engines, screen readers, translation tools, and visitors whose devices cannot render the effect smoothly.
Protect the user experience
Performance Optimization for an Animated Antigravity Website
Cinematic websites often look fast in a local demo and feel slow on an ordinary phone. Test with a cold cache and network throttling. The first page should become readable and usable without waiting for the entire animation.
Set a realistic performance budget
- Keep the initial HTML, critical CSS, and essential JavaScript small.
- Avoid preloading hundreds of image files in the document head.
- Serve appropriately sized images rather than full-resolution design exports.
- Use long-lived caching for fingerprinted frame assets.
- Defer analytics and nonessential third-party scripts.
- Use a system font or carefully subset and preload only required font files.
- Remove unused variants and duplicate frames from production.
Measure the correct things
Check Largest Contentful Paint, Interaction to Next Paint, Cumulative Layout Shift, total transfer size, request count, main-thread work, and memory use. An animation that reaches 60 frames per second after a 20 MB download is not a fast website.
Use video when scroll precision is unnecessary
If the hero only needs to loop automatically, an optimized WebM or MP4 may be substantially lighter than hundreds of individual frames. Ask Antigravity to implement both prototypes, measure them, and keep the simpler option when the experience is equally effective.
Make the site discoverable
SEO and Accessibility for a Google Antigravity Website
An impressive hero does not compensate for unclear content. Build the page around the search intent and user journey, then let motion support the message.
On-page SEO checklist
- Write a specific title and meta description for the product and audience.
- Use one descriptive H1, followed by logical H2 and H3 headings.
- Include useful product copy in HTML rather than baking it into images.
- Add a canonical URL after the production domain is known.
- Create an Open Graph image and social metadata.
- Add Product, Organization, or FAQ schema only when the visible content supports it.
- Use descriptive internal links and natural anchor text.
- Create a sitemap and robots file when the site has multiple public pages.
- Return real 404 status codes for missing pages.
Accessibility checklist
- Maintain sufficient text contrast over the lightest and darkest animation frames.
- Use actual buttons for actions and links for navigation.
- Make product variant controls keyboard accessible.
- Keep focus indicators visible.
- Do not rely on color alone to show an active flavor or selected state.
- Pause or remove nonessential animation for reduced-motion users.
- Give the canvas an appropriate accessible treatment while exposing equivalent text elsewhere.
After launch, use the detailed guide on how to add Google Analytics to an Astro site if your Antigravity project uses Astro. The same article also explains important GA4 principles such as production-only loading, consent, verification, and client-side navigation tracking.
Use agentic tools carefully
Google Antigravity Security and Permission Best Practices
An agent that can edit files, run terminal commands, and browse the web is more capable than a normal autocomplete tool. Treat its permissions with the same care you would give a developer working directly on your machine.
Minimum Safety Rules
- Work inside a dedicated folder and keep a current backup.
- Use Git so every agent change can be reviewed and reversed.
- Never paste passwords, private API keys, recovery codes, or production database credentials into prompts.
- Review shell commands before execution, especially recursive file operations.
- Do not import unknown repositories or documents and immediately grant broad autonomous permissions.
- Use limited test credentials when a service integration is necessary.
- Inspect new dependencies and package scripts before installation.
- Review generated forms and server endpoints for validation, rate limiting, and abuse protection.
Keep secret values in server-side environment variables when the deployment architecture supports them. Anything delivered to browser JavaScript can be inspected by visitors. A static website should not contain privileged API credentials.
If your project later needs a continuously running AI assistant rather than a website-building environment, use a separate server and permission model. The guide to setting up Hermes Agent on a Hostinger VPS covers an always-on agent deployment, API configuration, Telegram access, and operational security.
Go live
How to Deploy a Google Antigravity Website on Hostinger
The reference video demonstrates deployment after the build. You can publish the finished Antigravity code on Hostinger using a workflow appropriate to the project type.
Get Hosting Before You Deploy
Choose a Hostinger plan that matches the final website. A static landing page needs far fewer resources than a server-rendered application or a tool-enabled backend.
Option 1: Upload a static HTML website
- Confirm the project works locally and starts from
index.html. - Check that asset paths are relative or point to valid production URLs.
- Create a ZIP containing the website files, not an extra parent folder.
- Open Hostinger hPanel and the File Manager for your website.
- Open
public_html, upload the archive, and extract it there. - Confirm
index.htmlsits directly insidepublic_html. - Connect the domain, enable SSL, and test the HTTPS version.
Option 2: Deploy a framework build
For Vite, Astro, React, or another static framework, run the production build first. Upload the contents of the generated output directory, commonly dist, to public_html. Do not upload only the source files and expect a browser to run the build process.
npm install
npm run build
Open the generated site locally or with a preview command before deployment. Verify that the build does not contain localhost URLs, development-only environment settings, or broken absolute paths.
Option 3: Use Git deployment
If your Hostinger plan supports Git deployment for the project type, push the reviewed code to a private or public repository, connect the repository in hPanel, choose the correct branch and deployment directory, and deploy. Keep secrets out of the repository and confirm whether the hosting workflow runs a build or expects already-built files.
Option 4: Use a VPS for a server application
A site with a Node server, database, authentication, background jobs, or private API integration needs a compatible application-hosting environment. A Hostinger VPS gives more control, but you are responsible for runtime installation, process management, a reverse proxy, SSL, updates, firewall rules, logs, and backups.
Post-deployment checks
- Test the root domain and
wwwversion. - Confirm HTTPS redirects correctly.
- Check every animation asset in the Network panel.
- Verify caching and compression headers.
- Test the site on mobile data, not only broadband.
- Replace temporary canonical and social URLs with the live domain.
- Submit the sitemap to search engines if applicable.
- Install privacy-conscious analytics and verify real visits.
Publish Your Animated Website
Use Hostinger for the domain, SSL, production files, and the hosting environment your Antigravity project requires.
Troubleshooting
Common Google Antigravity Website Mistakes
Using a vague one-line prompt
A vague request produces generic design and invented details. Supply the real audience, offer, copy, assets, sections, interaction rules, and acceptance criteria.
Loading every animation frame before displaying content
This creates a long blank or preloader experience. Show a compressed poster immediately and progressively load the sequence.
Putting essential content inside the canvas
Canvas text is difficult for search engines and assistive technology to interpret. Keep all meaningful copy and controls in semantic HTML.
Ignoring mobile composition
A wide fruit splash may crop beautifully on desktop and hide the product on a phone. Create a mobile focal position, alternate crop, or separate optimized asset.
Approving every terminal command
Agent speed does not remove the need for review. Understand the command, confirm its working directory, and keep a reversible checkpoint.
Publishing AI-generated product claims
Do not allow the agent to invent health benefits, testimonials, nutrition data, warranties, pricing, or certifications. Replace placeholders with verified information.
Deploying source files instead of the production build
Framework projects commonly require a build. Upload the production output and test routes, assets, and environment configuration on the live domain.
Calling the design complete after one screenshot
A screenshot cannot prove keyboard access, working links, animation fallback, responsive behavior, performance, or error-free code. Test the actual site.
Questions answered
Frequently Asked Questions
What is Google Antigravity?
Google Antigravity is an agentic development platform that combines an AI-powered editor with agents that can work across project files, a terminal, and a browser. It also produces reviewable Artifacts such as plans, screenshots, and implementation summaries.
Can Google Antigravity build a complete website?
Yes. It can create the code, launch a local server, inspect the result, test interactions, and refine the implementation. You remain responsible for the brief, permissions, content accuracy, testing, security, and deployment.
How do I create an animated website using Google Antigravity?
Prepare an optimized video, animated image, CSS/SVG scene, or image sequence. Tell Antigravity exactly how the motion should respond, what fallback to show, and how reduced-motion visitors should be handled. Then test download size, frame rate, and mobile behavior.
Does Google Antigravity require coding knowledge?
You do not need to type every line yourself, but enough web knowledge to recognize file paths, dependencies, unsafe commands, broken semantics, performance problems, and deployment requirements will produce a much safer result.
Is Google Antigravity a no-code website builder?
Not in the traditional drag-and-drop sense. It is a code-focused agentic environment. Natural-language instructions can generate a website, but the output is still a software project that should be reviewed and maintained.
Can I host a Google Antigravity website on Hostinger?
Yes. Upload a plain static site directly, deploy a framework’s production build, connect a Git repository when supported, or use a VPS for a server-side application. Choose the method based on the code Antigravity generated.
Why is my scroll animation slow?
The sequence may contain too many large frames, preload too aggressively, draw inefficiently, or exceed the device’s memory. Resize and compress frames, load them progressively, prioritize nearby frames, use a poster, and consider an optimized video instead.
Is Google Antigravity the same as Google AI Studio?
No. Both can assist with software creation, but Antigravity centers on agentic work across a code editor, terminal, browser, and workspaces. Google AI Studio centers on Gemini model experimentation and browser-based app-building workflows.
Final recommendation
Is Google Antigravity Good for Building Websites?
Google Antigravity is especially useful when you want AI to work inside a real project instead of merely suggesting snippets. Its ability to plan, edit, run, browse, verify, and summarize can compress a large amount of routine frontend work.
The strongest results still come from human preparation. Bring a clear product story, distinctive assets, a detailed brief, realistic technical scope, and measurable acceptance criteria. Review the plan before implementation, keep permissions narrow, and treat every generated claim as something to verify.
For an animated product site, prioritize the experience before the spectacle. The page should load readable content immediately, preserve controls and SEO in HTML, respect reduced-motion preferences, and remain useful when the animation is unavailable. When the build passes those tests, publish it on a production host and measure how real visitors use it.
Ready to Put Your Antigravity Website Online?
Choose Hostinger, connect your domain, upload the tested production build, enable SSL, and launch your website.
Related JoshWP Guides
Sources and Further Reading
- Google Developers Blog: Build with Google Antigravity
- Google Antigravity official website
- Google Labs: Whisk
- Reference video: Animated Product Website Using Google Antigravity
- AutoBizEdge YouTube channel
Google Antigravity was described by Google as a public-preview product in its November 2025 announcement. Features, supported models, limits, pricing, and availability may change. Check the official site before installation.