How to Open a Wise Account : The Complete Guide
By JoshWP Team | Updated: | ~19 min read | International Banking · Account Setup
Quick Answer
Opening a Wise account takes about 5–10 minutes for the sign-up form itself, and most personal accounts are fully verified within minutes once you upload a photo ID — though it can take longer in some countries or for business accounts requiring company documents. You’ll need a valid email, a mobile phone for verification, a government-issued ID, and — for a business account — your company registration details. Wise is free to open, supports 40+ currencies and 160+ countries, and charges no monthly fee. This guide walks through the real sign-up flow screen by screen, then covers business accounts, verification, connecting a bank account, sending and receiving money, withdrawals, fees, transfer limits, safety, and supported countries — with nothing left out.
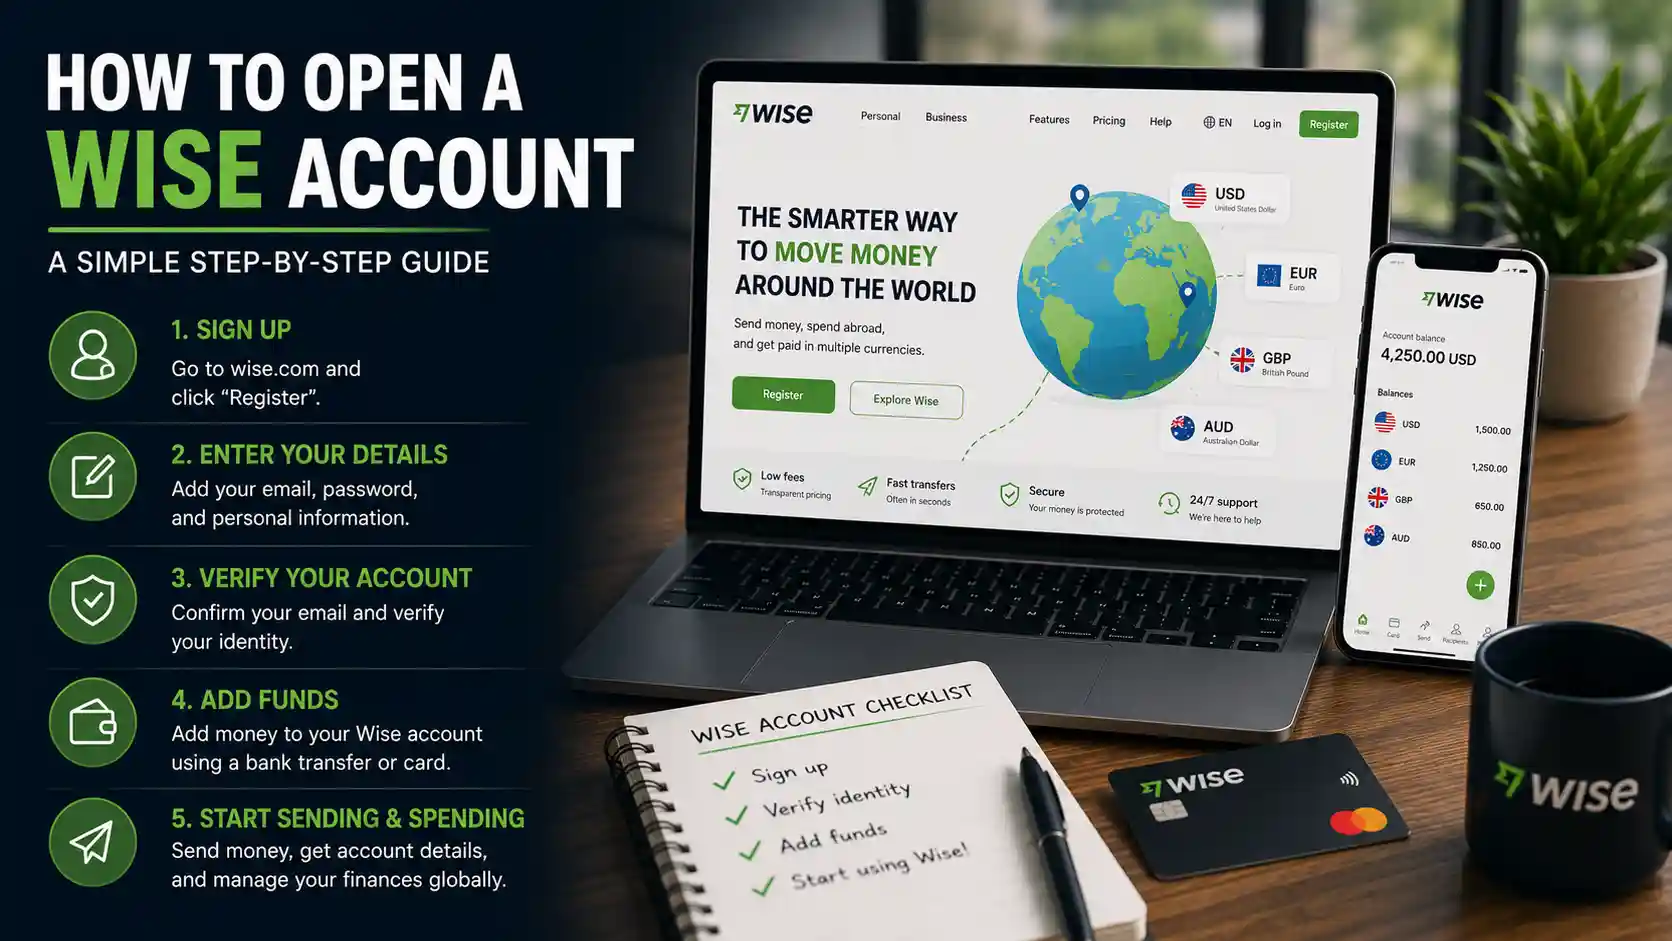
Wise (formerly TransferWise) has become one of the most trusted ways to hold, send, and spend money across borders — and a big part of that trust comes from how transparent the sign-up and pricing process actually is. There’s no sales call, no hidden minimum balance, and no confusing tier system to decode before you can see what anything costs.
This guide is built to be the only page you need: a real walkthrough of the actual account-creation screens in the order you’ll see them, followed by everything else worth knowing — how to open a business account specifically, how verification works, how to connect a bank account, how to send and receive money internationally, how to add funds, how to withdraw, what it all costs, how transfer limits work, whether it’s safe, and which countries are supported.
Table of Contents
- 1. What Is Wise?
- 2. What You’ll Need Before You Start
- 3. Step-By-Step: How to Open a Wise Account
- 4. How to Open a Wise Business Account
- 5. Verifying Your Phone Number
- 6. Your Dashboard, Once Set Up
- 7. How to Verify Your Wise Account
- 8. How to Add Money to Your Wise Account
- 9. How to Receive Money With Wise
- 10. How to Send Money Internationally With Wise
- 11. How to Withdraw Money From Wise
- 12. Wise Fees Explained
- 13. Wise Transfer Limits Explained
- 14. Countries Supported by Wise
- 15. Is Wise Safe?
- 16. Wise By The Numbers
- 17. Common Sign-Up Problems & Fixes
- 18. Pros and Cons
- 19. Frequently Asked Questions
What Is Wise?
Wise is a UK-founded, publicly listed financial technology company that lets individuals and businesses hold, send, and spend money in 40+ currencies at the real mid-market exchange rate — the same rate you’d see on Google — for a transparent, disclosed fee. It was founded in 2011 as TransferWise and rebranded to Wise in 2021, the same year it listed on the London Stock Exchange; it has since added a primary listing on the Nasdaq as well.
Wise is regulated as an Electronic Money Institution (EMI) rather than a traditional bank, and offers both personal and business accounts, along with a debit card that spends directly from your currency balances anywhere Visa or Mastercard is accepted.
What You’ll Need Before You Start
✅ A valid email address you can access immediately, to confirm your registration.
✅ A mobile phone number for SMS verification.
✅ A government-issued photo ID — passport, driver’s license, or national ID card.
✅ Your residential address, matching your ID where possible.
✅ Bank account details if you plan to connect a bank for adding or withdrawing funds.
✅ Business registration details (only if opening a business account) — company name, registration number, and business address.
Step-By-Step: How to Open a Wise Account
Here’s the real sign-up flow, screen by screen, exactly as you’ll see it.
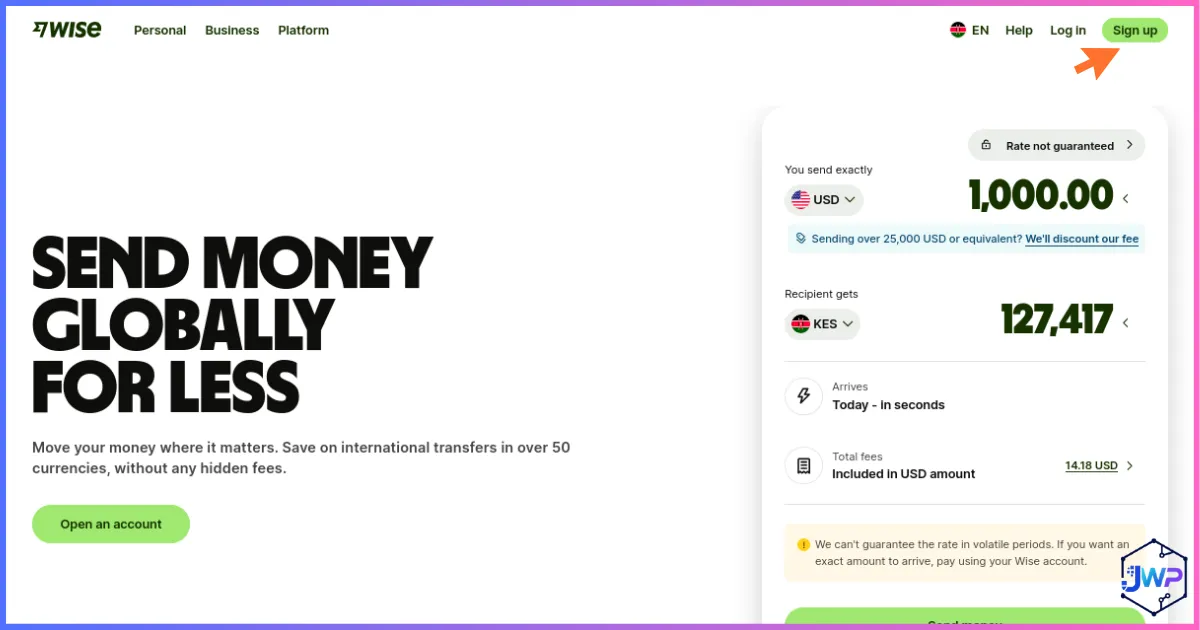
Visit the Wise Homepage
Head to Wise’s homepage and click the sign-up button to begin.
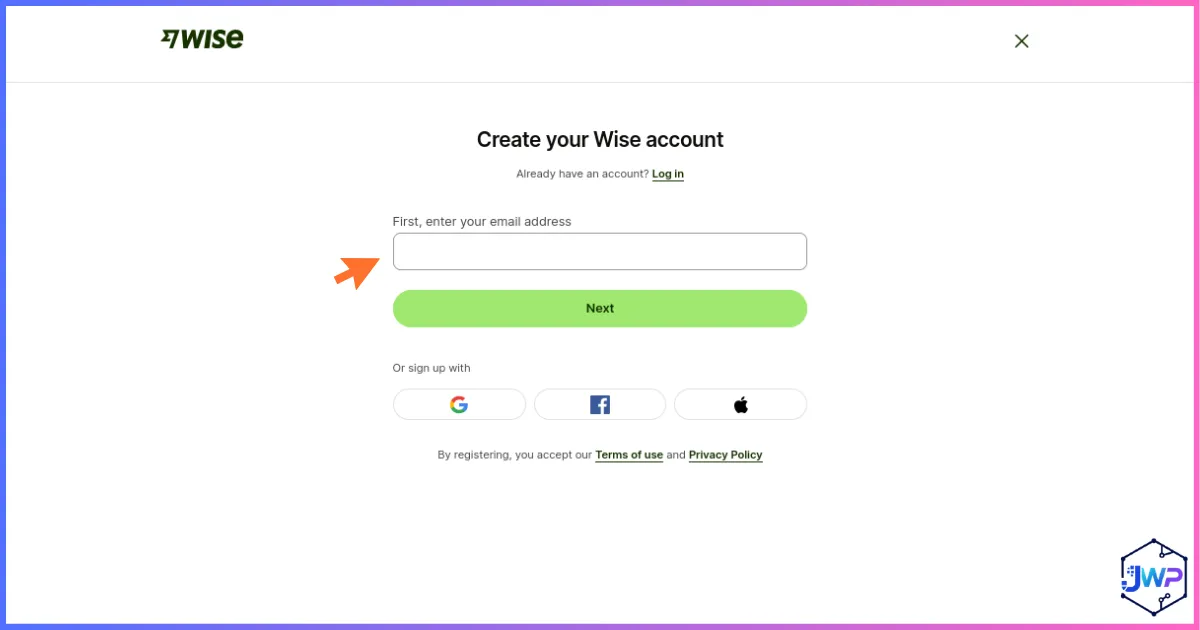
Create Your Wise Account
Enter your email address and create a password to start your Wise account.
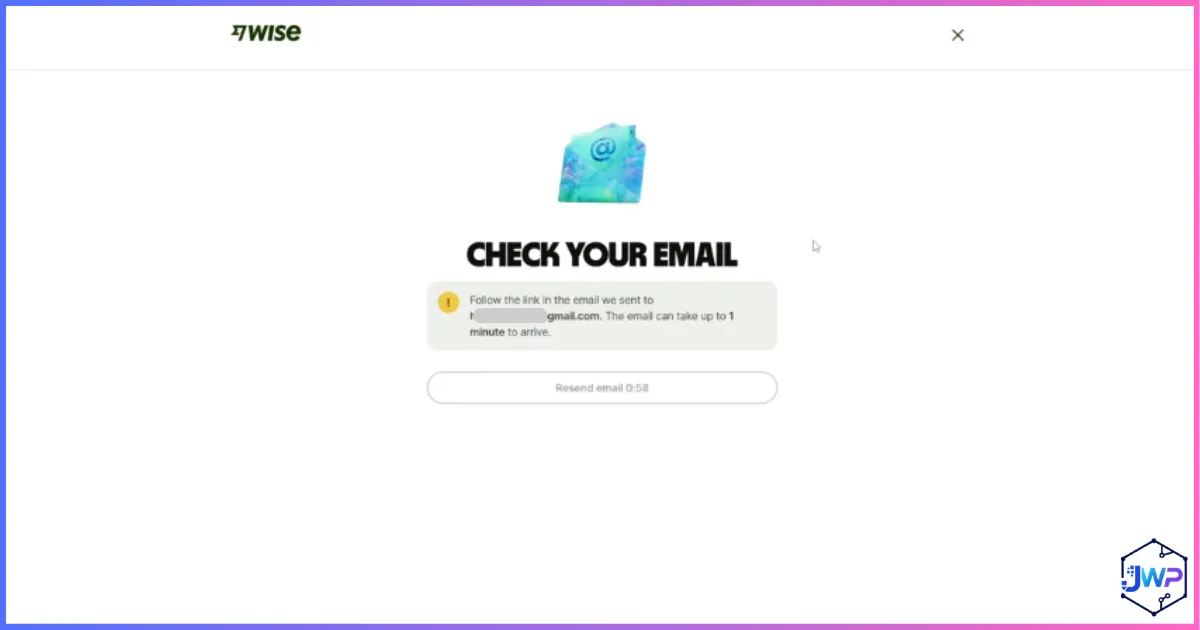
Confirm Your Registration Email
Check your inbox for a confirmation email from Wise and click through to confirm your address.
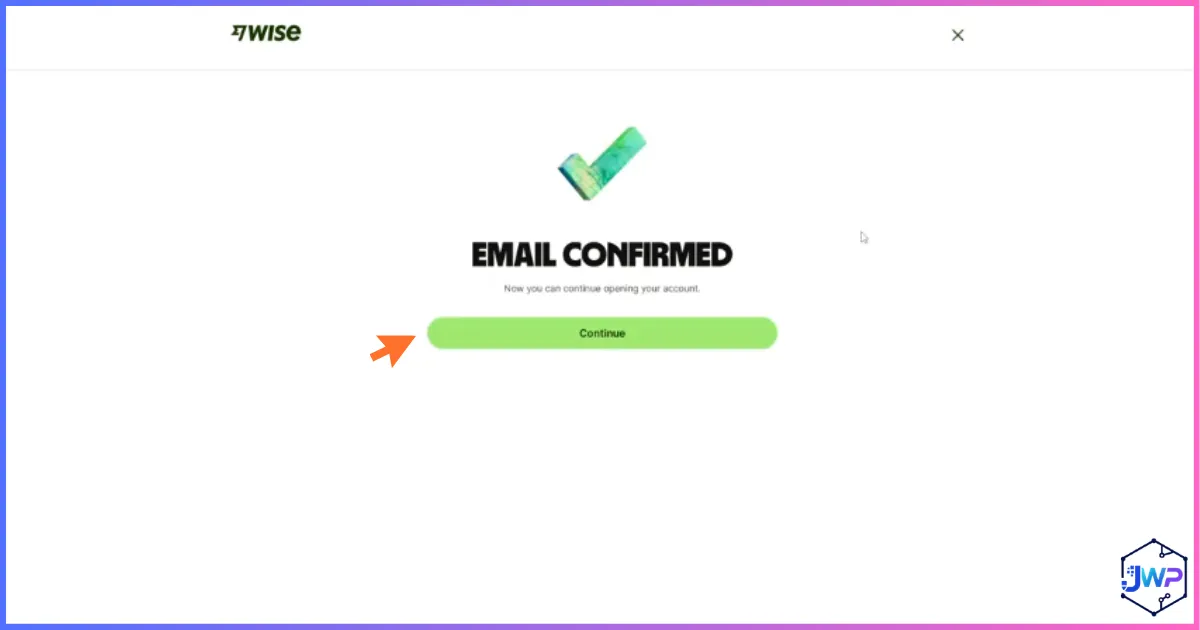
Get Your Email Confirmed Notification
Once you click the confirmation link, Wise shows you a confirmation that your email is verified.
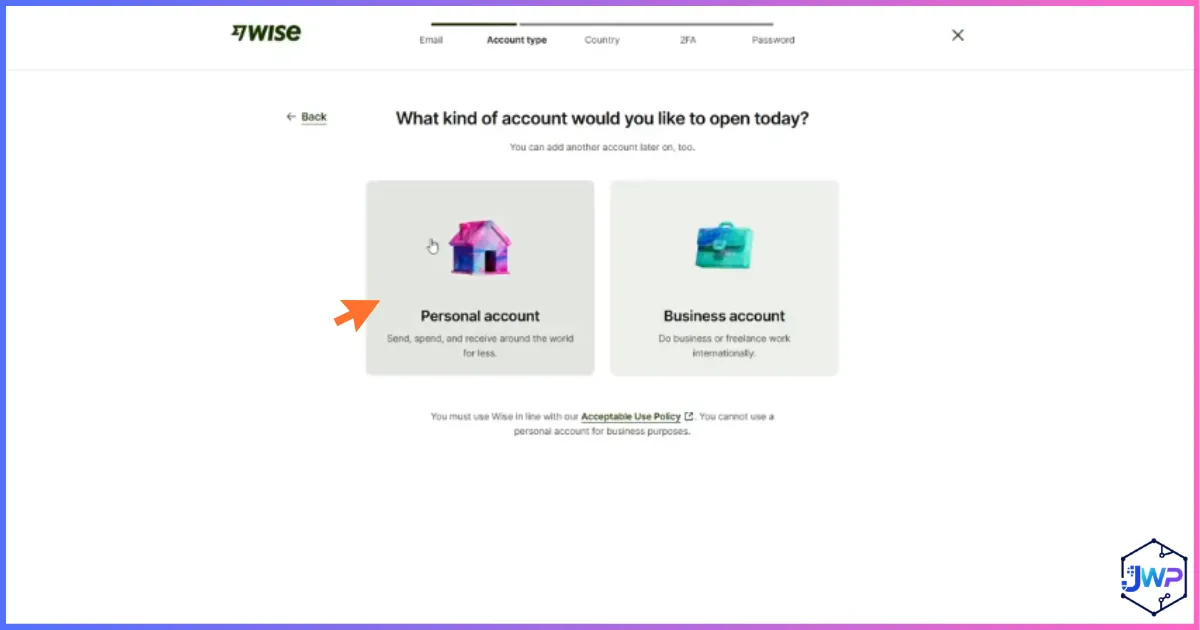
Select the Type of Account to Open
Choose between a personal account or a business account — this determines which questions come next. We’ll cover the business path in detail in the next section.
How to Open a Wise Business Account
If you selected “Business” in the previous step, Wise walks you through a slightly different path built around your company’s details rather than just your own.
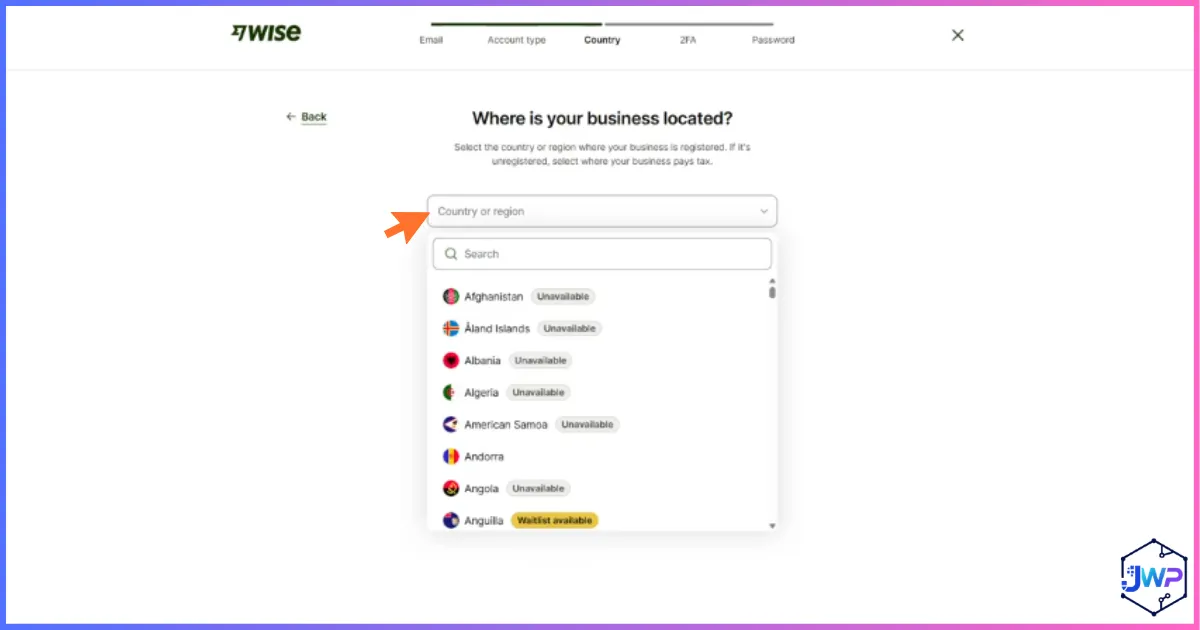
Tell Wise Where Your Business Is Located
Select your business’s registered country — this determines which currencies, receiving account types, and compliance requirements apply to your account.
From there, a Wise Business account typically asks for:
Company registration number and legal business name, matching your official incorporation documents.
Business structure — sole trader, LLC, corporation, partnership, or nonprofit, depending on your country.
Details of company directors and beneficial owners, a standard regulatory requirement (Know Your Business/UBO checks) for any business financial account.
Expected business activity — what your company does and roughly how much volume you expect to move.
Business vs Personal: What’s Actually Different
A Wise Business account adds batch payments (paying up to 1,000 invoices in one upload), accounting software integrations (Xero, QuickBooks), multiple team member cards with spending permissions, and generally higher transfer limits — all layered on top of the same core multi-currency account and mid-market exchange rate personal users get.
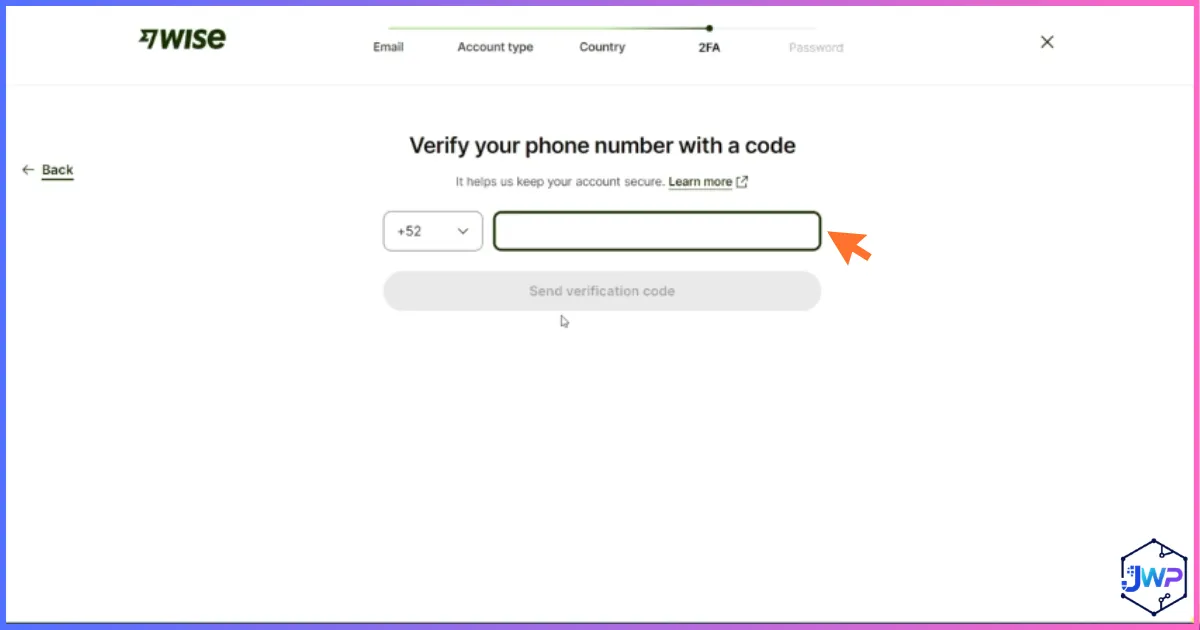
Verifying Your Phone Number
Enter the Code Sent to Your Phone
Wise sends a one-time code by SMS to confirm your mobile number — enter it to continue. This number also becomes part of your two-factor authentication going forward.
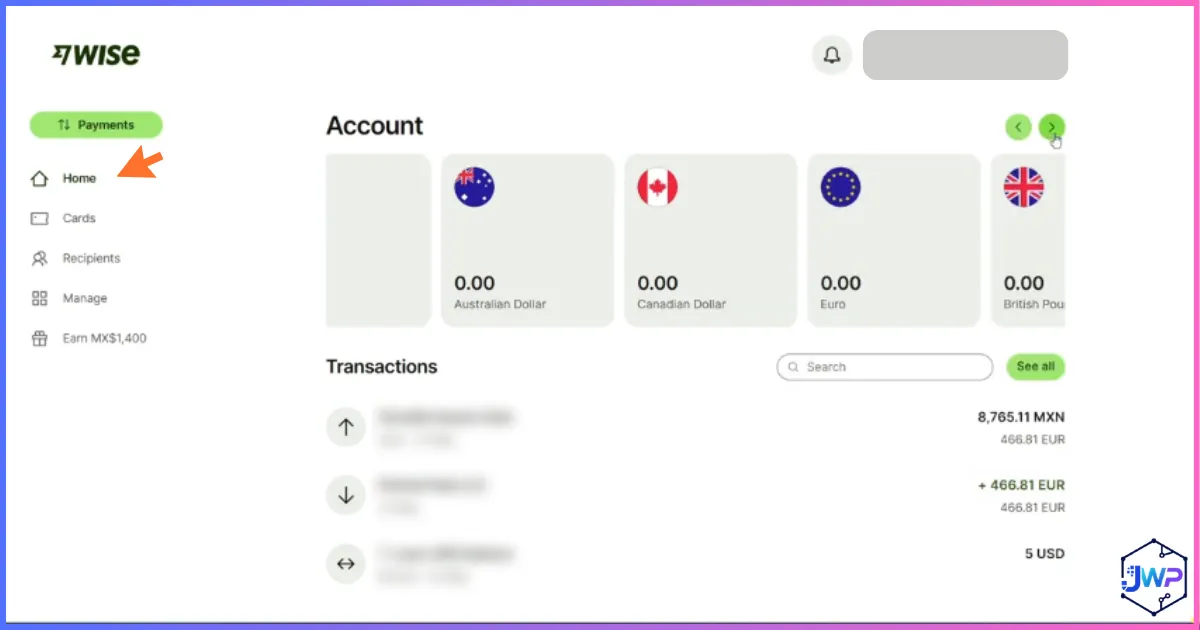
Your Dashboard, Once Set Up
Explore Your Account Home
Once your basic account is created, you land on your dashboard home — showing your currency balances, quick actions to send or add money, and a summary of recent activity.
How to Verify Your Wise Account
Identity verification is a regulatory requirement (KYC — Know Your Customer) for any licensed payment company, and Wise is no exception. Here’s what the process generally involves:
1. Government-issued photo ID. A passport, driver’s license, or national ID card, either scanned live via your phone’s camera or uploaded as a clear photo.
2. A live selfie check. Many verifications require a quick selfie to confirm the ID belongs to the person opening the account.
3. Proof of address (if requested). A recent utility bill, bank statement, or government letter, particularly for higher transfer limits or business accounts.
4. Business documents (business accounts only). Incorporation certificate, proof of business address, and details of directors and beneficial owners.
How Long Does It Take?
Most personal accounts verify within minutes once documents are submitted. Business accounts and certain countries can take longer — sometimes a few business days — since more documentation typically needs manual review. Verifying proactively, rather than waiting until you need to send a large amount, is the best way to avoid delays later.
How to Link a Bank Account to Your Wise Account
You can add funds to your Wise balance by card, by connecting a bank account for a transfer, or by receiving money from someone else. Here’s the bank-connection flow specifically, screen by screen.
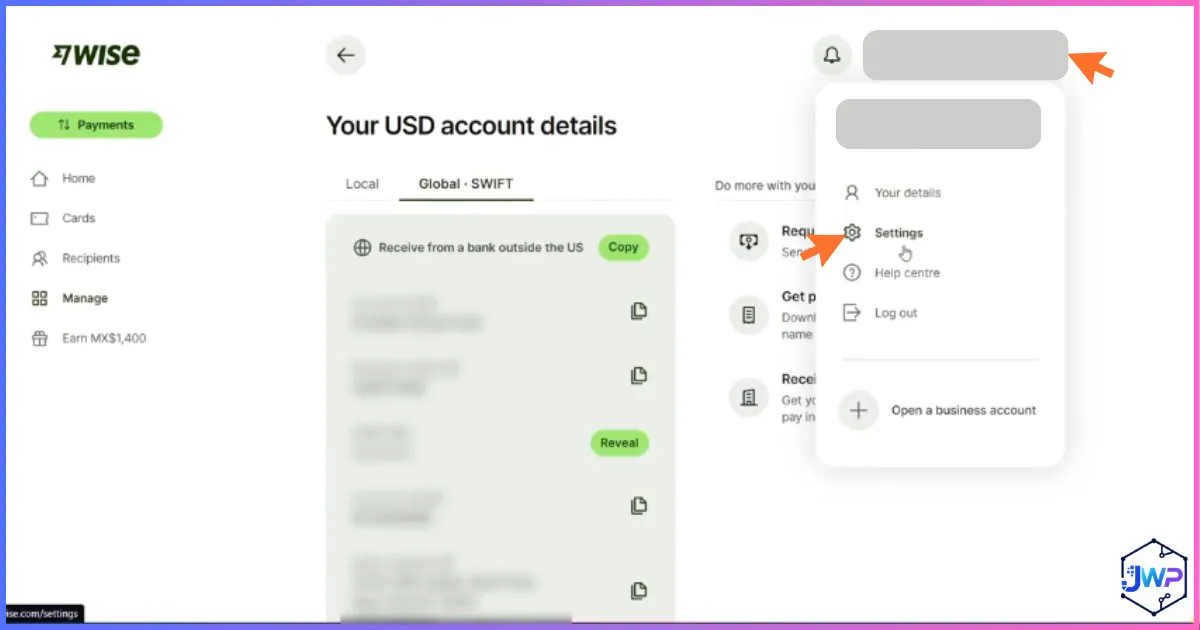
Click the Settings Button
From your dashboard, open Settings to find account and payment method options, including connecting a bank account.
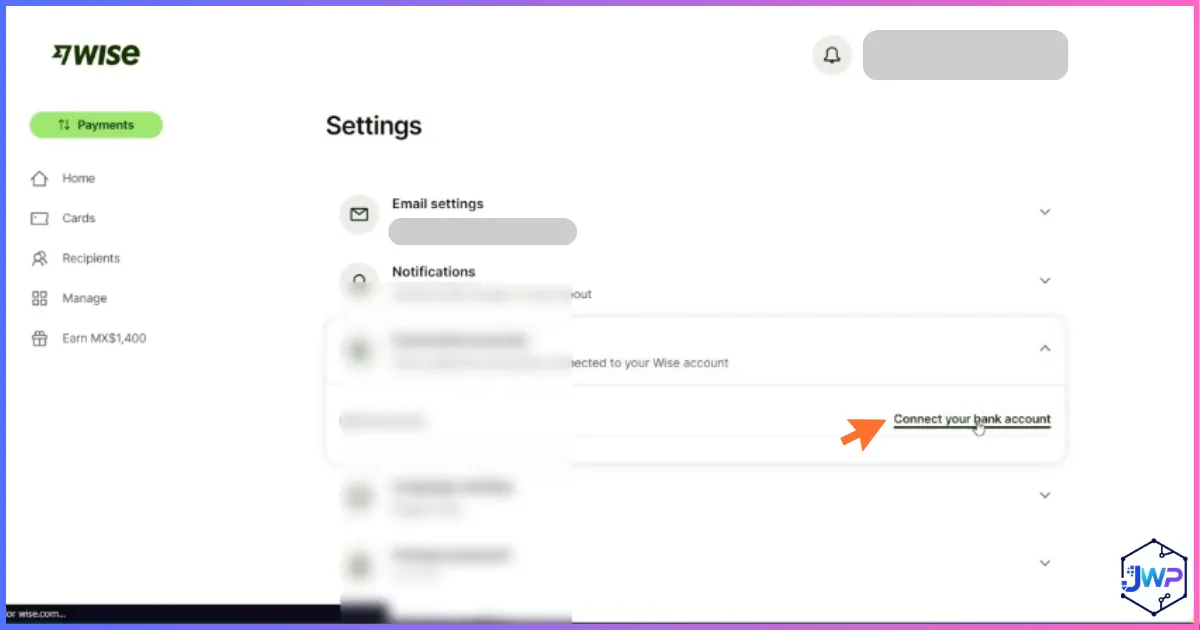
Connect Your Bank Account
Select the option to connect a bank account, which lets you add funds via bank transfer and set up future withdrawals.
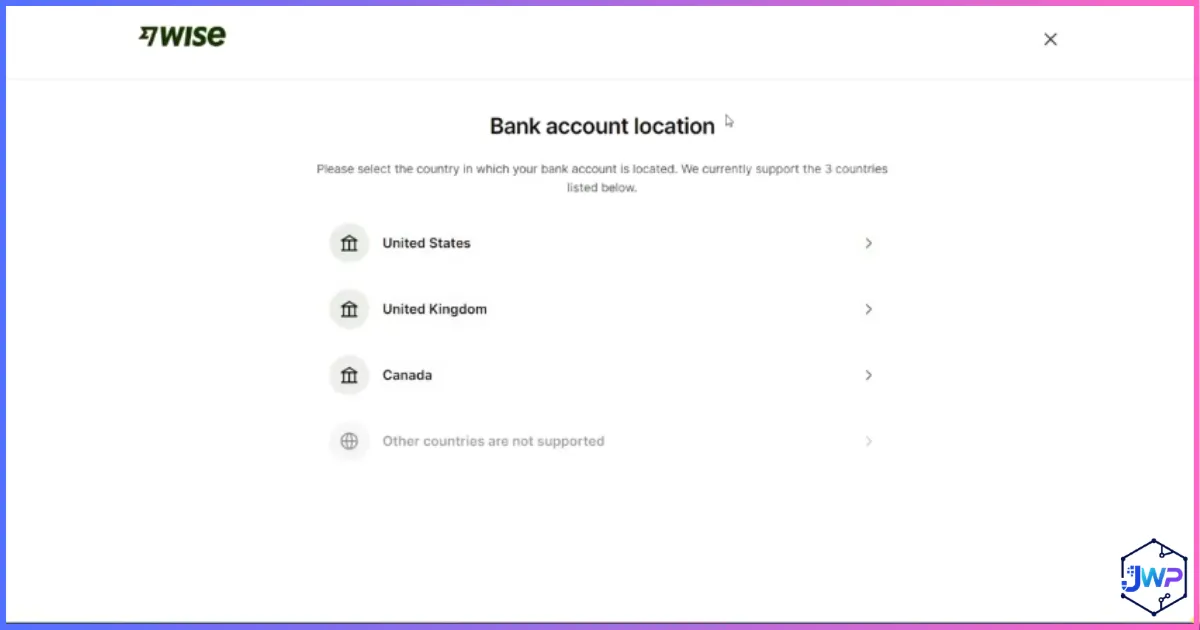
Select Your Bank Account’s Location
Choose the country where your bank account is held — this determines which connection methods (instant login or manual entry) are available.
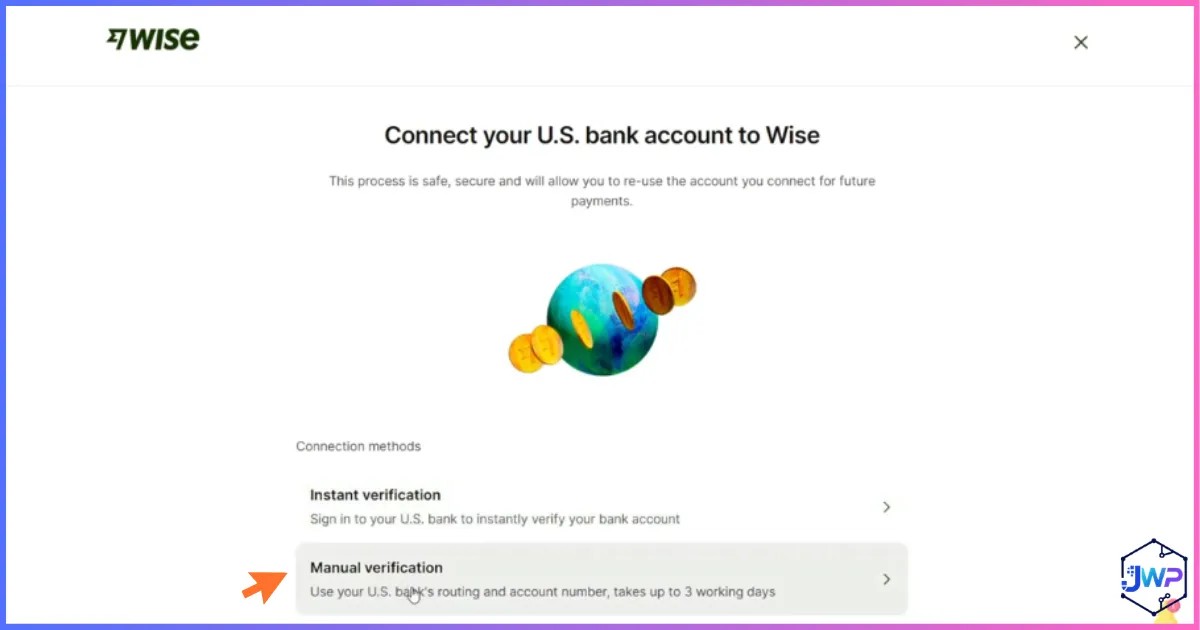
Choose the Manual Verification Method
If your bank isn’t supported for instant login, Wise offers a manual verification method instead — entering your account details directly.
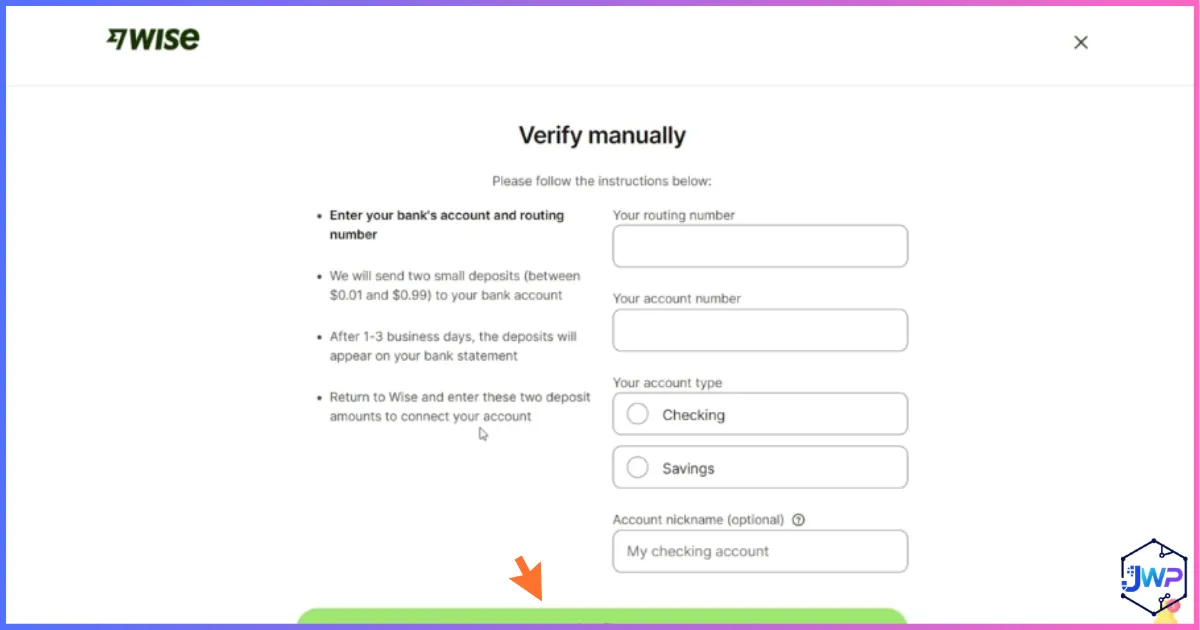
Enter Your Bank’s Manual Verification Details
Enter your account number and routing details (or IBAN, depending on your country) exactly as they appear on your bank statement. Wise may verify with a small test deposit before the connection is fully active.
Other Ways to Add Money
Beyond a linked bank transfer, you can add funds to your Wise balance with a debit or credit card (faster, but carries a higher fee than a bank transfer), or simply by having someone else send money directly to your account details.
How to Receive Money With Wise
1. Open a balance in the currency you want to receive (USD, EUR, GBP, and dozens more) from your dashboard.
2. Wise generates local account details for that currency — a US routing number and account number, a UK sort code, an IBAN, and so on, depending on the currency.
3. Share those details with whoever is paying you, exactly the way you’d share your own bank details — they can pay you like a local, with no international wire required on their end.
4. Funds typically arrive within a business day for most currencies and payment methods, and land directly in your Wise balance.
How to Send Money Internationally With Wise
1. From your dashboard, select “Send” and choose the currency and amount you want to send.
2. Enter your recipient’s bank details — Wise will guide you through exactly what’s needed based on their country and currency.
3. Choose your funding source — your Wise balance, a linked bank account, or a card — and review the fee and exchange rate shown before confirming. Wise always shows the real mid-market rate alongside the fee, with no hidden markup.
4. Confirm the transfer. Roughly 63% of Wise transfers complete in under 20 seconds, with the large majority landing within an hour — though some corridors and payment methods take 1–2 business days.
How to Withdraw Money From Wise
1. From your dashboard, select “Withdraw” and choose the currency balance you want to move.
2. Choose your linked bank account as the destination — withdrawing in the same currency as your balance is free in most cases and avoids any conversion cost.
3. Confirm the amount and review any fee shown (most standard same-currency withdrawals to a linked bank carry no separate withdrawal fee, since Wise’s fee structure is built into sending/converting, not withdrawing).
4. You can also withdraw cash directly via ATM using the Wise debit card, free up to 250 GBP/EUR per month, with a small percentage fee on withdrawals above that.
Wise Fees Explained
Wise’s core pitch is fee transparency, so here’s the complete breakdown.
| Action | Typical Cost |
|---|---|
| Opening an account (personal or business) | Free |
| Holding money in your account | Free (up to a large balance threshold) |
| Sending money, funded by bank transfer | From ~0.33%–0.67% of the amount, varies by currency pair |
| Sending money, funded by debit/credit card | Higher than bank transfer, typically an additional 1–2% on top |
| Converting between your own balances | Same fee structure as sending |
| Getting the Wise debit card | ~7 GBP/EUR one-time, no subscription |
| Spending with the card (matching currency) | Free — no conversion fee if you hold that currency already |
| ATM withdrawals | Free up to 250 GBP/EUR per month, then ~2.69% (UK) / ~1.75% (EU) above that |
| Receiving most payment types | Free |
| Receiving USD wire transfers specifically | Small fixed fee (a few USD); ACH/direct deposit in USD is free |
| Holding large balances | ~0.40%/year over roughly 15,000 EUR-equivalent |
Send Fee by Funding Method (Illustrative)
Approximate fee ranges; exact cost depends on currency pair and route — always check the live quote in-app.
Flat-Fee & Threshold Items
Card fee and ATM allowance shown in GBP/EUR equivalent; holding fee threshold shown in thousands.
Wise Transfer Limits Explained
Wise doesn’t publish one single universal transfer limit — your actual limit depends on the currency you’re sending, your payment method, your verification level, and whether you have a personal or business account. Here’s the general shape of it, based on commonly reported figures for US-based accounts:
| Payment Method | Typical Limit |
|---|---|
| ACH bank transfer (personal) | Up to ~$50,000 per day |
| Wire transfer | Up to $1,000,000 per transfer (higher for business accounts) |
| Debit/credit card funding | Typically $2,000–$5,000 per day |
| Fully verified personal account, annual sending | Reportedly up to roughly $1,000,000 per year, with individual transfers often capped around $50,000–$150,000 per corridor |
| Unverified or partially verified accounts | Much lower — often in the $500–$3,000 range per transfer |
| Receiving money | Generally no fixed limit for most currencies, though large or unusual amounts may trigger a manual review |
Approximate Daily/Per-Transfer Limits by Method
Log scale, since the gap between card limits and wire limits is very large. Figures are commonly reported approximations for US personal accounts — always confirm your exact limit in the Wise app, since it varies by country, currency, and verification status.
How to Raise Your Limits
Completing full identity verification before you need to send a large amount is the single most effective way to unlock higher limits. For unusually large transfers, Wise may also request documentation about the source of funds — this is standard across the industry and not unique to Wise.
Countries Supported by Wise
Wise supports customers in 160+ countries and payments in 40+ currencies, with local receiving account details available in a large subset of those currencies (USD, EUR, GBP, AUD, NZD, and more).
Reach: Countries vs Currencies Supported
Restrictions Do Apply
As a regulated financial company, Wise cannot operate in countries subject to international sanctions, and account availability and specific features can vary by country. Always check current availability directly during sign-up.
Is Wise Safe?
Generally, yes — but “safe” has a few distinct angles worth covering honestly rather than glossing over.
✅ Regulatory Standing
Wise is regulated as an Electronic Money Institution by the UK’s Financial Conduct Authority and holds over 65 licenses globally, safeguarding customer funds in segregated accounts separate from its own operating money.
✅ Security Features
Two-factor authentication, encryption, and continuous fraud monitoring are standard. Enable 2FA immediately after opening your account.
⚠️ Not a Bank
Wise is not a bank, so your balance isn’t covered by deposit insurance schemes like FSCS (UK) or FDIC (US) the way a bank deposit is. Funds are safeguarded, which is a real protection, but a structurally different one than deposit insurance.
⚠️ Account Reviews Can Happen
Like any regulated payment company, Wise can flag or temporarily restrict accounts for compliance review, and — in rarer cases — close accounts entirely if risk systems flag something. This is an industry-wide pattern, not unique to Wise, but it’s a reason not to route 100% of your finances through any single provider.
Bottom line: Wise is a well-regulated, publicly listed company with strong security fundamentals, used by tens of millions of people. The realistic caveats are structural (EMI status, not a bank) rather than about fraud or mismanagement — worth understanding, not a reason to avoid using it.
Wise By The Numbers
Trustpilot Rating Breakdown
Based on 287,000+ reviews, overall rating “Excellent” (4.3/5).
Editorial Feature Strength Assessment
Editorial scoring (0–10) based on researched features, not an official Wise benchmark.
Common Sign-Up Problems & Fixes
Confirmation email not arriving? Check spam/junk folders and confirm the email address was typed correctly before requesting a resend.
ID document rejected? Make sure the photo is well-lit, in focus, and shows all four corners of the document — blurry or cropped images are the most common cause of rejection.
Bank connection failing? Double-check account and routing numbers character by character, and confirm the account name matches your verified Wise identity exactly.
Business account verification taking a while? This is common — business accounts require additional document review. Make sure all requested company documents are current and clearly legible.
Pros and Cons
✓ Pros
- Free to open, no monthly fee
- Genuine mid-market exchange rate, no hidden markup
- 160+ countries, 40+ currencies supported
- Fast verification for most personal accounts
- Transparent fees shown before you confirm any transaction
- Both personal and business account types, with batch payments for business
- Publicly listed, regulated, strong security fundamentals
✗ Cons
- Not a bank — no FSCS/FDIC deposit insurance
- Card funding carries a higher fee than bank transfer
- Business account verification can take longer than personal
- Fees apply on holding very large balances
- Transfer limits vary significantly by method and country, which can be confusing
- No credit products — no loans, credit cards, or overdrafts, by regulatory design
Related Reads
If Wise looks like the right fit, these articles will help you compare it against the other major options:
- Payoneer vs Wise — the best direct comparison when you want to weigh marketplace payouts against low-cost conversion.
- Wise vs PayPal — helpful if you’re deciding between a transfer specialist and a wider checkout network.
- How to Open a Payoneer Account — the setup guide for the marketplace-focused alternative.
- Wise Review — a fuller review of Wise’s pricing, strengths, and limitations.
Frequently Asked Questions
Is it free to open a Wise account?
Yes, opening a Wise personal or business account is completely free, with no monthly fee or minimum balance requirement.
How long does Wise account verification take?
Most personal accounts verify within minutes of submitting a photo ID. Business accounts and certain countries can take longer, sometimes a few business days, due to additional document review.
What’s the difference between a Wise personal and business account?
Both share the same core multi-currency account and mid-market exchange rate. A business account adds batch payments, accounting software integrations, multiple team member cards, and generally higher transfer limits, but requires company registration details during sign-up.
How do I receive money with Wise?
Open a balance in the currency you want to receive, and Wise generates local account details for it — a routing number, IBAN, or sort code depending on the currency. Share those details with whoever is paying you, just like you would your own bank details.
How do I send money internationally with Wise?
Select “Send” from your dashboard, enter your recipient’s bank details and the amount, choose your funding source, review the fee and mid-market exchange rate shown, and confirm. Most transfers complete within an hour, and many complete in under 20 seconds.
How do I add money to my Wise account?
Connect a bank account through Settings for a bank transfer (cheapest option), add funds with a debit or credit card (faster but higher fee), or simply have someone send money directly to your account details.
How do I withdraw money from Wise?
Select “Withdraw,” choose your linked bank account, and confirm the amount. Same-currency withdrawals to a linked bank are typically free. You can also withdraw cash via ATM with the Wise debit card, free up to 250 GBP/EUR per month.
What are Wise’s main fees?
Sending money via bank transfer costs roughly 0.33%-0.67% depending on the currency pair. Card funding carries a higher fee. The debit card costs about 7 GBP/EUR one-time. ATM withdrawals are free up to 250 GBP/EUR monthly. A small annual fee applies to balances over roughly 15,000 EUR-equivalent.
What are Wise’s transfer limits?
Limits vary by payment method, currency, and verification level. ACH bank transfers are commonly capped around $50,000/day, wire transfers can go up to $1,000,000 per transfer, and card funding is typically limited to $2,000-$5,000/day. Full identity verification is the key step to unlocking higher limits.
Is Wise safe to use?
Yes, generally. Wise is a regulated, publicly listed Electronic Money Institution with strong security features and safeguarded customer funds. It is not a bank, so balances aren’t covered by FSCS or FDIC deposit insurance the way a bank account is — worth knowing, though not a reason to avoid using it.
Which countries does Wise support?
Wise supports customers in 160+ countries and payments in 40+ currencies, though it cannot operate in countries under international sanctions. Availability of specific features can vary by country.
Disclosure: This article contains an affiliate link. If you sign up through our link we may earn a commission at no extra cost to you. Figures on fees, limits, and company statistics reflect publicly available information at the time of writing and may change — always confirm current details directly on wise.com before making financial decisions. This article is for informational purposes only and is not financial advice. Screenshots shown are from the actual Wise sign-up flow at the time of writing and may change as Wise updates its interface.